Flywheel Gear: Service and Repair
FLYWHEEL RING GEARRemoval
Warning:
^ This procedure should be carried out only by a correctly equipped and Ad acetylene torch operator. To avoid personal injury, tongs must be used or asbestos gloves worn when handling the heated flywheel ring gear. Failure to follow these instructions may result in personal injury.
1. Remove the flywheel.

Caution:
^ Tap the flywheel ring gear evenly to prevent binding.
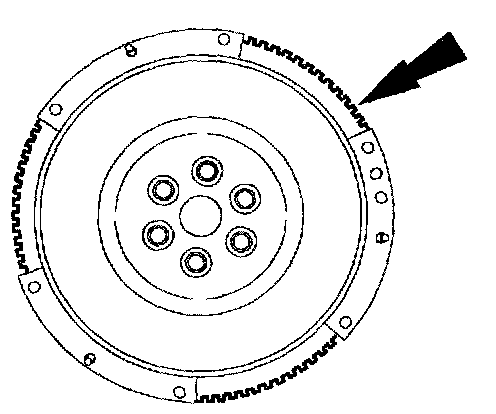
2. Remove the flywheel ring gear from the flywheel
1. Evenly heat the flywheel ring gear and use a brass drift to drive the flywheel ring gear off the flywheel.
Installation
Warning:
^ This procedure should be carried out only by a correctly equipped and experienced acetylene torch operator. To avoid personal injury, tongs must be used or asbestos gloves worn when handling the heated flywheel ring gear. Failure to follow these instructions may result in personal injury.
Caution:
^ Do not heat the flywheel ring gear beyond 278°C (532°F). Use heat indicating crayons to prevent overheating.
Caution:
^ Keep the torch moving to prevent hot spots.
1. Evenly heat the flywheel ring gear.
Caution:
^ The bevel on the flywheel ring gear must face the rear of the flywheel.
2. Install the flywheel ring gear.
1. Use a brass drift to tap the flywheel ring gear into position.
3. Install the flywheel.