Attachment II - Service Procedure
A. VEHICLE INSPECTION PROCEDURE1. Verify the vehicle is within one of the following ranges:
^ 2001-2003 Tribute vehicles
VIN Ranges:
2001-2003 Tribute 4F2******1KM00001 - 3KN99999
2004-2005 Tribute vehicles built between June 2, 2003 through July 30, 2004.
VIN Ranges:
2004 Tribute 4F2*Z****4KM00004 - M34822
2005 Tribute 4F2*Z****5KM00003 - M22946
- If the vehicle is within one of the above ranges, proceed to step 2.
- If the vehicle is not within one of the above ranges, return vehicle to the customer or inventory.
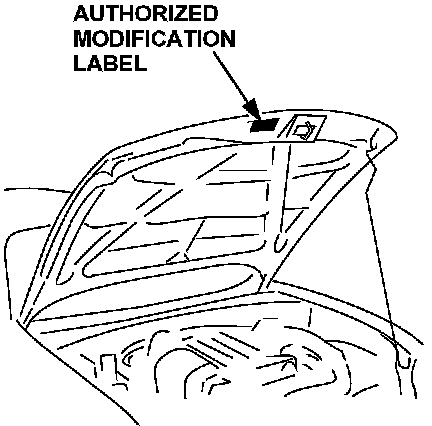
2. Perform a Warranty Vehicle Inquiry using your eMDCS System and inspect vehicle for an Authorized Modification Label Recall 2804L attached to the vehicle's hood. Refer to eMDCS System - Warranty Vehicle Inquiry Results table shown.
NOTE:
Be sure to verify RECALL number as the vehicle may have multiple Recall labels.
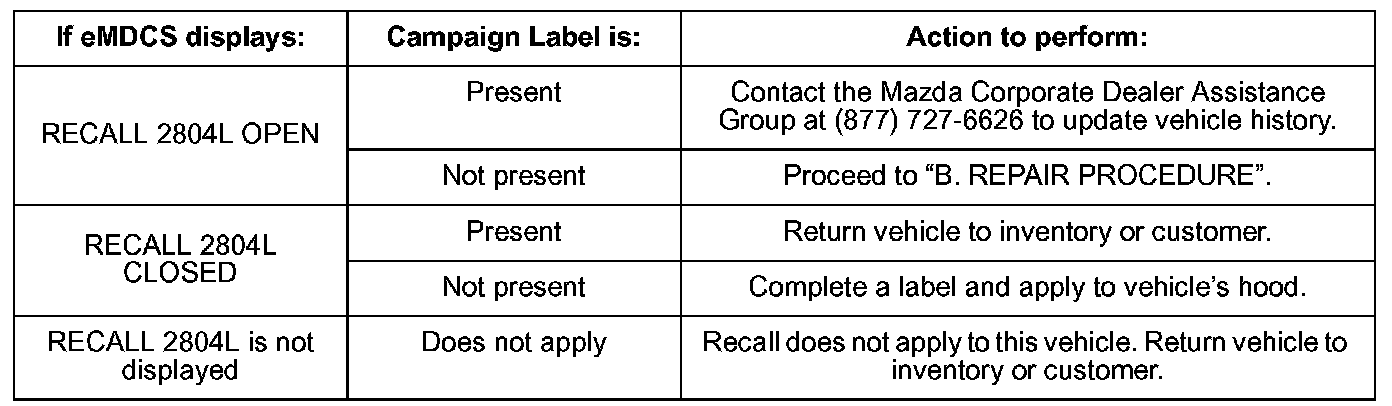
eMDCS System - Warranty Vehicle Inquiry Results shown.
B. REPAIR PROCEDURE OVERVIEW
This program involves performing specific liftgate latch system repairs on two (2) specific vehicle populations. Each repair procedure identifies the affected vehicles requiring that particular repair. See the list below for specific repairs needed for each vehicle population.
2004 model year Tribute vehicles and 2001-2003 Tribute vehicles serviced with subject parts:
^ replace the liftgate latch release rod
^ replace release rod clip
^ replace handle assembly return spring and circlip
2005 model year Tribute vehicles:
^ replace the liftgate latch release rod
^ replace release rod clip
LIFTGATE HANDLE REMOVAL AND REPAIR
AFFECTED VEHICLES:
2004 MODEL YEAR TRIBUTE VEHICLES AND 2001-2003 MODEL YEAR TRIBUTE VEHICLES SERVICED WITH SUBJECT PARTS
1. Open the liftgate.
2. If equipped, remove the rear wiper motor cover.
3. Remove the four (4) screws and remove the liftgate trim panel.
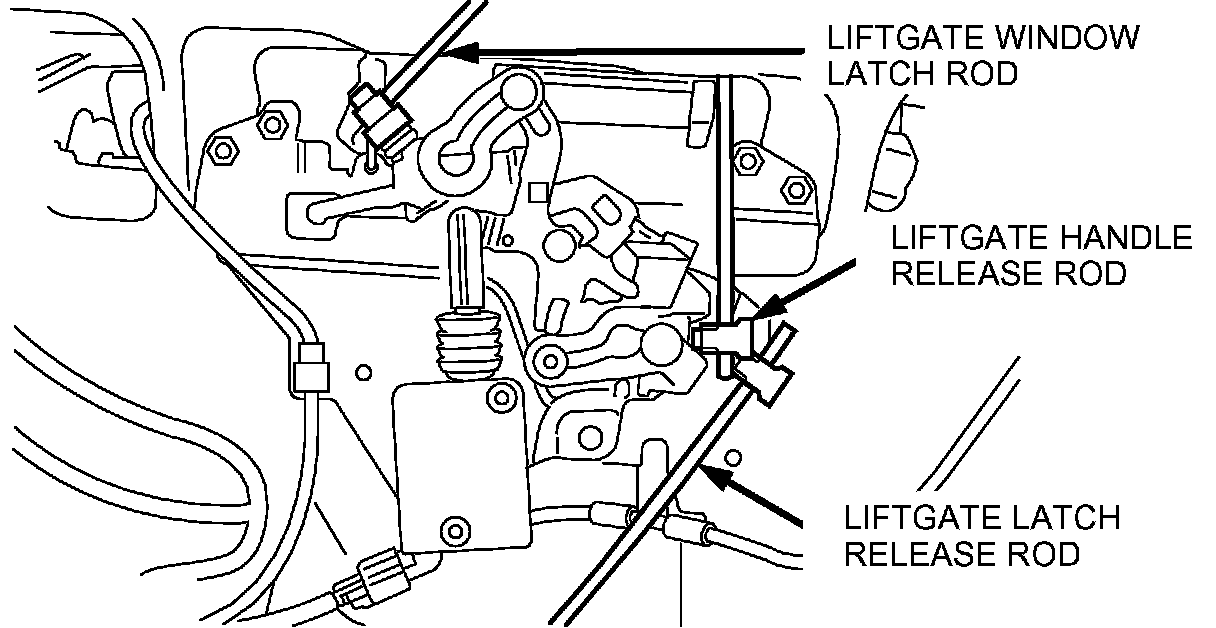
4. Disconnect the liftgate window latch, liftgate handle, and liftgate latch release rods by opening the clips.
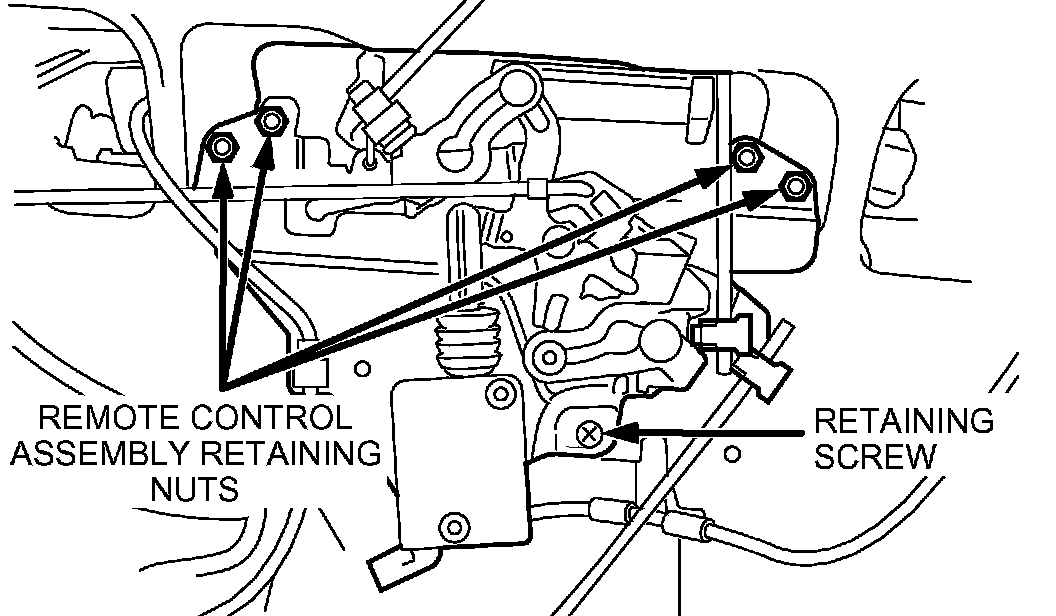
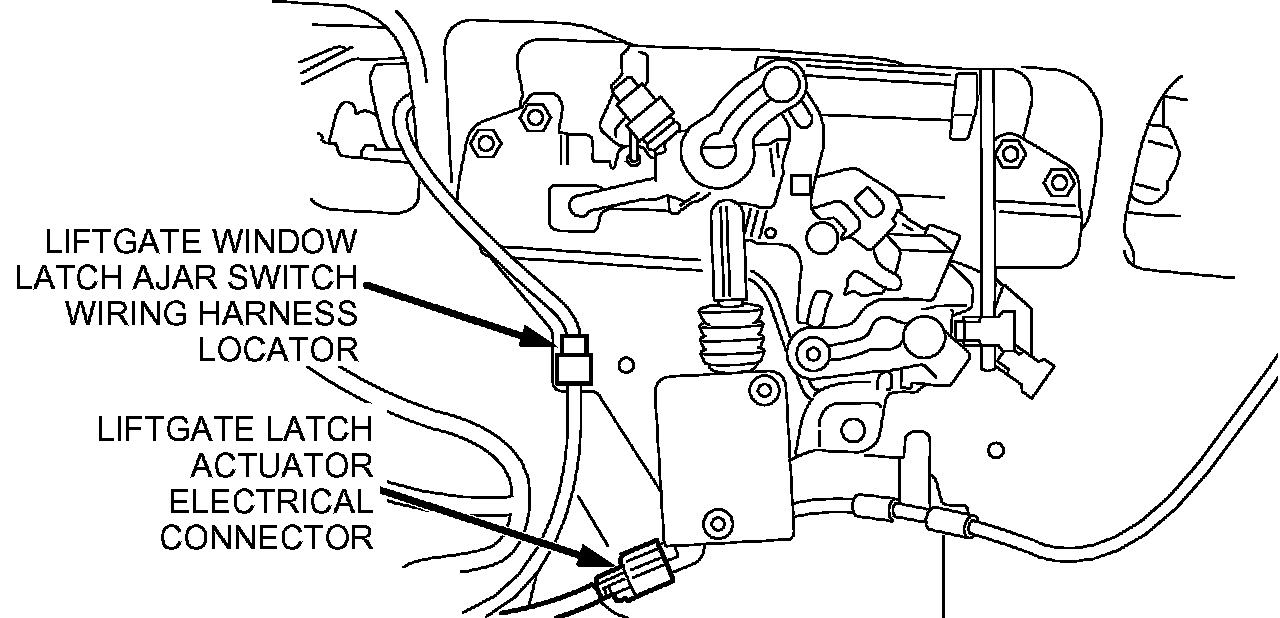
5. Release the liftgate window latch ajar switch wiring harness locator and if equipped, disconnect the liftgate latch actuator electrical connector.
6. Remove the liftgate latch remote control assembly retaining screw and all four (4) retaining nuts.
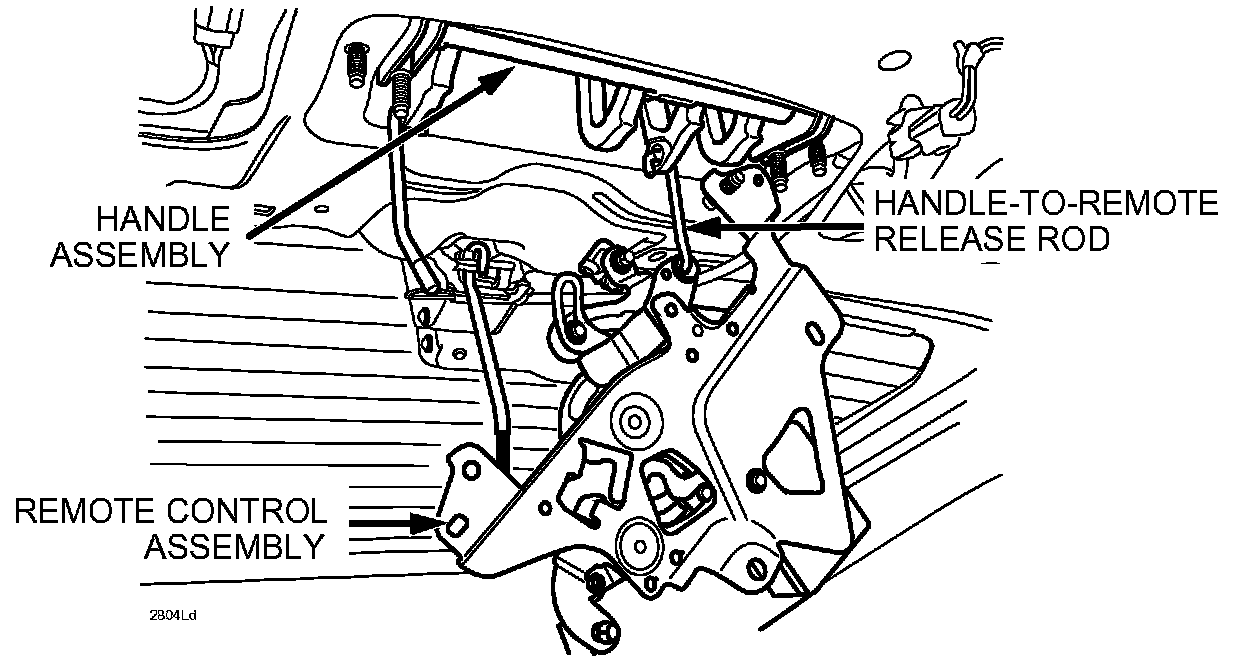
7. Disconnect the liftgate handle-to-remote release rod from the remote control assembly, then remove the remote control.
8. Remove the liftgate handle assembly and place it on a bench.
9. Disassemble the handle as follows:
a. Remove the circlip from the end of the pivot rod.
b. Pull the pivot rod out of the handle assembly.
c. Note the position of the spring then remove the spring from the handle assembly.
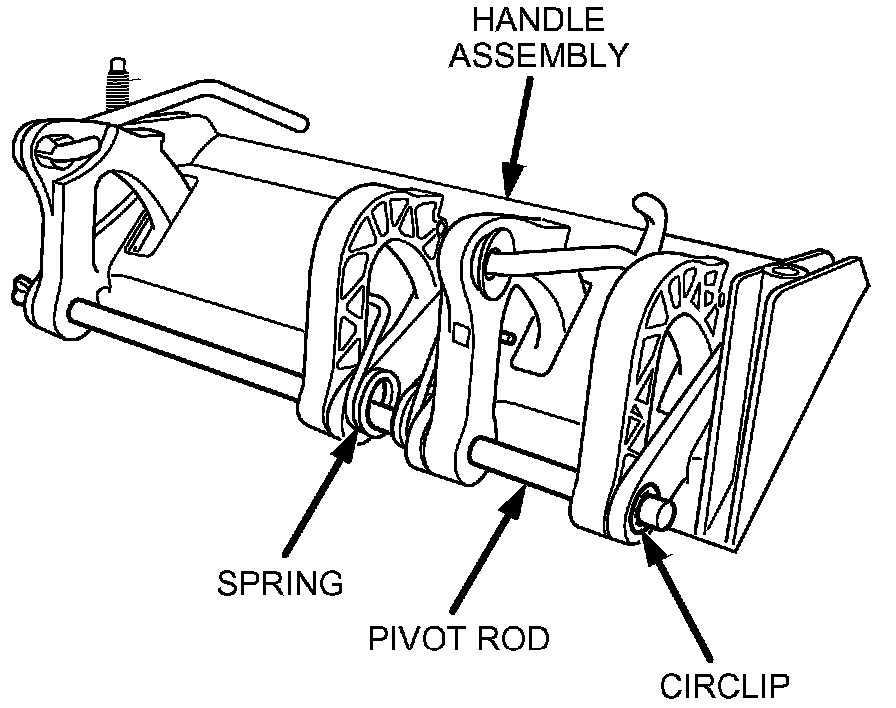
10. Install the new spring and circlip to the original pivot rod and handle.
NOTE:
The new circlip is supplied in the bag with the new spring. Make sure to retain the new circlip for installation to the original pivot rod and handle.
LIFTGATE LATCH REMOVAL AND RELEASE ROD REPLACEMENT
AFFECTED VEHICLES:
ALL VEHICLES COVERED BY RECALL 2804L
NOTE:
For 2001-2004 model year vehicles, proceed to Step 4. For 2005 model year vehicles, begin this repair from Step 1.
1. Open the liftgate.
2. If equipped, remove the rear wiper motor cover.
3. Remove the four (4) screws and remove the liftgate trim panel.
4. Disconnect the liftgate ajar switch electrical connector (located on the liftgate switch).
5. Remove the three (3) liftgate latch bolts and retain.
6. Remove the liftgate latch.
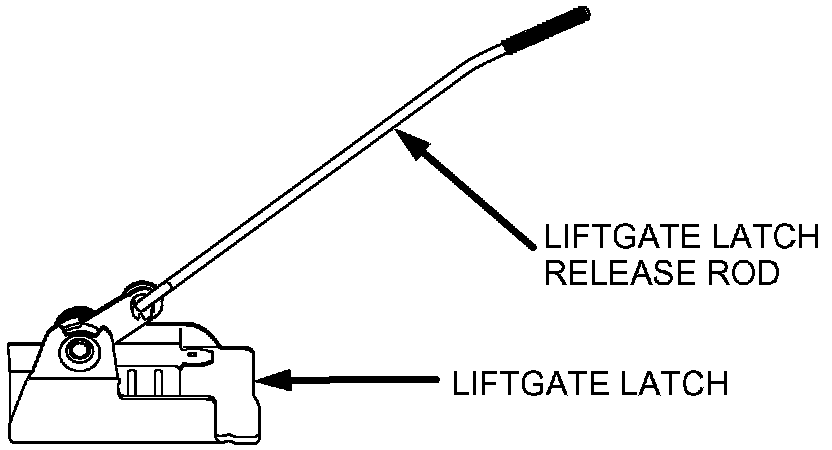
7. Remove the liftgate latch release rod and install the new rod.
8. Remove the original release rod clip and replace with the new clip.
LIFTGATE LATCH INSTALLATION
AFFECTED VEHICLES:
ALL VEHICLES COVERED BY RECALL 2804L
1. Position the latch assembly in the vehicle.
2. Apply (locally obtained) Permatex Medium Strength Thread locker (blue), to the bolts and install the three (3) liftgate latch bolts.
Tightening Torque: 5 Nm (44 lb-in)
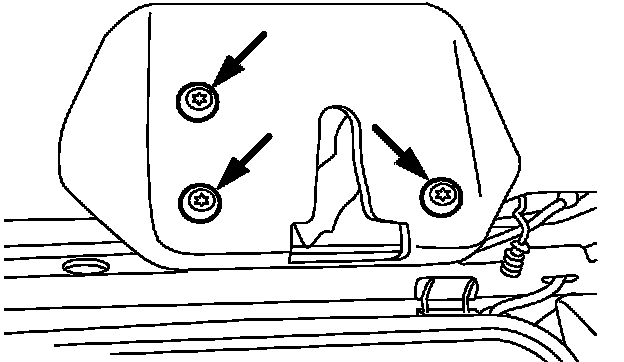
3. Connect the liftgate ajar switch electrical connector.
NOTE:
For 2001-2004 model year vehicles, proceed to "Liftgate Handle Installation." For 2005 model year vehicles, proceed to Step 4.
4. Install the liftgate trim panel and four (4) screws.
5. If equipped, install the rear wiper motor cover.
6. Close the liftgate.
LIFTGATE HANDLE INSTALLATION
AFFECTED VEHICLES:
2001-2004 MODEL YEAR VEHICLES
1. Position the handle assembly in the vehicle.
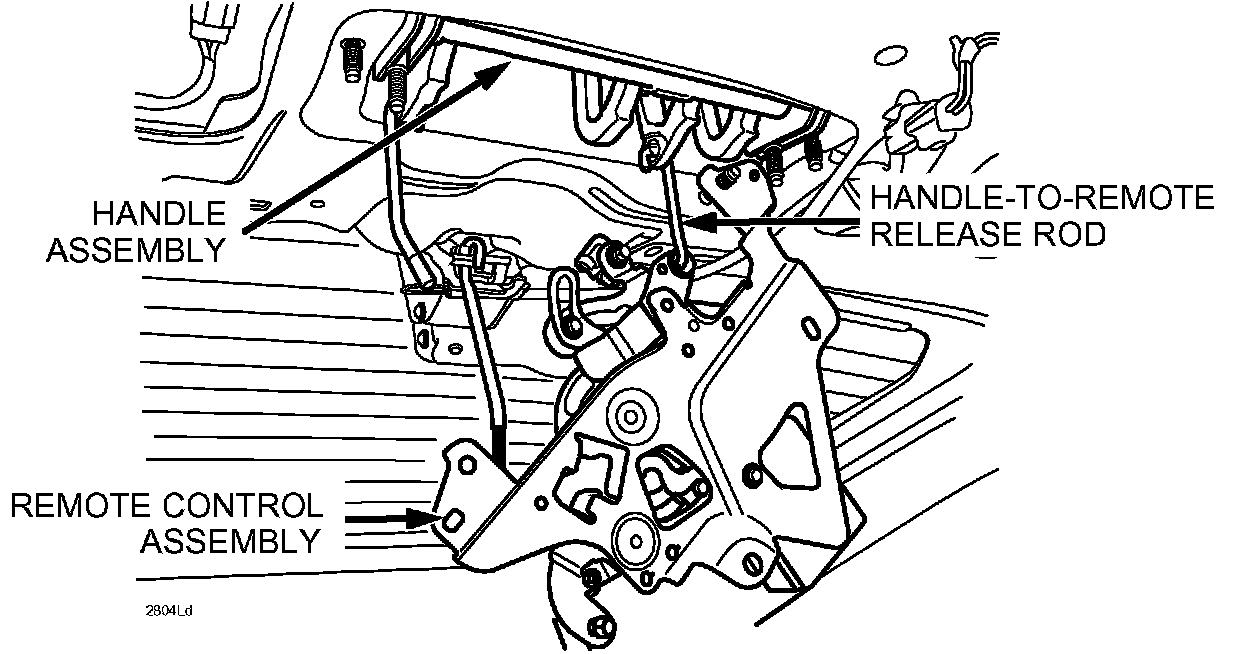
2. Connect the liftgate handle-to-remote release rod to the remote control assembly.
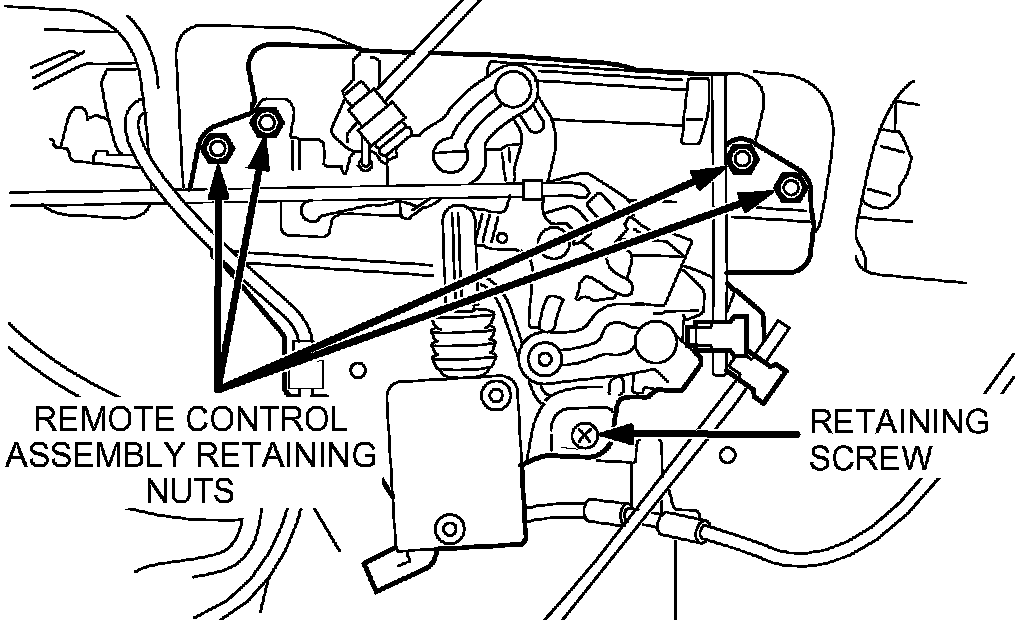
3. Install all four (4) nuts and the retaining screw.
Tightening Torque: 7 Nm (62 lb-in)
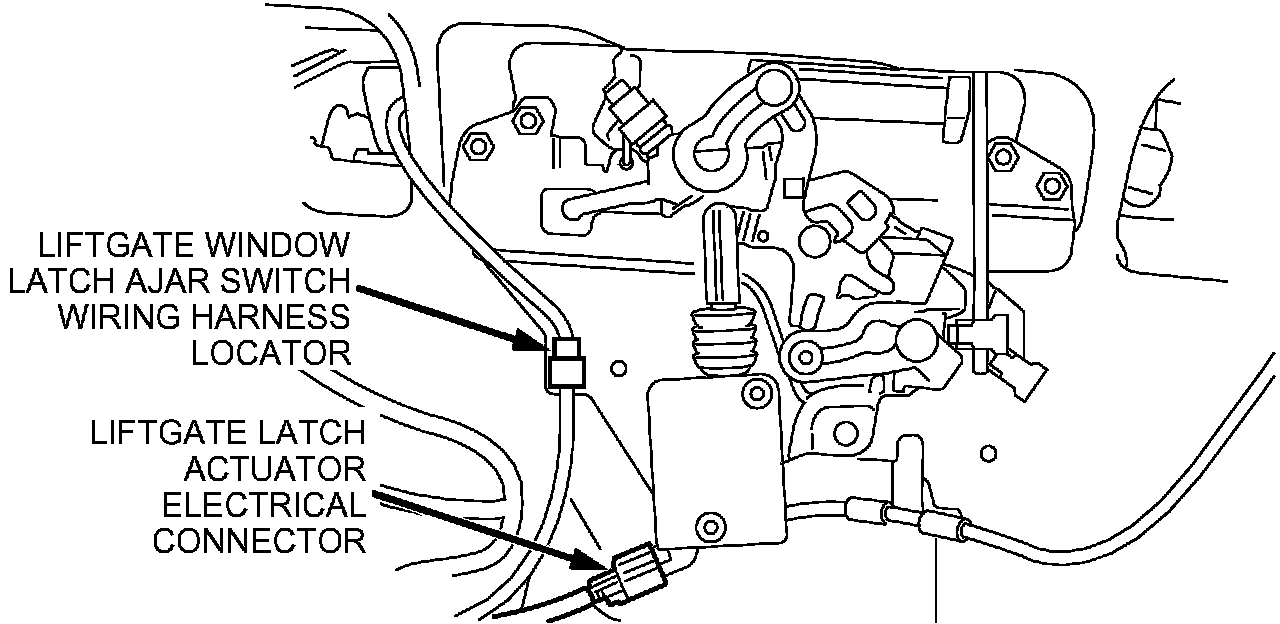
4. Secure the liftgate window latch ajar switch wiring harness locator and connect the liftgate latch actuator electrical connector.
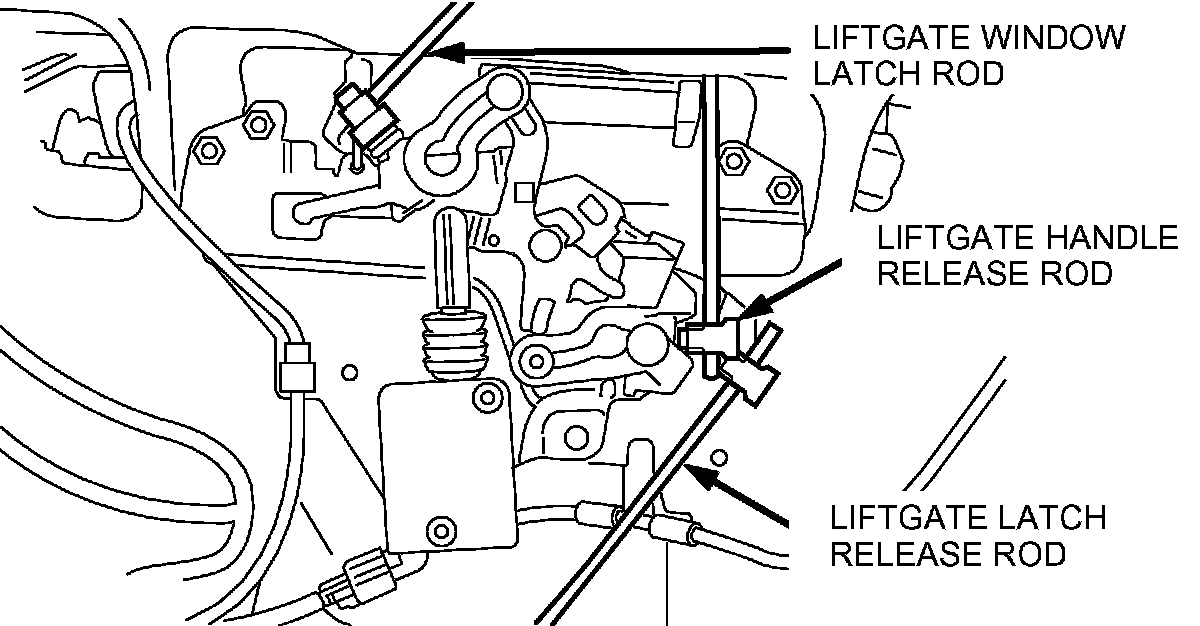
5. Connect the liftgate handle actuating rod and the liftgate window latch release rods.
NOTE:
Be sure the latch rods are not binding or putting pressure on the latches when connected.
6. Open and close the liftgate and the liftgate glass a few times to verify correct operation of the liftgate and liftgate window latches.
7. Install the liftgate trim panel and install the screws.
8. If equipped, install the rear wiper motor cover.
9. Close the liftgate.
C. AUTHORIZED MODIFICATION LABEL INSTALLATION
Complete an "Authorized Modification Label" with the Recall number written on the sticker and affix it to the vehicle's hood. Refer back to the illustration under "A. VEHICLE INSPECTION PROCEDURE".