Intake Air Temperature Sensor 2
INTAKE AIR TEMPERATURE (IAT) SENSOR N0.2 INSPECTIONNOTE: Before performing the following inspection, make sure to follow the procedure as indicated in the troubleshooting flowchart.
Resistance Inspection
1. Disconnect the IAT sensor No.2 connector.
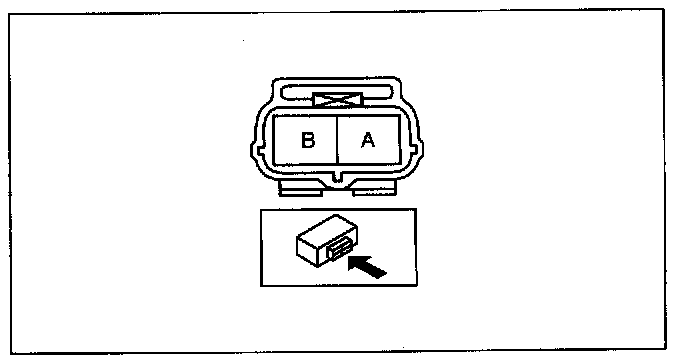
2. Verify that the resistance between terminals A and B is within the specification.
- If not within the specification, replace the IAT sensor No.2. (See INTAKE-AIR SYSTEM REMOVAL/INSTALLATION [BP WITH TC].)
- If the monitor item condition/specification (reference) is not within the specification, even though there is no malfunction, perform the "Circuit Open/Short Inspection".
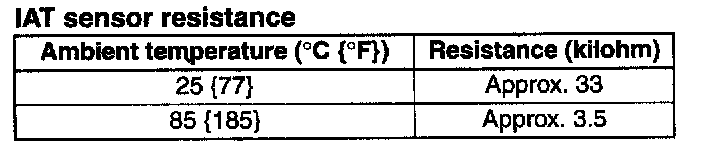
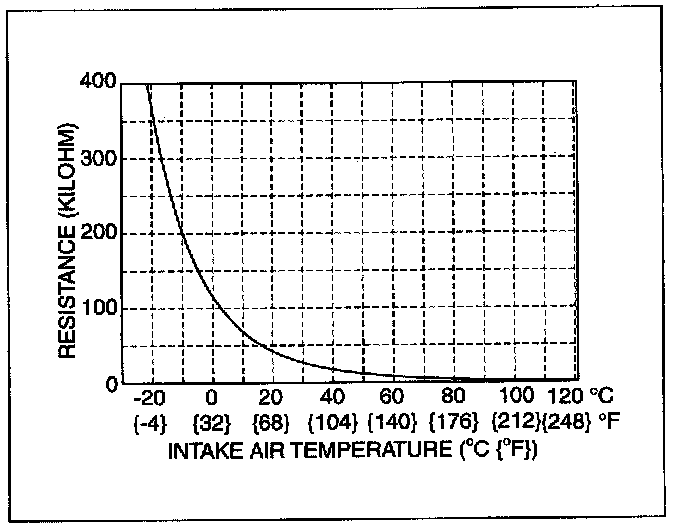
IAT sensor characteristics graph (reference)

IAT sensor characteristics table (reference)
Circuit Open/Short Inspection
1. Remove the PCM connector cover.
2. Disconnect the PCM connector.
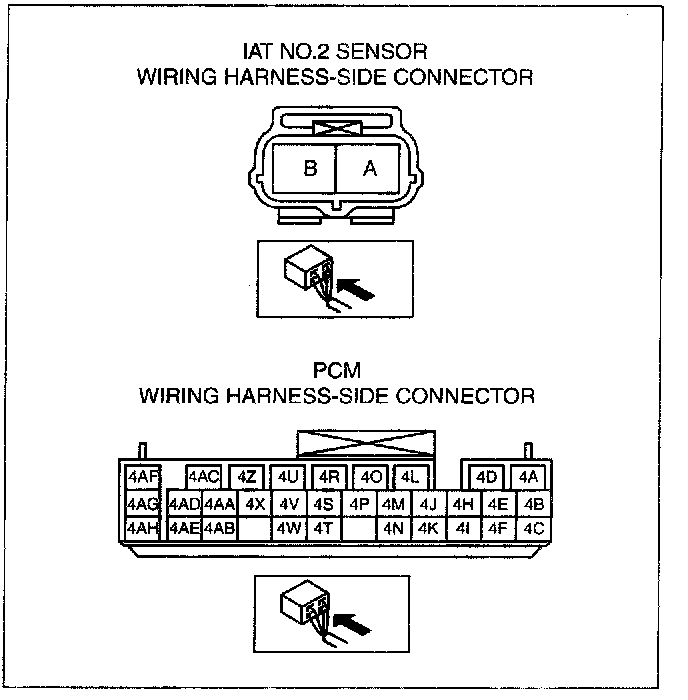
3. Inspect the following wiring harness for open or short circuit (continuity check).
Open circuit
- If there is no continuity, there is an open circuit. Repair or replace the wiring harness.
- IAT sensor No.2 terminal A and PCM terminal 4O
- IAT sensor No.2 terminal B and PCM terminal 4R
Short circuit
- If there is continuity, there is a short circuit. Repair or replace the wiring harness.
- IAT sensor No.2 terminal A and power supply
- IAT sensor No.2 terminal B and power supply
- IAT sensor No.2 terminal B and body GND