Engine Coolant Leakage Inspection
ENGINE COOLANT LEAKAGE INSPECTIONWarning:
^ Remove and install all parts when the engine is cold, otherwise they can cause severe burns or serious injury.
^ Turn off the engine and wait until it is cool. Even then, be very careful when removing the cap. Wrap a thick cloth around it and slowly turn it counterclockwise to the first stop. Step back while the pressure escapes.
^ When you are sure all the pressure is gone, press down on the cap using the cloth, turn it, and remove it.
1. Inspect the engine coolant level.
2. Remove the cooling system cap.
3. Clean the installation parts of the cooling system cap and the under radiator hose.
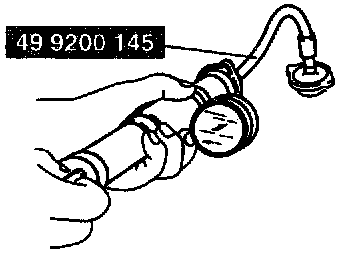
4. Install the SST and a radiator cap tester to the coolant reserve tank filler port.
5. Apply pressure using the radiator cap tester.
Caution:
^ Applying more than 127 kPa (1.3 kgf/cm2, 18 psi) can damage the hoses, fittings, and other components, and cause leaks.
Pressure 127 kPa (1.3 kgf/cm2, 18 psi) [1 min]
6. When pressurizing the radiator, verify that the pressure is maintained.
^ If the gauge needle drops, it may indicate water leakage, therefore perform leakage inspection.
^ If engine coolant leaks from the upper hose installation part, replace the upper hose and the clamp.
^ If the engine coolant leaks from the main body of the radiator (caulked part), replace the radiator.