Oil Pan: Service and Repair
OIL PAN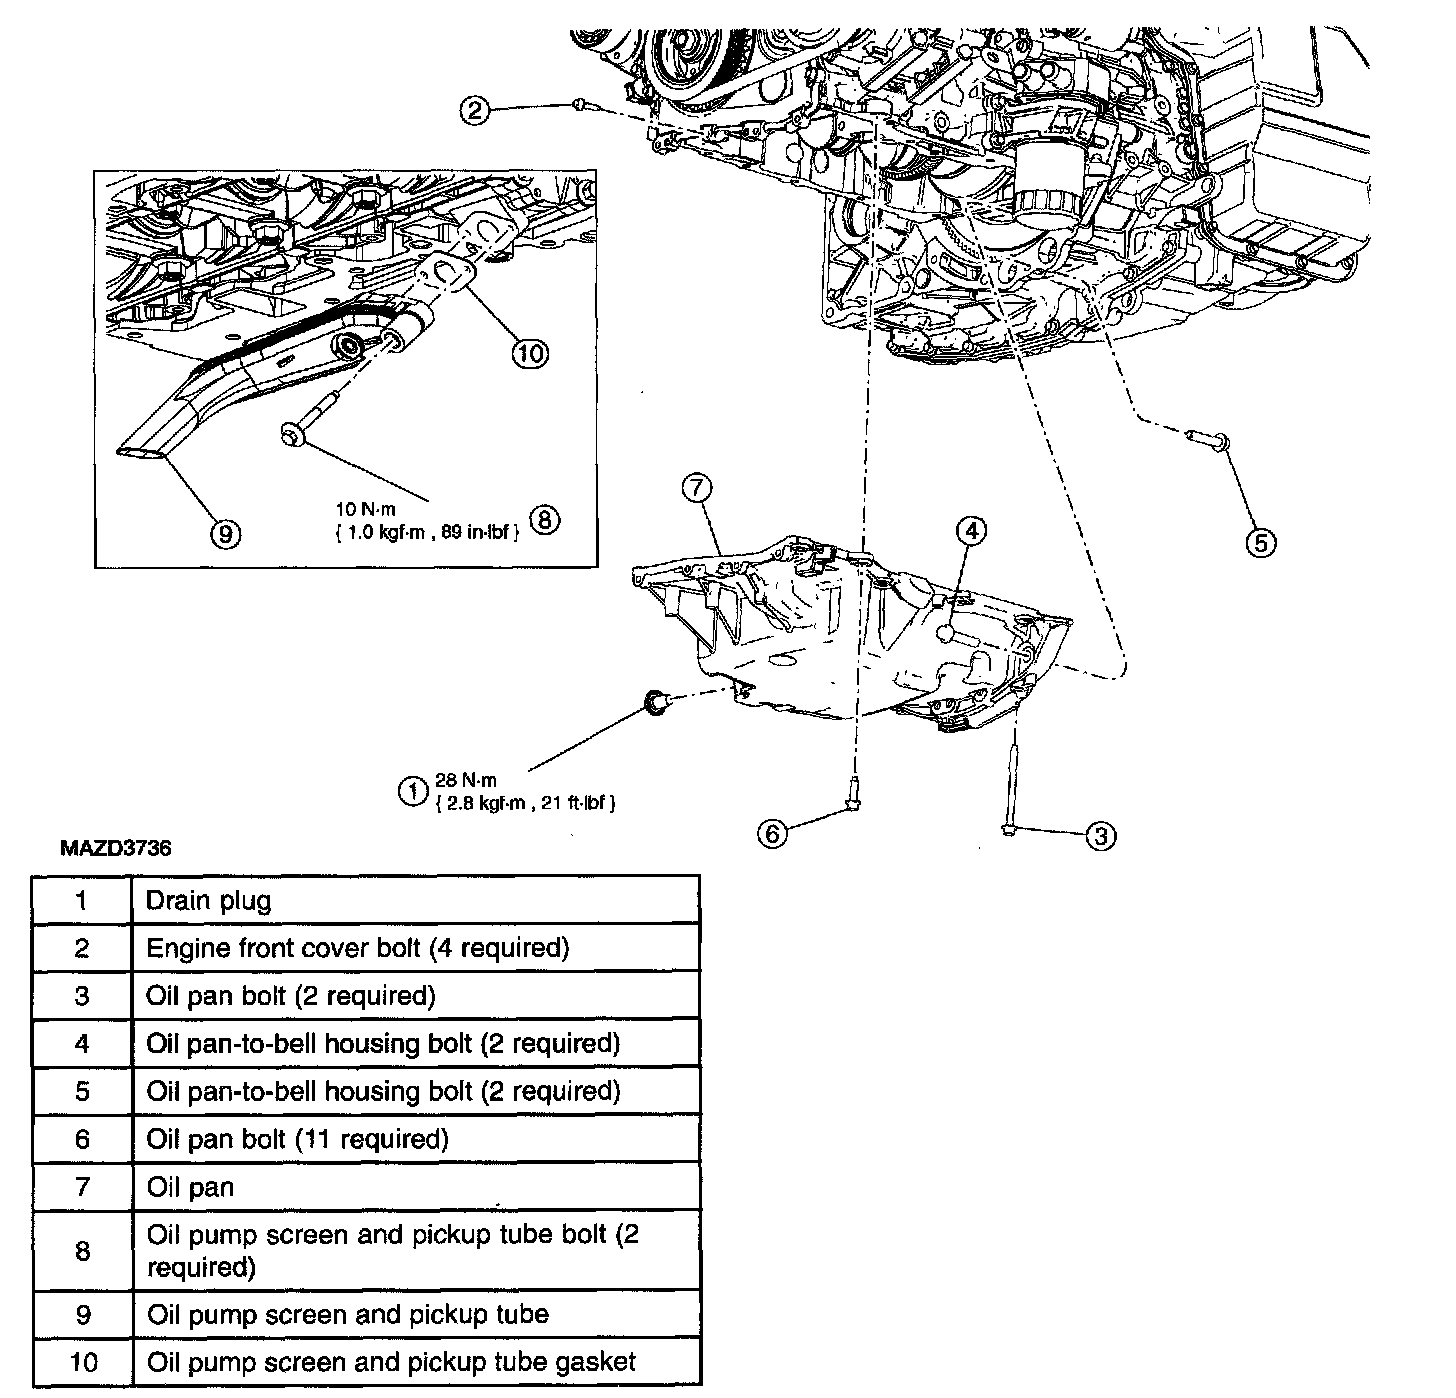
Removal and Installation
1. Drain the engine oil. Install the drain plug.
2. Remove the oil level indicator and tube.
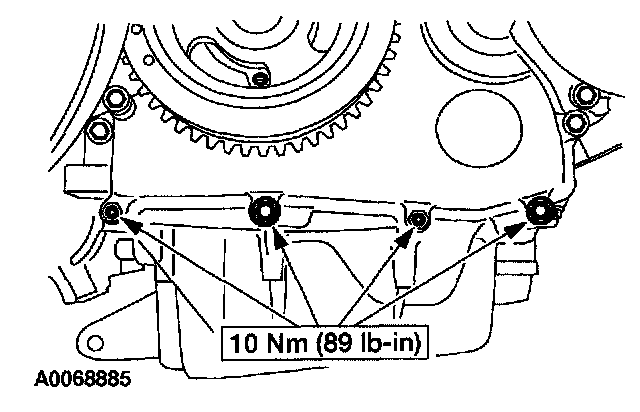
3. Remove the four engine front cover-to-oil pan bolts.
4. Remove the 2 rear oil pan bolts.
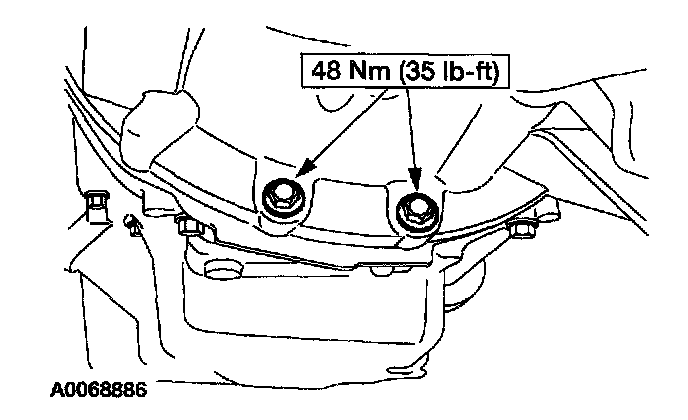
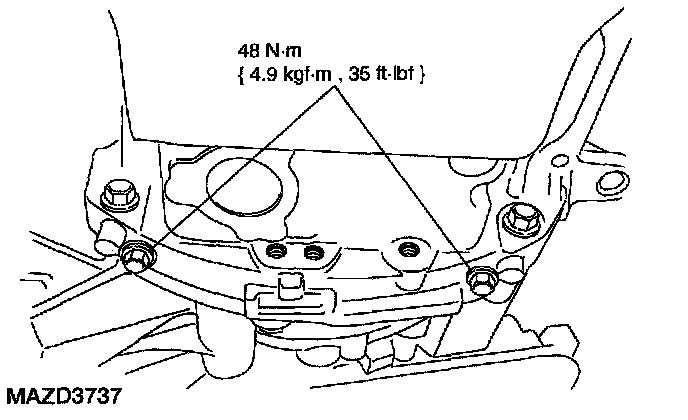
5. Remove the 2 bell housing-to-oil pan bolts.

6. Remove the 13 bolts and the oil pan.
Caution:
^ The oil pan sealing surfaces are soft metals. Do not use abrasive grinding discs to remove gasket material; use only manual scrapers. Do not scratch or gouge the aluminum sealing surfaces.
7. Clean and inspect the mounting faces of both the oil pan and the cylinder block with Metal Surface Cleaner. Both surfaces must be flat, clean and dry.
Note:
^ The oil pan must be installed and the bolts tightened to specification within four minutes of sealer application or oil leaks may occur.
Note:
^ Apply a 2.5 mm (0.098 inch) continuous bead of silicone gasket and sealant to the oil pan.
8. To install, reverse the removal procedure.