Disassembly
TRANSAXLE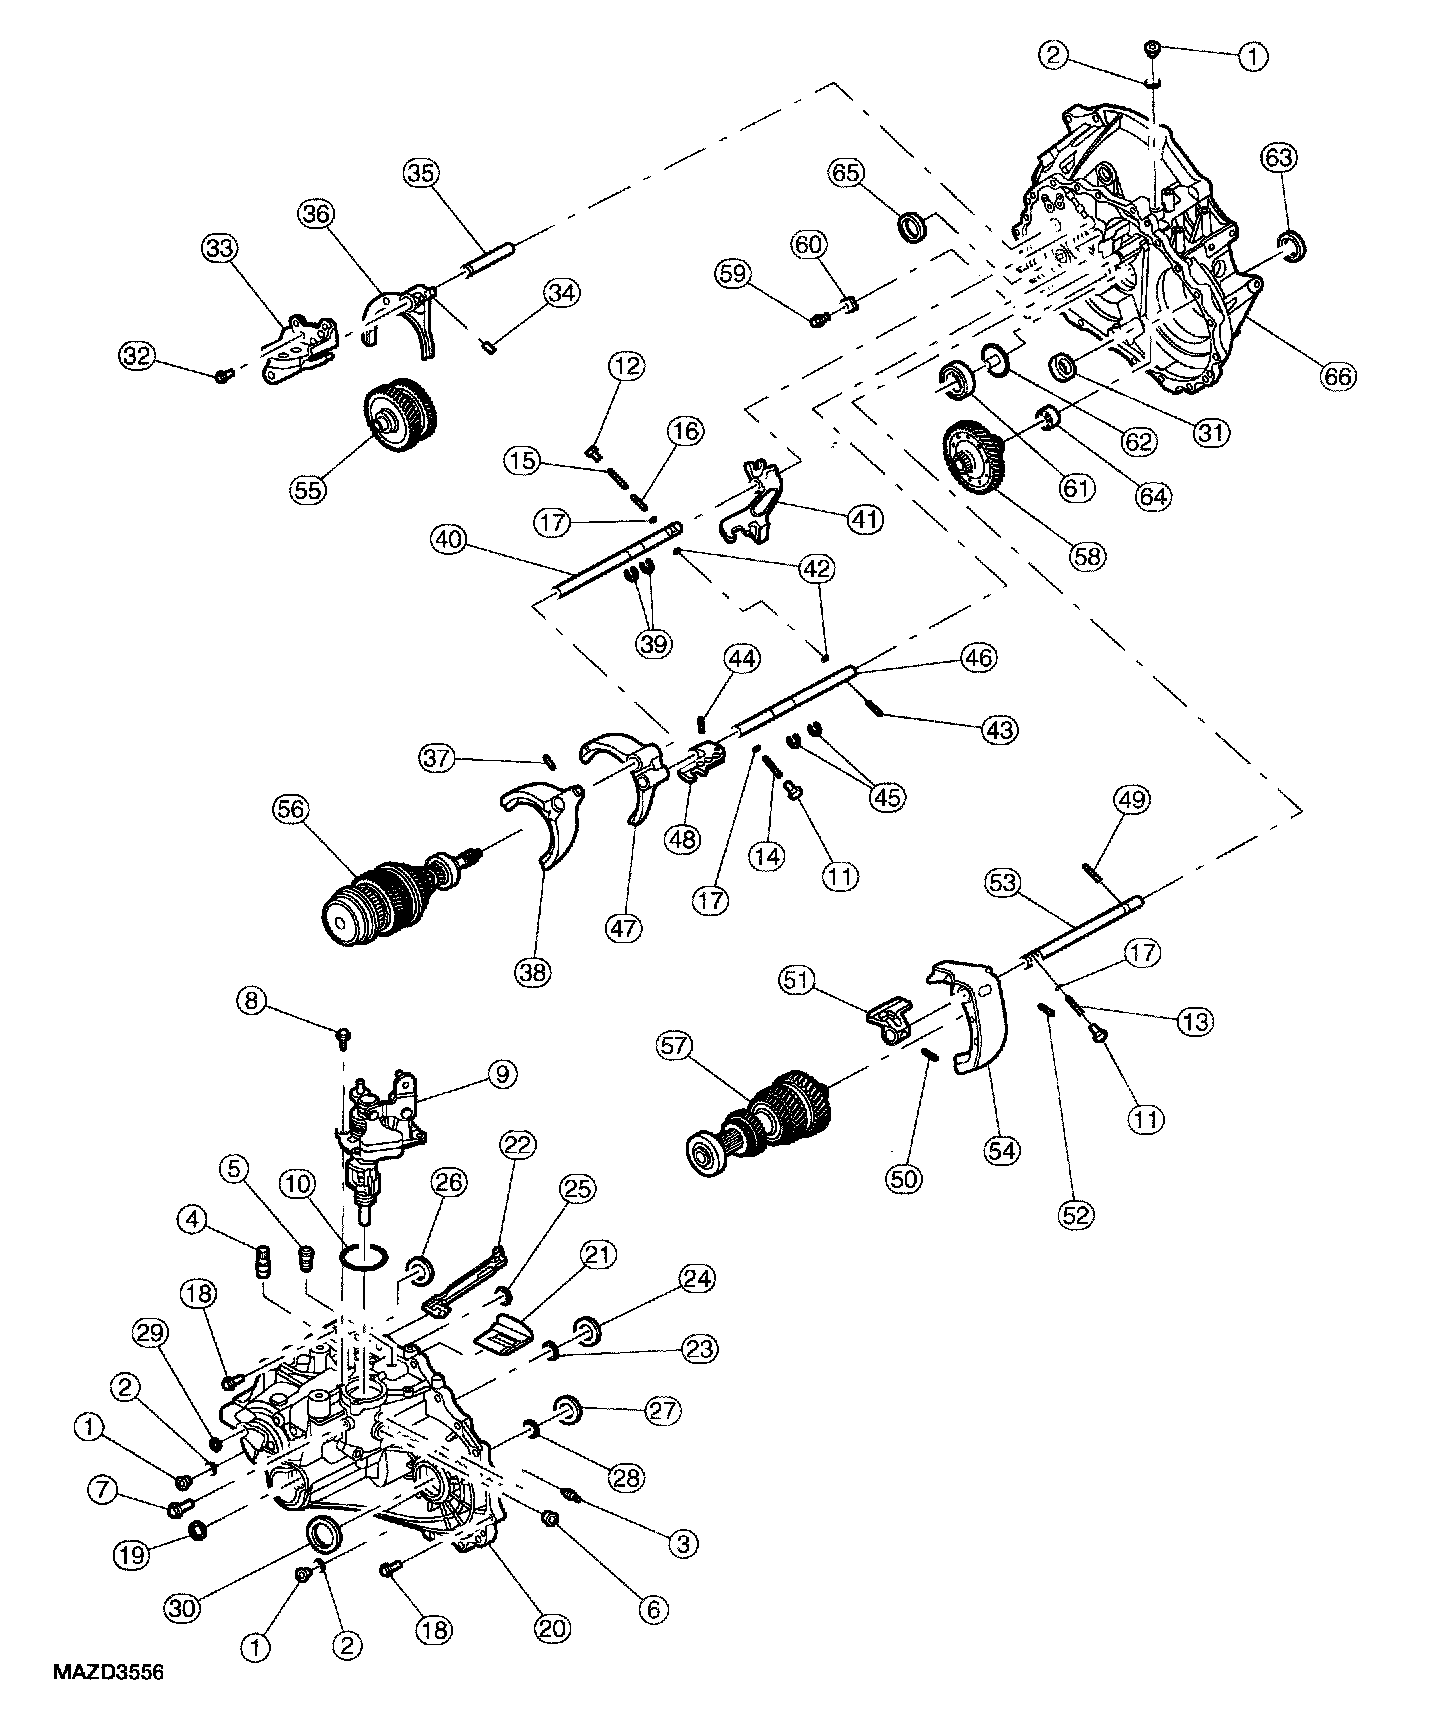
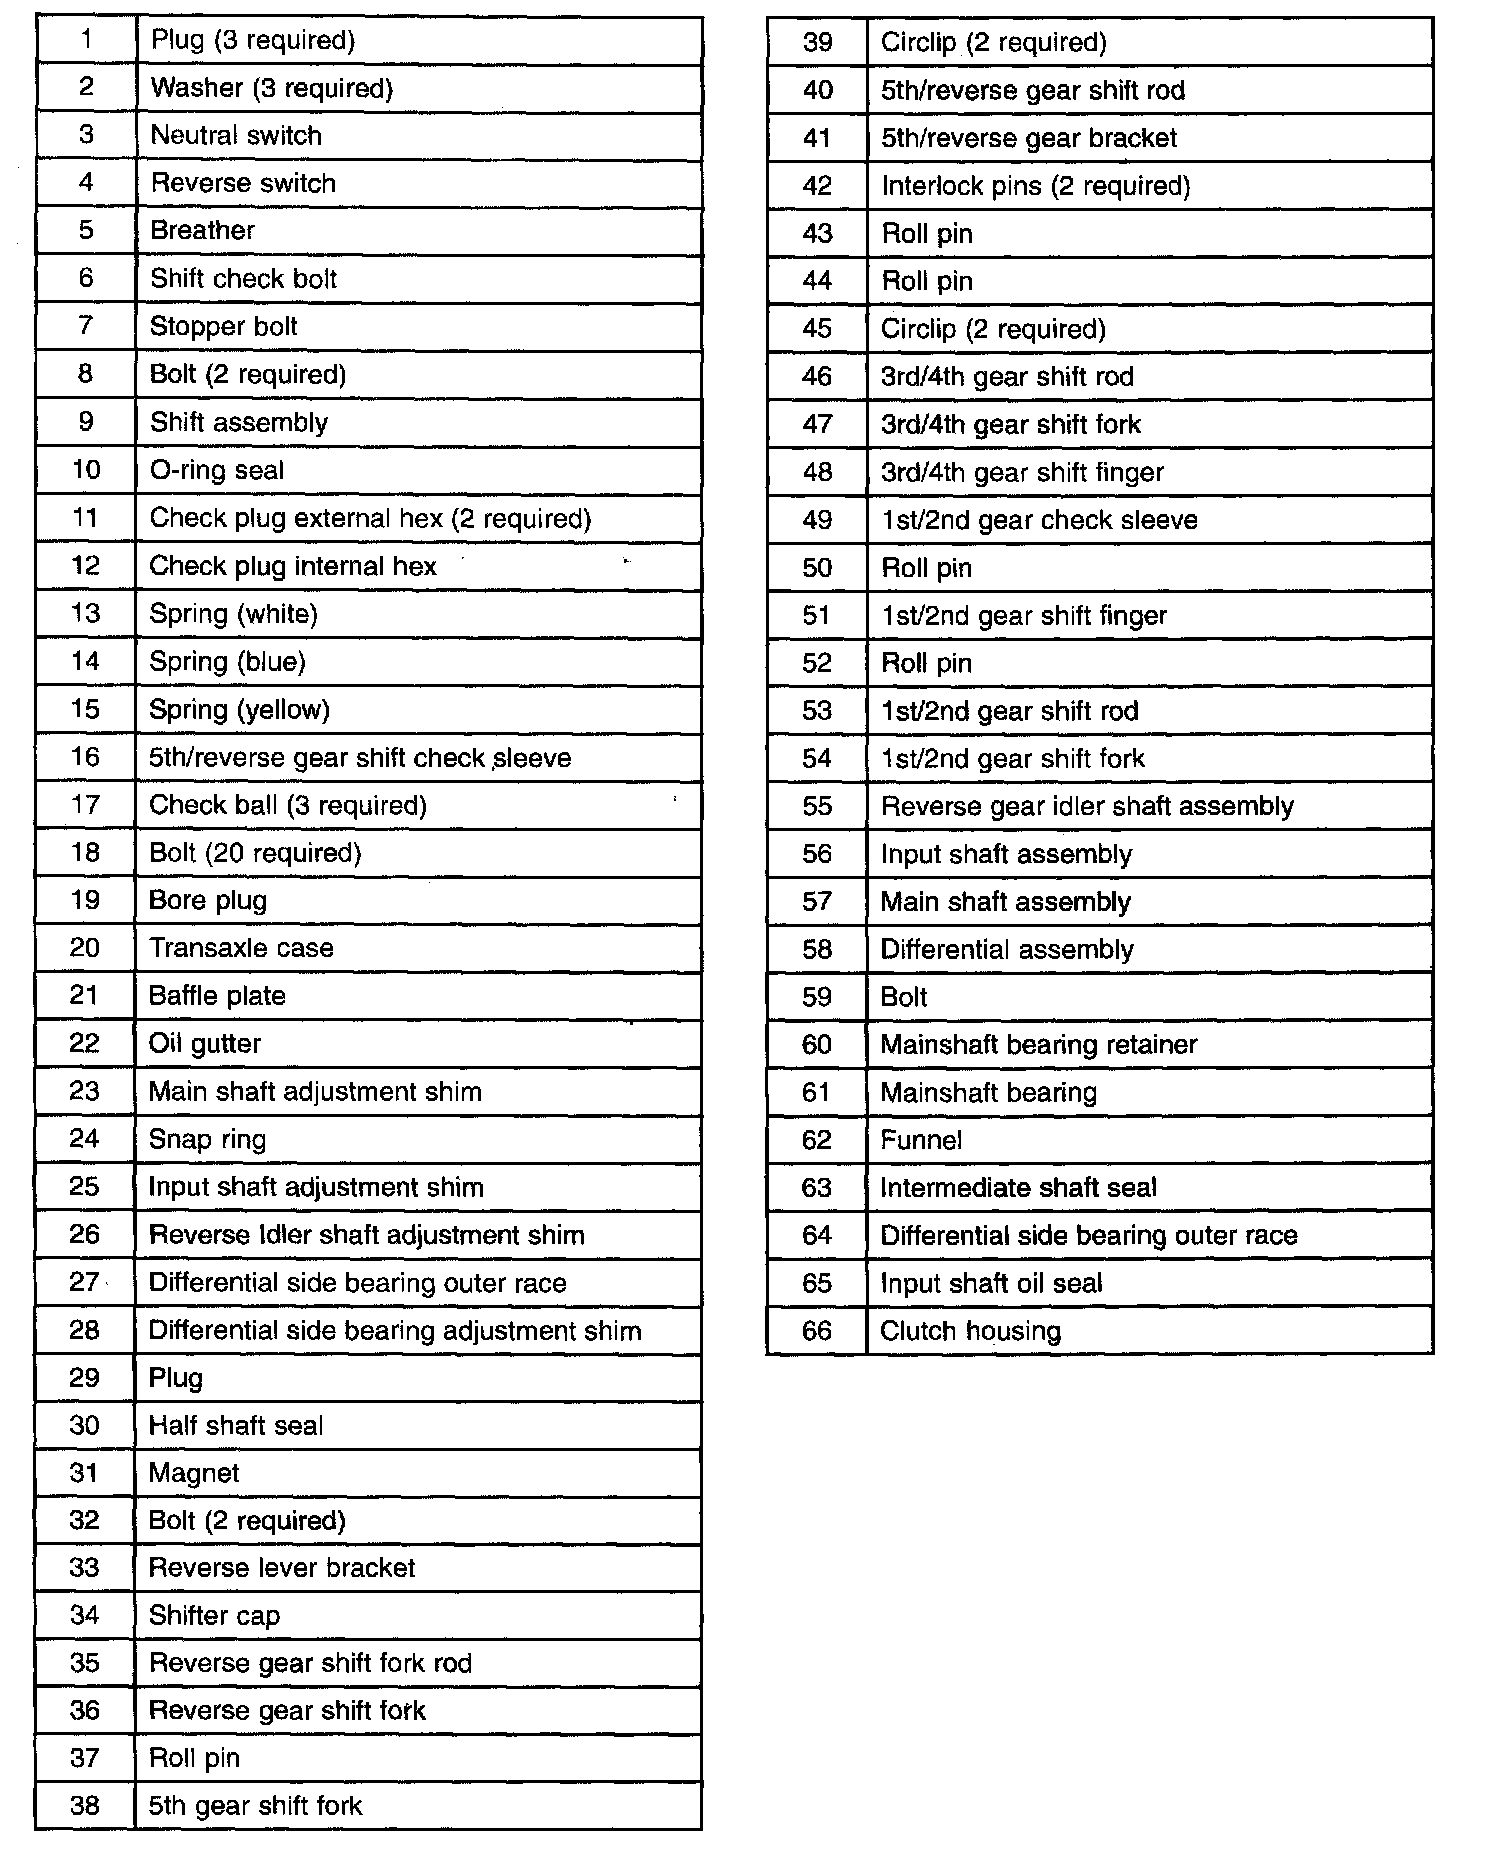
Disassembly
Caution: Clean all disassembled parts In a suitable solvent only and blow dry with compressed air or damage to the transaxle may occur.
Caution: Disassembly should only be carried out in a clean environment or damage to the transaxle may occur.
Caution: Be careful not to scratch the sliding face or mating faces or damage to the transaxle may occur.
Caution: Visually inspect all disassembled parts for any damage, deformation or abnormal wear. Replace any unsuitable parts with new parts only or damage to the transaxle may occur.
Caution: Do not work on the transaxle with cotton gloves, cotton threads could become dislodged and damage to the transaxle may occur.
Note: Verify the normal assembled condition before disassembly.
1. Remove the drain plug and filler plug.
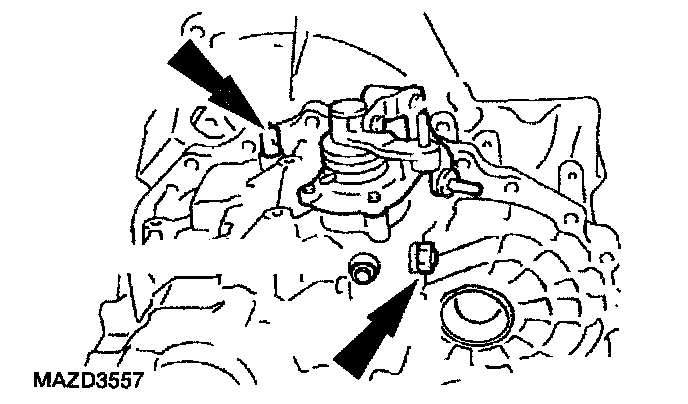
2. Remove the reverse lamp switch and shift rod plug.
3. Remove the control assembly.
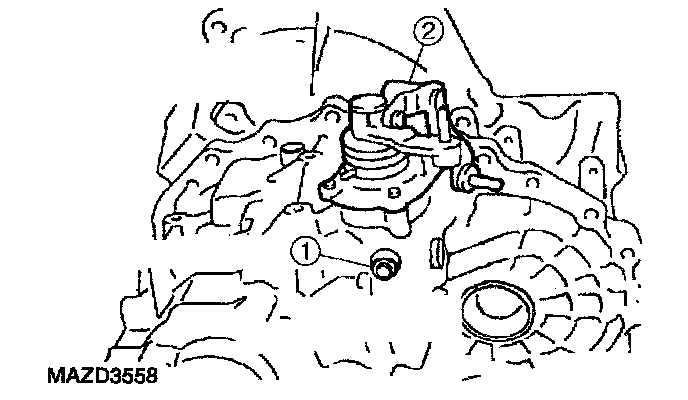
1. Remove the stopper bolt.
2. Remove the bolts and the control assembly.
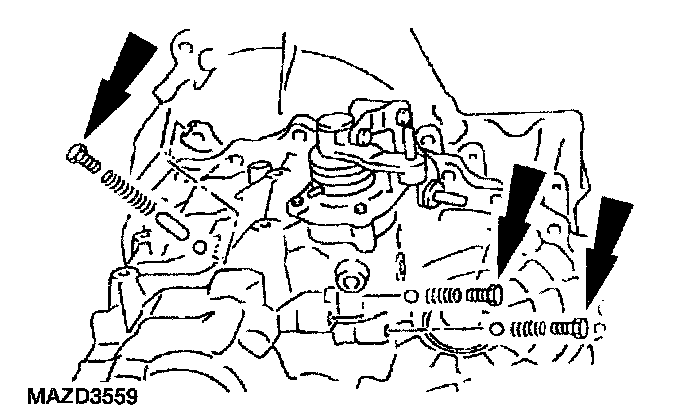
4. Remove the three check plugs, check springs and check balls and one shift check sleeve.
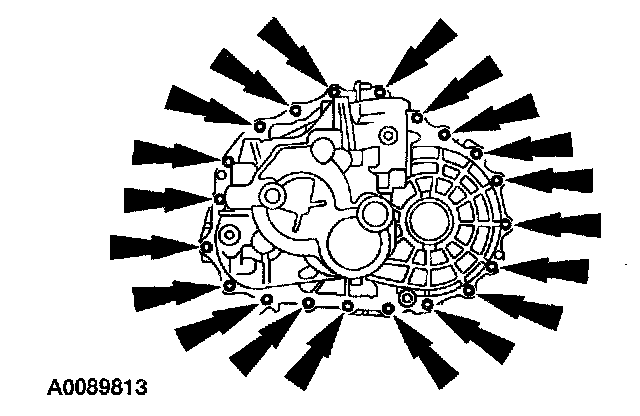
5. Remove 20 bolts.
Note: The main shaft will make noise as it drops when the snap ring releases from the main shaft.
6. Remove the transaxle case.
^ Remove the bore plug.
^ Pry open the snap ring.
^ Separate the transaxle case from the clutch housing.
7. Remove the oil gutter and baffle plate.
8. Remove the snap ring, mainshaft rear bearing adjusting shim and the input shaft rear bearing adjusting shim from the transaxle case.
Caution: Do not exceed 120°C (248°F) or damage to the transaxle case may occur.
Note: If there is difficulty in removing the differential side bearing outer race, use the special tool.
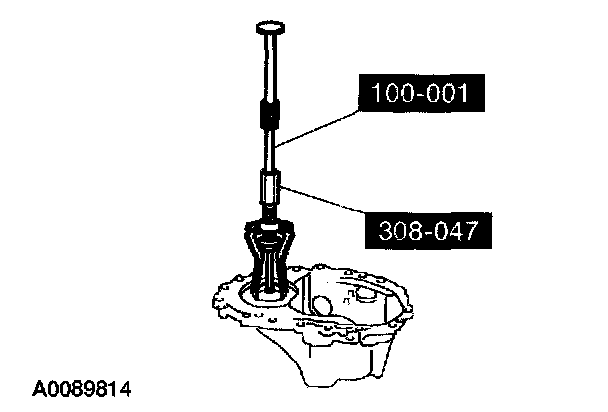
9. Heat the transaxle case to 100°C (212°F) and remove the differential side bearing outer race.
10. If required, remove the welch plug.
11. Remove the differential oil seal.
12. Remove the magnet.
Caution: Be careful not to lose the shifter cap.

13. Remove the reverse lever.
^ Shift the transaxle to 5th gear and remove the bolts.
^ Remove the bracket.
^ Lift and remove the reverse lever.
14. Remove the reverse lever rod then remove the re verse shift fork.
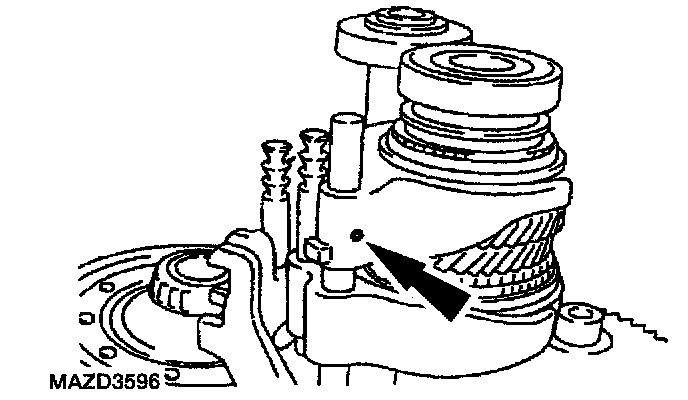
15. Shift the transaxle to 3rd gear and remove the 5th shift fork roll pin.
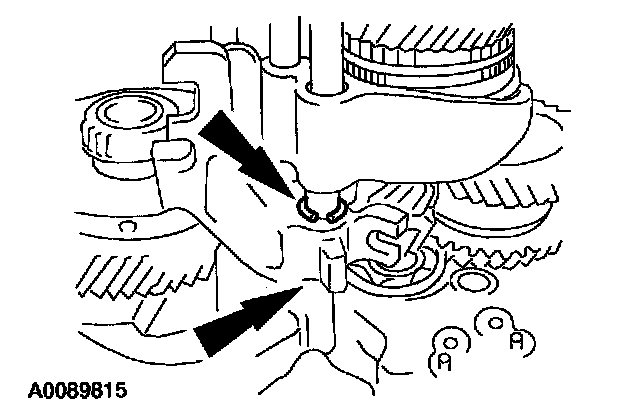
16. Remove the circlips.
17. Remove the 5th/reverse fork rod, the 5th shift fork and the 5th/reverse bracket.
18. Remove the 2 check balls and the interlock pin.
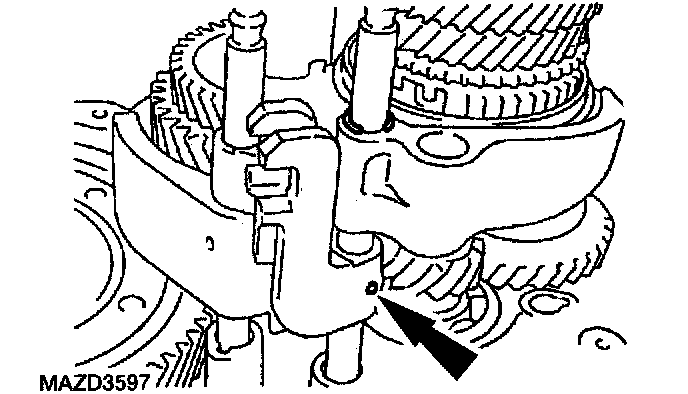
19. Remove the roll pin.
20. Remove the circlips.
21. Remove the 3rd/4th fork rod, 3rd/4th shift fork and the bracket.
22. Remove the 1st/2nd shift check sleeve from the clutch housing.
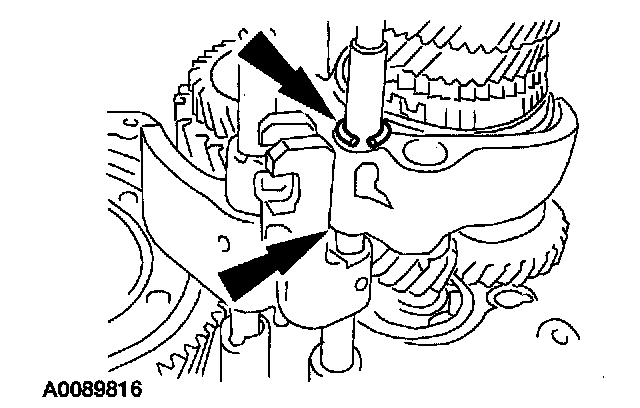
23. Remove the roll pin.
24. Remove the 1st/2nd fork rod and the 1st/2nd bracket as an assembly.
25. Remove the 1st/2nd shift fork.
26. Remove the 1st/2nd bracket roll pin and separate the fork rod from the bracket.
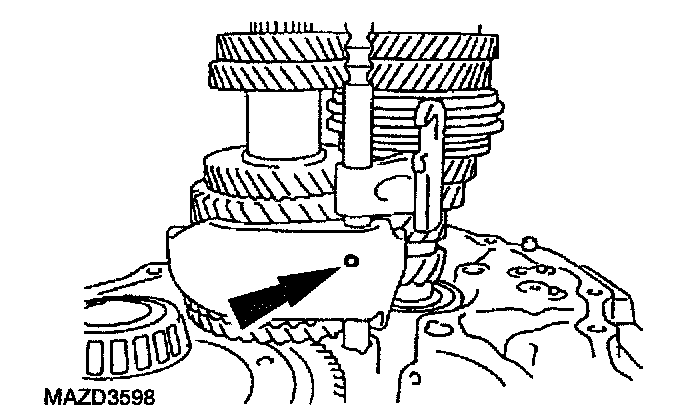
Caution: Make sure to remove the main shaft straight out. Failure to remove the main shaft correctly may result in damage to the funnel on the clutch housing.
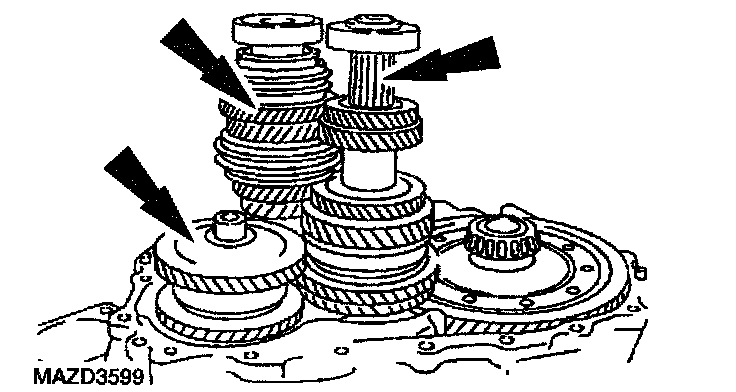
27. Remove the reverse gear idler shaft, main shaft and input shaft as set.
28. Remove the differential.
29. Remove the oil channel.
1. Remove the bearing retainer.
Caution: Do not exceed 120°C (248°F) or damage to the clutch housing may occur.
Note: If there is difficulty in removing the bearing, heat the clutch housing.
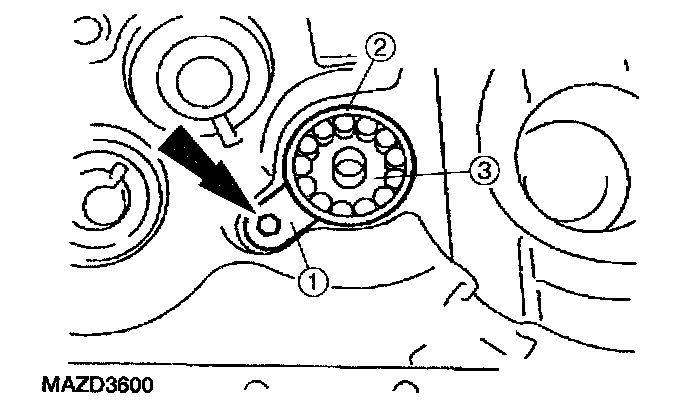
2. Remove the mainshaft front bearing.
3. Remove the oil channel
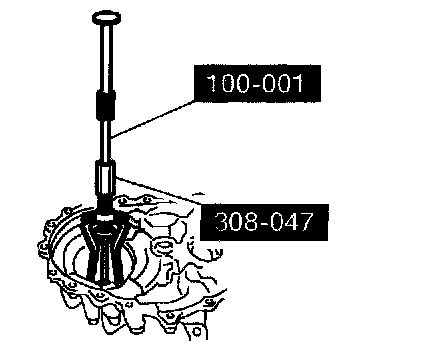
30. Remove the differential oil seal.
Caution: Do not exceed 120°C (248°F) or damage to the clutch housing may occur.
Note: If there is difficulty in removing the differential side bearing outer race, use the special tool.
31. Heat the clutch housing to 100°C (212°F) and remove the differential side bearing outer race.
32. Clean and inspect all parts.
^ Remove all traces of sealer.
^ Inspect all parts for wear or damage.
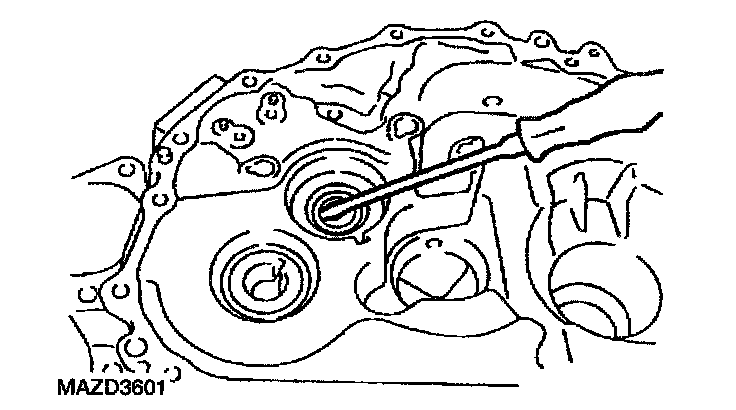
33. Remove the input shaft oil seal.