Parking Brake Lever: Service and Repair
PARKING BRAKE LEVER REMOVAL/INSTALLATION1. Remove the main silencer.
2. Remove the heat insulator.
3. Remove the under cover (rear).
4. Remove the second-row seat.
5. Remove the front seat.
6. Remove the center console.
7. Remove the front scuff plate.
8. Remove the front side trim.
9. Remove the rear scuff plate.
10. Remove the B-pillar lower trim.
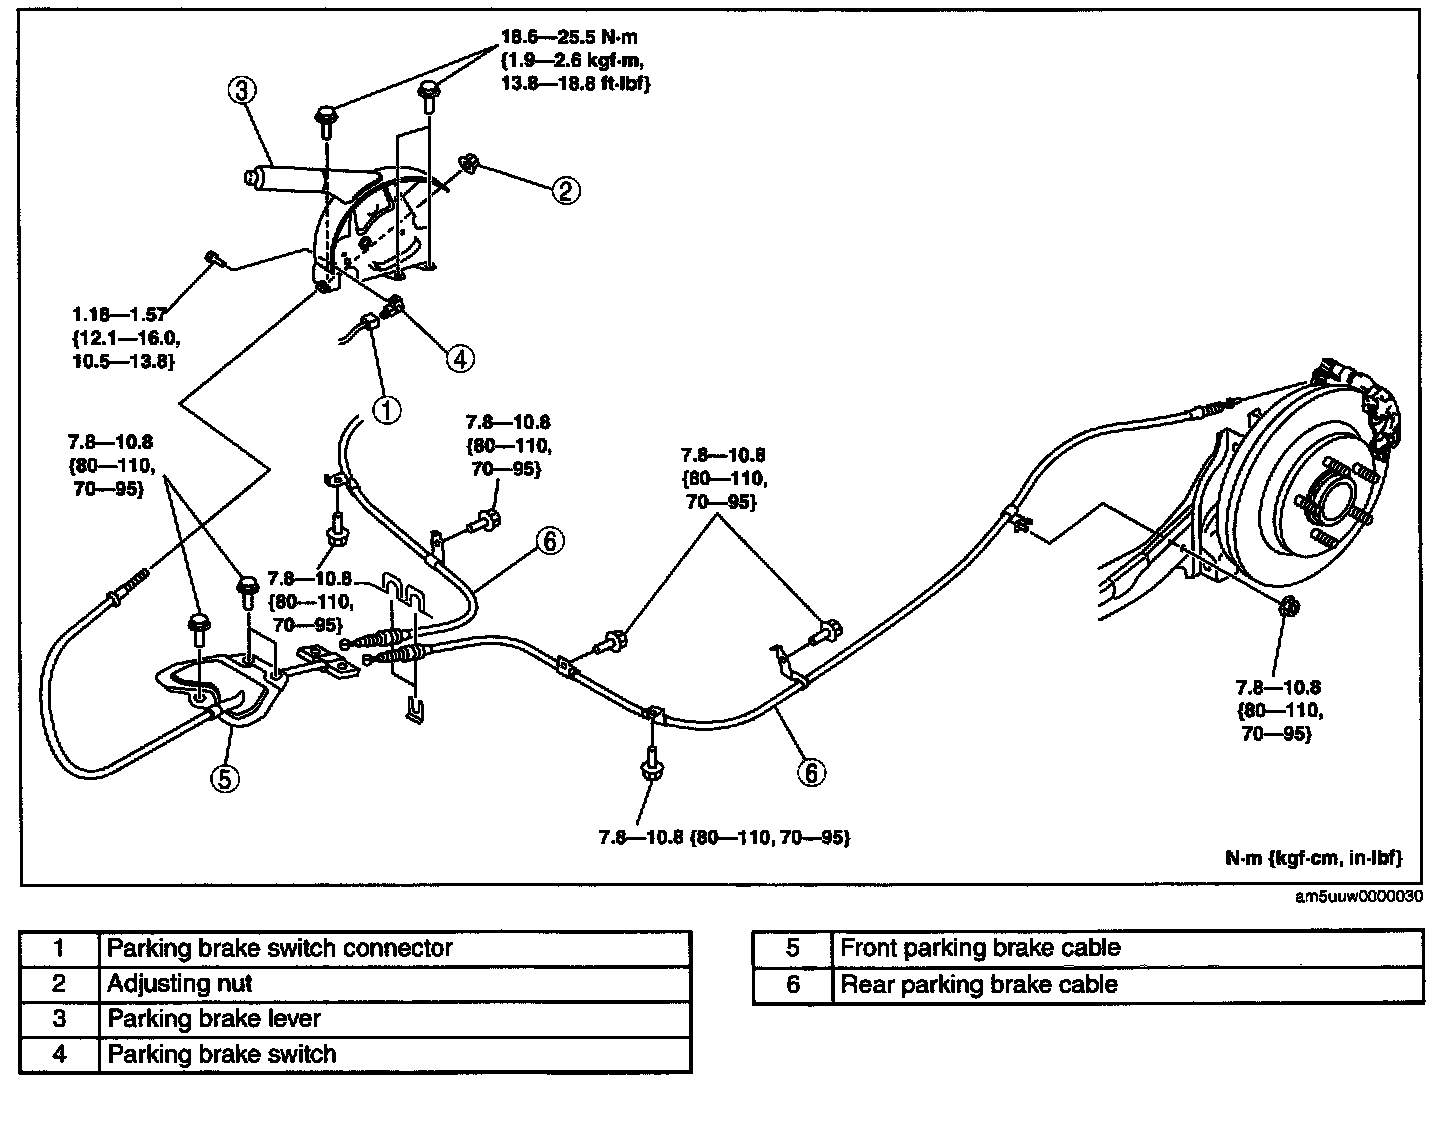
11. Remove in the order indicated in the table.
12. Install in the reverse order of removal.
13. After installation, inspect the parking brake lever stroke. (See PARKING BRAKE LEVER INSPECTION.) Testing and Inspection
Front Parking Brake Cable Removal Note
1. Lift the floor covering around the parking brake lever installation area.
2. Remove the front parking brake cable installation bolts through the parking brake lever installation hole of the floor covering.
3. Remove the front parking brake cable through the parking brake lever installation hole of the floor covering.
Rear Parking Brake Cable Installation Note
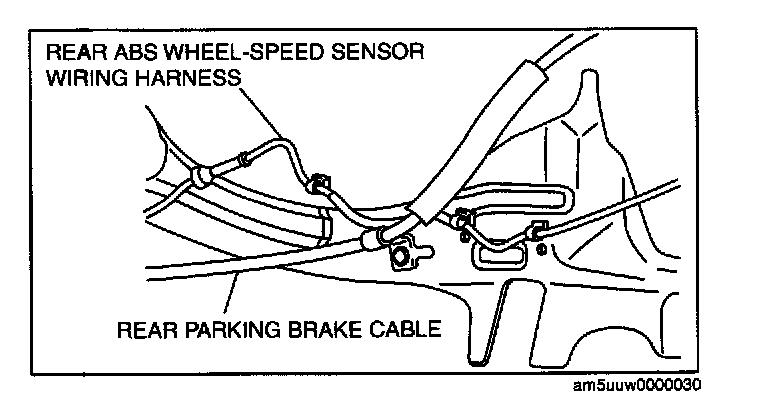
1. Pass the rear parking brake cable inside the rear ABS wheel-speed sensor wiring harness as shown in the figure.
2. Install the rear parking brake cable.
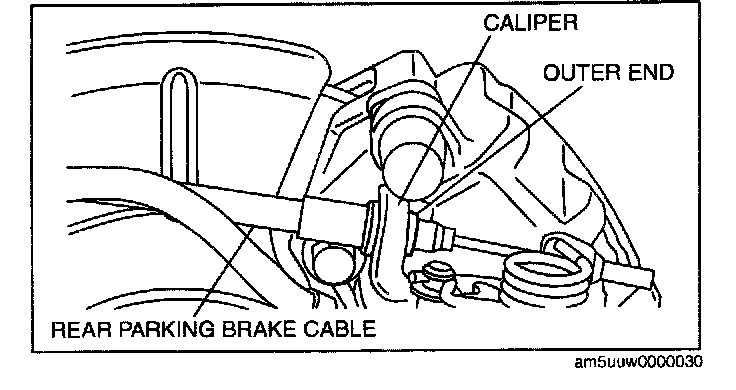
3. Verify that the end of the rear parking brake cable outer end is out of the caliper as shown in the figure.