Wheel Hub: Service and Repair
WHEEL HUB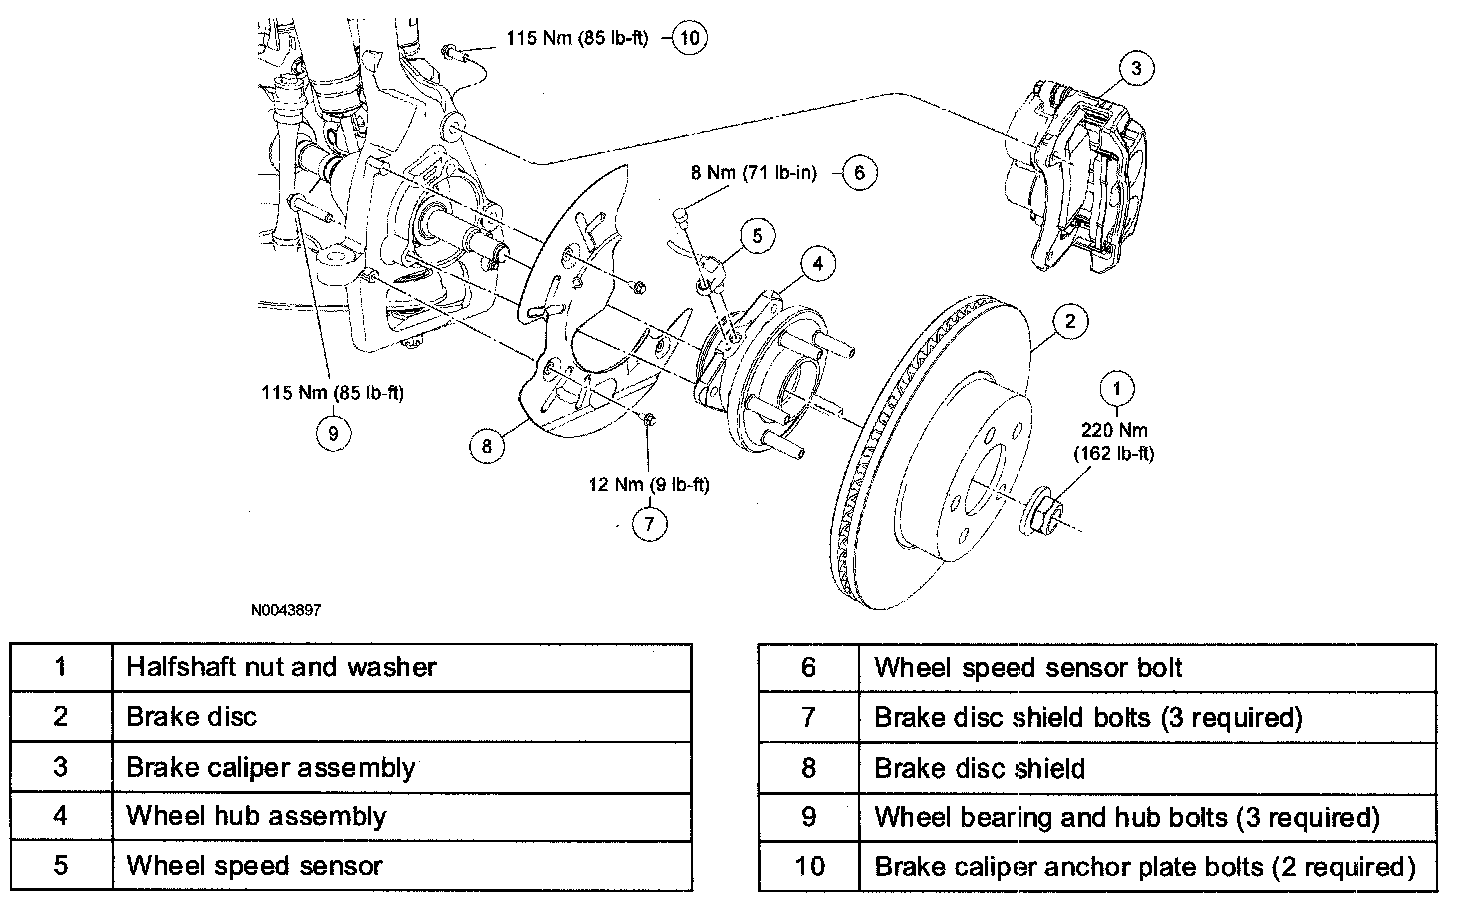
Removal and Installation
Caution:
^ Suspension fasteners are critical parts because they affect performance of vital components and systems and their failure can result in major service expense. A new part with the same part number or an equivalent part must be installed, if installation is necessary. Do not use a part of lesser quality or substitute design. Torque values must be used as specified during reassembly to make sure of correct retention of these parts.
1. With the vehicle in NEUTRAL, position it on a hoist.
2. Remove and discard the halfshaft nut and washer.
Tightening Torque
220 N-m (22.4 kgf-m, 162 ft-lbf)
Caution:
^ Do not use a hammer to separate the outboard CV joint from the wheel bearing and hub. Damage to the outboard CV threads and to internal components may result.
3. Using (SST 205-D070), separate the outboard CV joint from the wheel bearing and hub.
4. Remove the bolt and detach the wheel speed sensor from the wheel hub.
Tightening Torque
12 N-m (1.2 kgf-m, 9 ft-lbf)
5. Remove the brake disc shield.
Caution:
^ Do not overextend the CV joint and boots when removing the wheel bearing and hub assembly.
6. Remove and discard the 3 bolts, and remove the wheel bearing and hub.
Tightening Torque
115 N-m (11.7 kgf-m, 85 ft-lbf)
7. To install, reverse the removal procedure.