Trunk Side Trim Removal/Installation
TRUNK SIDE TRIM REMOVAL/INSTALLATIONDriver Side
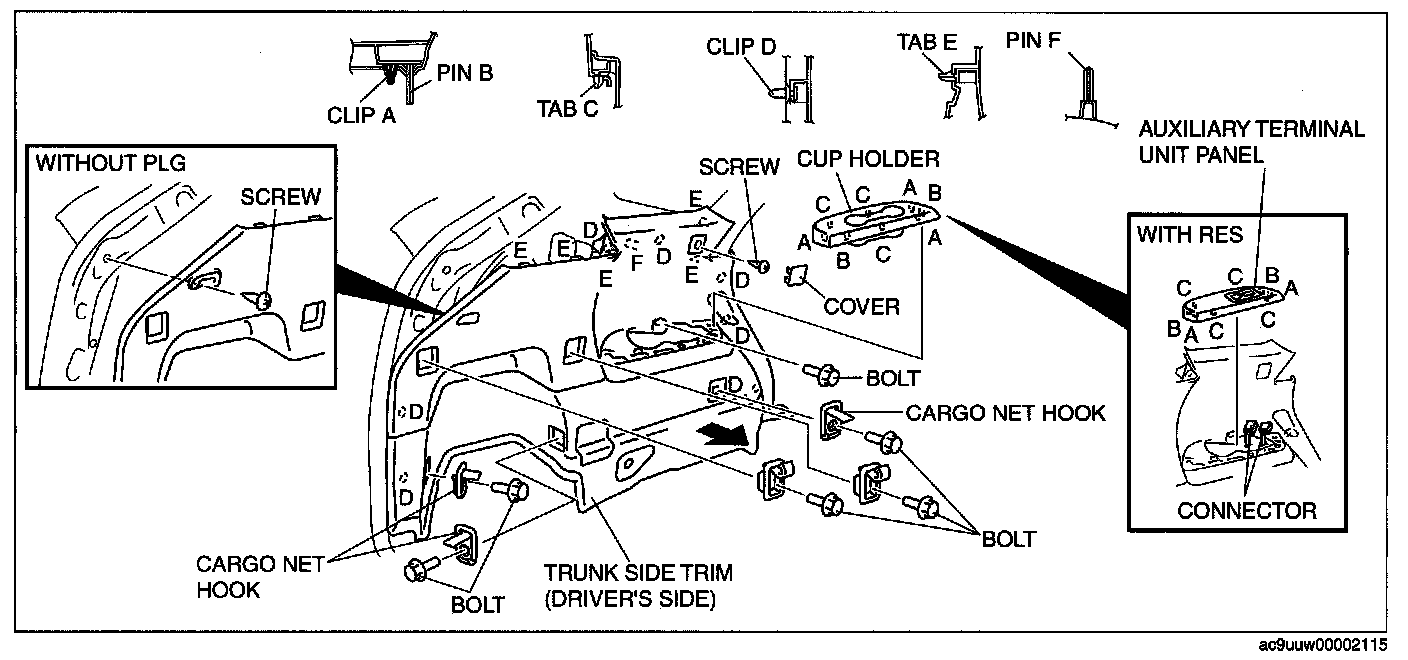
1. Disconnect the negative battery cable.
2. Remove the following parts:
1. Trunk box
2. Seat side box
3. Trunk end trim
4. Third-row seat
5. Rear scuff plate inner (LH)
6. Third-row seat belt lower anchor installation bolt (LH)
3. Pull the cup holder upward and detach clips A, pins B, and tabs C. (Vehicles without RES)
4. Pull the auxiliary terminal unit panel upward and detach clips A, pins B, and tabs C. (Vehicles with RES)
5. Disconnect the power supply socket connector and external input connector. (Vehicles with RES)
6. Remove the cup holder. (Vehicles without RES)
7. Remove the external input panel. (Vehicles with RES)
8. Remove the bolts, and remove the cargo net hook.
9. Remove the cover.
10. Remove the screw.
11. Remove the bolts.
12. Pull the trunk side trim outward and detach clips D, tabs E, and pin F.
13. Remove the trunk side trim.
14. Install in the reverse order of removal.
Passenger Side
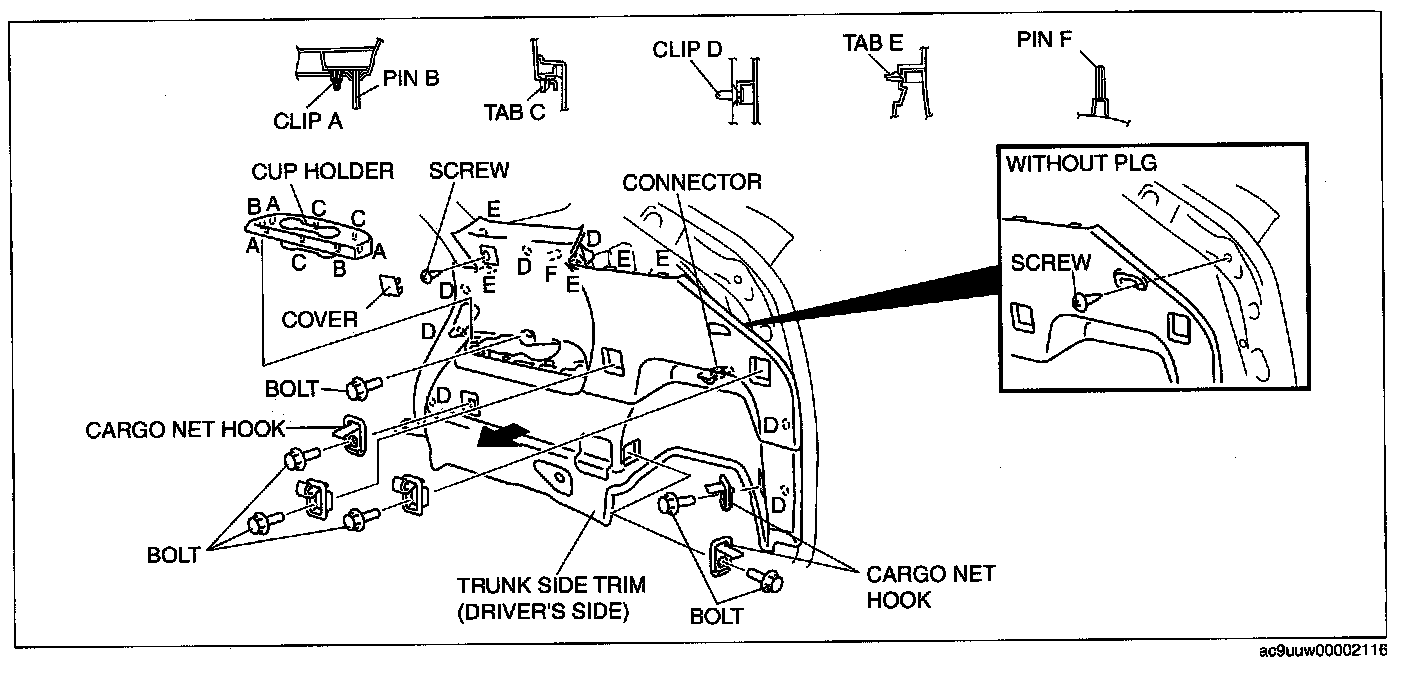
1. Disconnect the negative battery cable.
2. Remove the following parts:
1. Trunk box
2. Seat side box
3. Trunk end trim
4. Third-row seat
5. Rear scuff plate inner (RH)
6. Third-row seat belt lower anchor installation bolt (RH)
3. Pull the cup holder upward and detach clips A, pins B, and tabs C.
4. Remove the cup holder.
5. Remove the bolts, and remove the cargo net hook.
6. Remove the cover.
7. Remove the screw.
8. Remove the bolts.
9. Pull the trunk side trim outward and detach clips D, tabs E, and pin F.
10. Disconnect the accessory socket connector.
11. Remove the trunk side trim.
12. Install in the reverse order of removal.