Attachment II
A. VEHICLE INSPECTION PROCEDURE1. Verify that the vehicle is within the following range:
^ 2007 CX-9 - VIN Range: JM3 TB**** 70 100082 - 110351
^ If the vehicle is within the above range, proceed to step 2.
^ If the vehicle is not within the above range, return the vehicle to the customer or inventory.
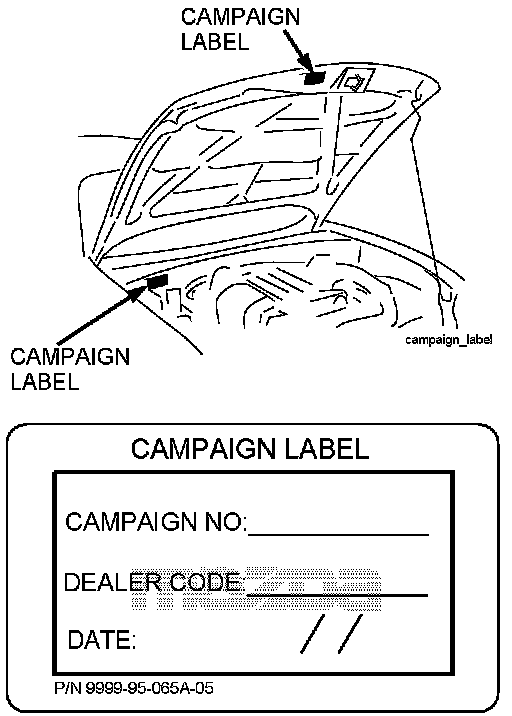
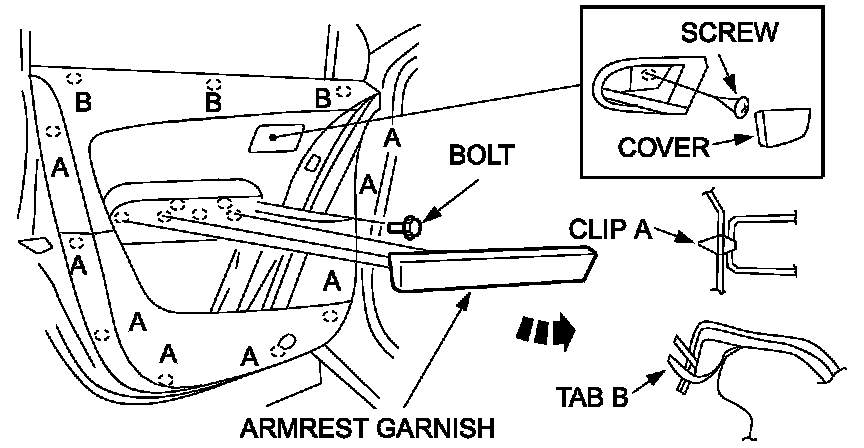
2. Perform a Warranty Vehicle Inquiry using your eMDCS System and inspect vehicle for a Campaign Label SSP 73 attached to the vehicle's hood or bulkhead. Refer to eMDCS System - Warranty Vehicle Inquiry Results table below.
NOTE:
Verify SSP number as the vehicle may have multiple SSPs.
eMDCS System - Warranty Vehicle Inquiry Results
B. REPAIR PROCEDURE
1. Record customer radio station presets.
2. Disconnect the negative battery cable.
3. Remove the inner garnish. (Detach clips A and hook B by pulling them in the direction of the arrow.)
4. Open the cover using a small flathead screwdriver and remove the screw.
5. Remove the armrest garnish in the direction of the arrow.
6. Remove the bolt located behind the armrest garnish.
7. Detach clips A from the front door using a fastener remover.
8. Pull the front door trim upward and detach tabs B from the front door.

9. Remove tab A, and move the front door trim in the direction of the arrow.
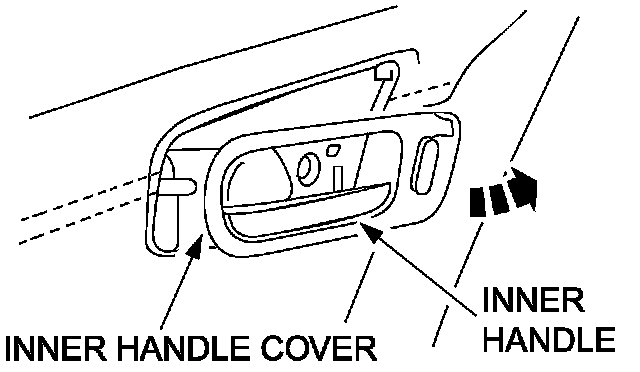
10. Turn the inner handle cover in the direction of the arrow and remove it from the front door trim.
11. For the driver's door, disconnect the power window main switch connector and the power outer mirror switch connector and door lock switch connector.
12. For the passenger's door, disconnect the power window sub switch connector.
13. For both doors, disconnect the courtesy light connector.
14. Remove the front door trim.
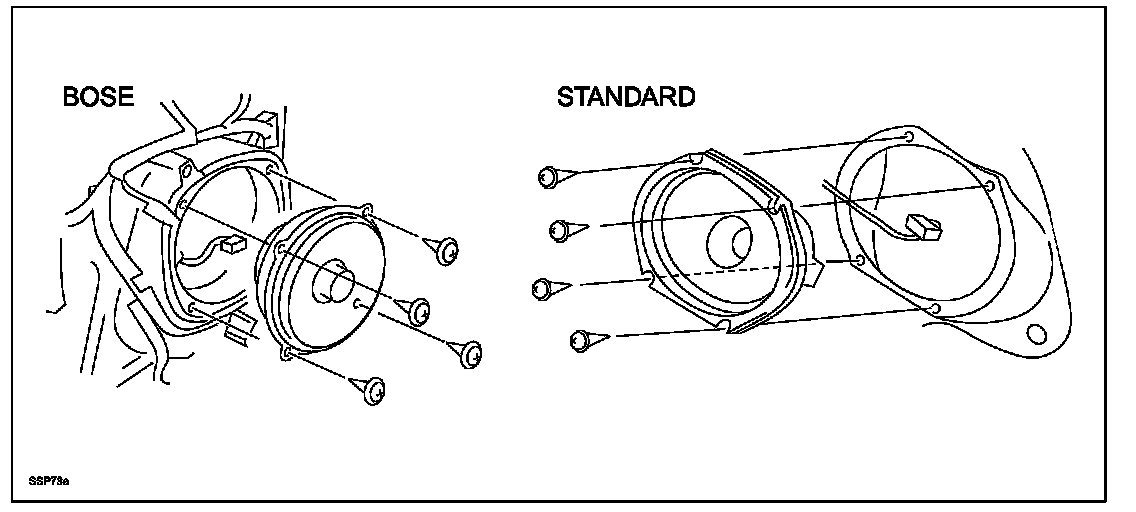
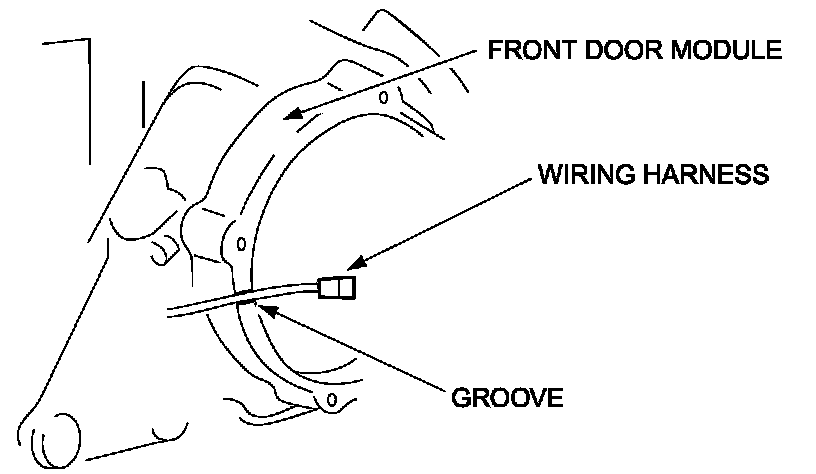
15. Remove the front door speaker with the wiring harness passing through the groove of the front door module.
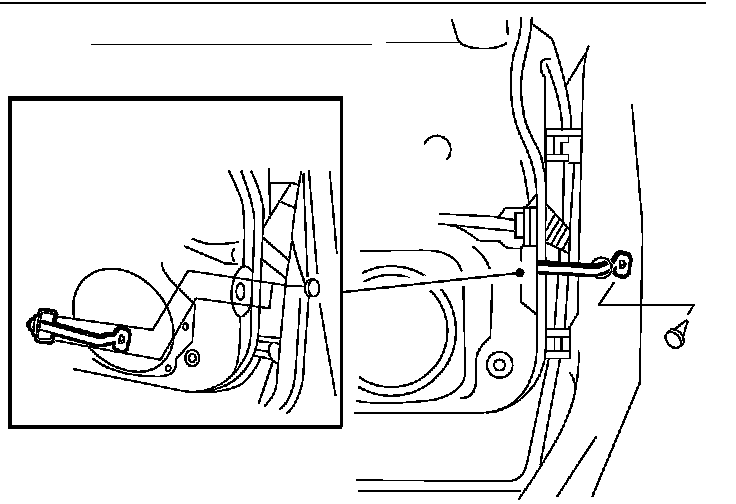
16. Remove the front door checker.
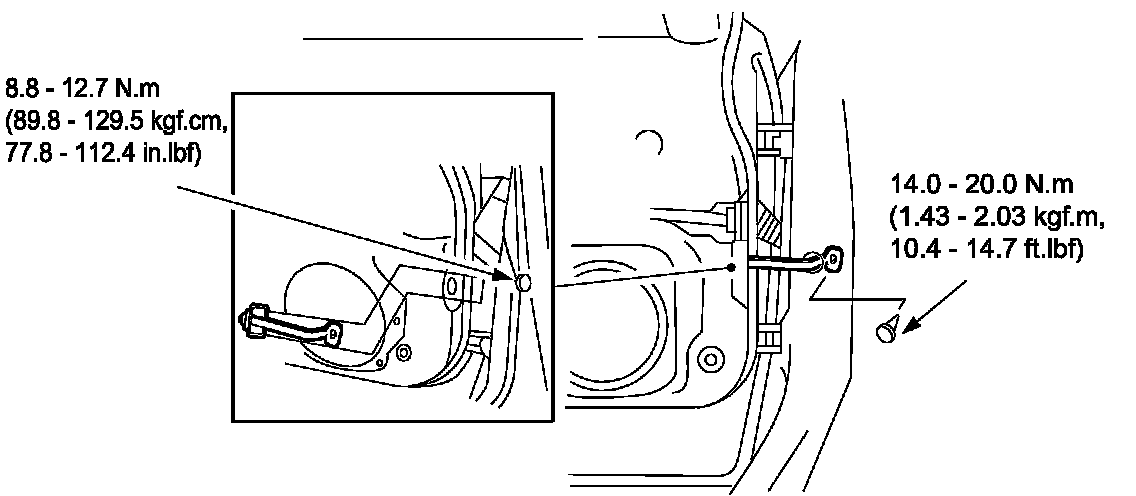
17. Install new front door checker.
Checker-to-Door Tightening Torque: 77.8-112.4 in lbf (8.8-12.7 N.m)
Checker-to-Body Tightening Torque: 10.4-14.7 ft lbf (14-20 N.m)
18. Install the front door speaker.
CAUTION:
^ If the front door speaker is installed with the wiring harness out of the groove, damage to the wiring harness may occur.
19. Install the remainder of components in the reverse order of removal.
20. Connect negative battery cable.
Tightening Torque: 25.7-43.3 in lbf (2.9-4.9 N.m)
21. Turn ignition to ON position.
22. Set clock and input customer radio station presets.
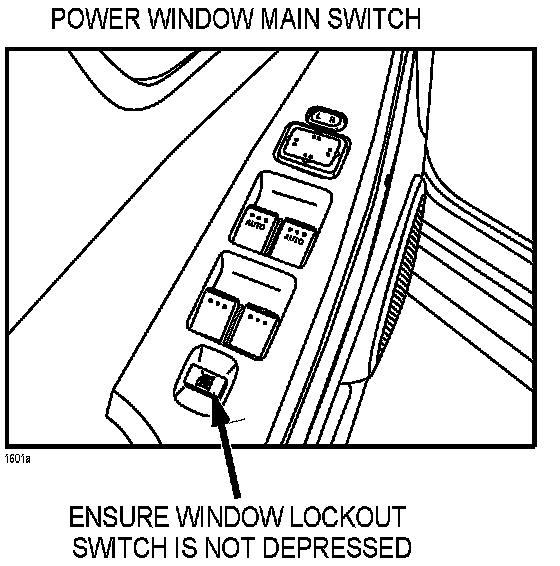
23. From driver's seat ensure window lockout switch is NOT depressed.
24. Press window switch down to fully open door window.
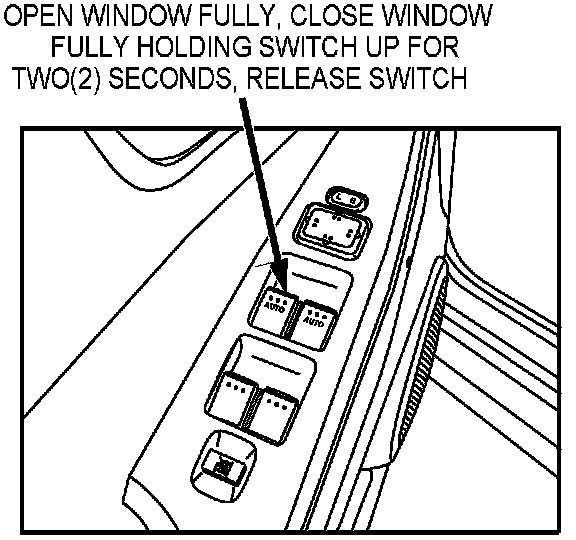
25. Pull window switch up to fully close door window; hold switch up for two (2) seconds; release switch.
26. Move to front passenger seat and repeat Steps 24 - 25 on passenger window switch.
27. Verify proper window operation using each door switch.
C. CAMPAIGN LABEL INSTALLATION
Complete a "Campaign Label" with the SSP number written on the sticker and affix it to the vehicle's hood or bulkhead. Refer back to the illustration under "A. VEHICLE INSPECTION PROCEDURE".