Rear Drain Hose
REAR DRAIN HOSE REMOVAL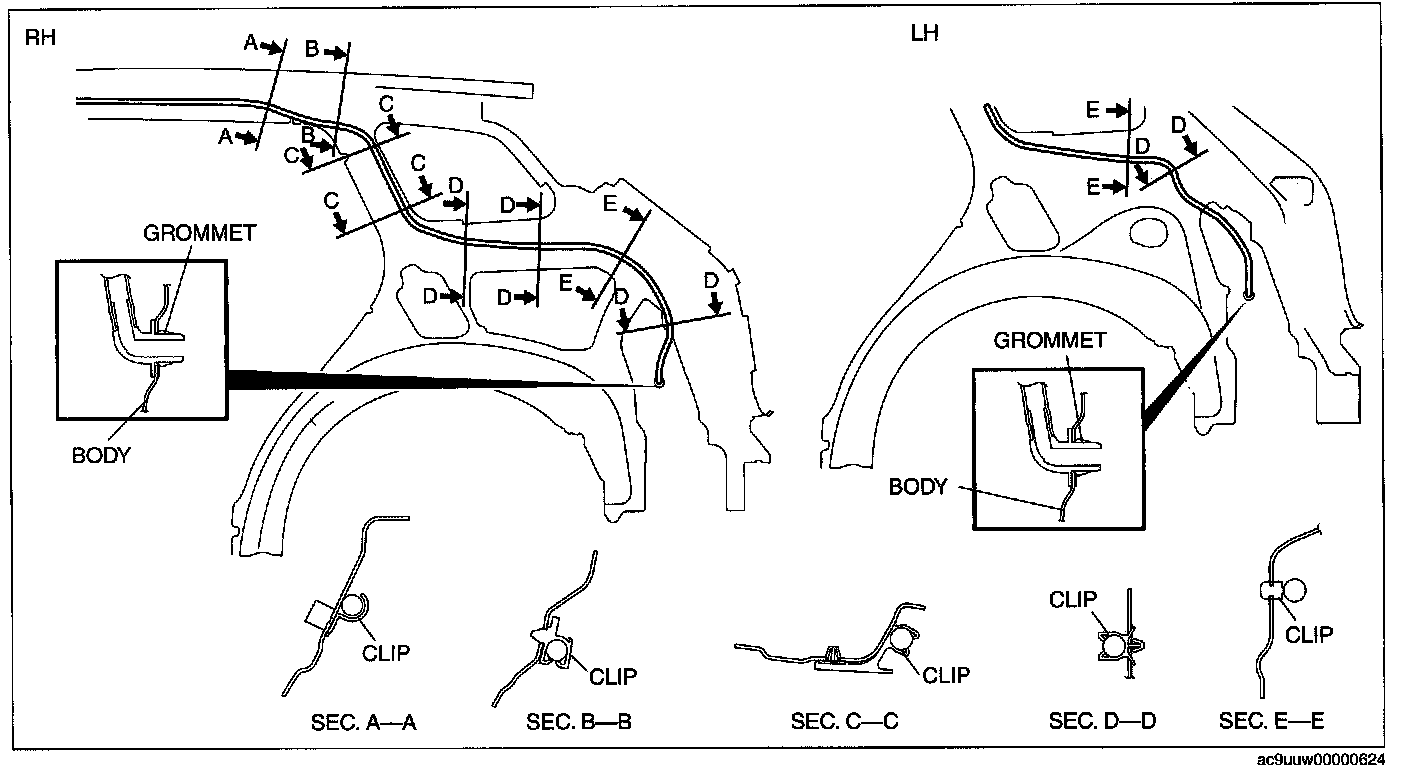
1. Disconnect the negative battery cable.
2. Partially peel back the seaming welt.
3. Remove the following parts;
1. A-pillar trim.
2. Front scuff plate inner.
3. Rear scuff plate inner.
4. Front seat belt lower anchor installation bolt (Driver side).
5. B-pillar lower trim.
6. Front seat belt upper anchor installation bolt.
7. B-pillar upper trim.
8. Trunk box.
9. Seat side box.
10. Trunk end trim.
11. Third-row seat.
12. Third-row seat belt lower anchor installation bolt.
13. Trunk side trim.
14. Roof side trim.
15. Second-row seat belt upper anchor installation bolt.
16. C-pillar trim.
17. Third-row seat belt upper anchor installation bolt.
18. D-pillar trim.
19. Front map light.
20. Sunvisor.
21. Assist handle.
22. RES unit cover (Vehicles with RES).
23. Headliner.
4. Disconnect the rear drain hose from the sunroof frame.
5. Remove the rear drain hose from the clips.
6. Pull the rear drain hose into the room side.
7. Remove the rear drain hose.
REAR DRAIN HOSE INSTALLATION
CAUTION: If the rear drain hose is pinched or bent anywhere, the water in the hose may not discharge and enter the inside of the vehicle. During and after installation of the trims and the headliner, always make sure there is no interference with the rear drain hose. Fix any problem if found.
1. Apply soapy water to the rear drain hose inserting area.
2. Insert one end (the wider side) of the rear drain hose into the sunroof frame.
3. Install the rear drain hose to the clips parallel to the pillar and free of slack.
4. Insert the rear drain hose joint into the rear pillar inner hole.
5. Install the following parts:
1. Headliner.
2. RES unit cover (Vehicles with RES).
3. Assist handle.
4. Sunvisor.
5. Front map light.
6. D-pillar trim.
7. Third-row seat belt upper anchor installation bolt.
8. C-pillar trim.
9. Second-row seat belt upper anchor installation bolt.
10. Roof side trim.
11. Trunk side trim.
12. Third-row seat belt lower anchor installation bolt.
13. Third-row seat.
14. Trunk end trim.
15. Seat side box.
16. Trunk box.
17. B-pillar upper trim.
18. Front seat belt upper anchor installation bolt (Driver side).
19. B-pillar lower trim.
20. Front seat belt lower anchor installation bolt.
21. Rear scuff plate inner.
22. Front scuff plate inner.
23. A-pillar trim.
6. Install the seaming welt.