Oil Pan Assembly Note
Oil Pan Assembly NoteType A
Caution
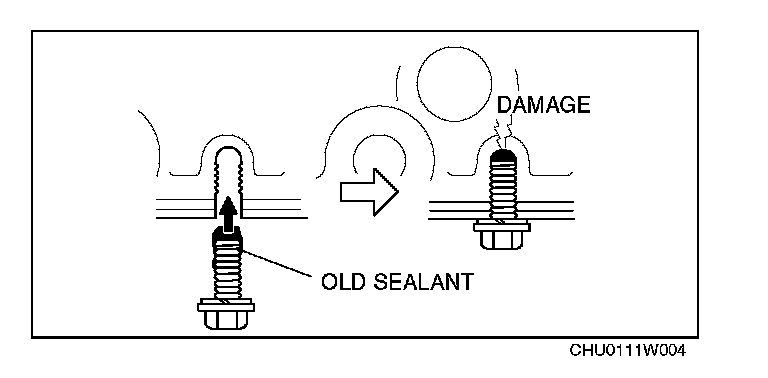
^ Using bolts with the oil sealant still adhering could cause cracks in the housing. Clean all sealant off all oil pan bolts before assembly.
^ Apply the silicon sealant in a single, unbroken line around the whole perimeter.
^ Install the engine front cover within 5 min after applying the silicone sealant.
1. Completely clean and remove any oil, dirt, sealant or other foreign material that may be adhering to the housing and oil pan.
2. When reusing oil pan installation bolts, clean any old sealant from the bolts.
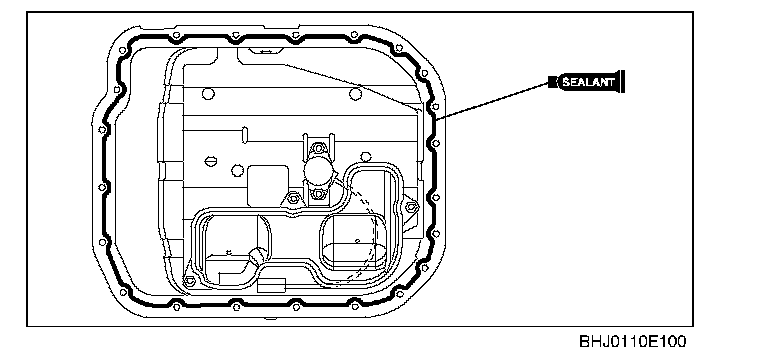
3. Apply silicone sealant to the areas shown in the figure.
Bead thickness
2.5-6.5 mm (0.1-0.2 in)
4. Tighten the oil pan installation bolts.
Tightening torque
8.8-11.8 N-m (90-120 kgf-cm, 78-104 in-lbf)
Type B
Caution
^ Apply the silicon sealant in a single, unbroken line around the whole perimeter.
^ Install the oil pan within 5 min after applying the silicone sealant.
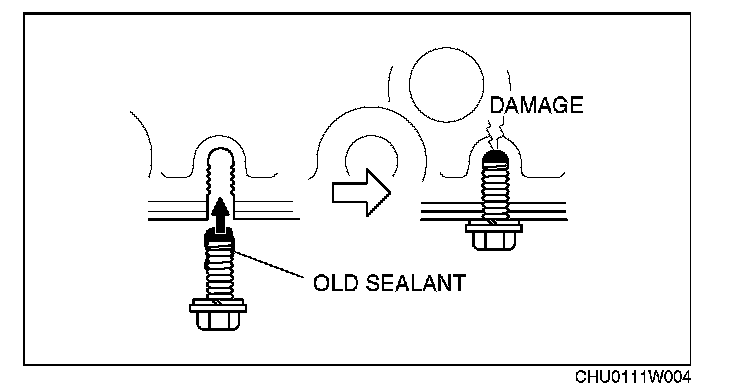
^ Using bolts with the old seal adhering could cause cracks in the housing.
1. Completely clean and remove any oil, dirt, sealant or other foreign material that may be adhering to the oil pan upper block and oil pan.
2. When reusing the oil pan installation bolts, clean any old sealant from the bolts.
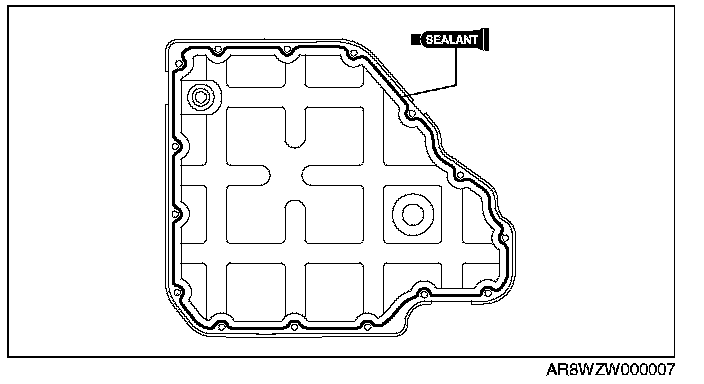
3. Apply silicone sealant to the areas as shown in the figure.
Thickness
2.5-6.5 mm (0.10-0.26 in)
4. Install the oil pan to the oil pan upper block.
5. Tighten the oil pan installation bolts.
Tightening torque
7.8-10.8 N-m (80-110 kgf-cm, 69.0-95.5 in-lbf)