Removal
TRANSAXLE REMOVAL1. With the vehicle in NEUTRAL, position it on a hoist.
2. Remove the air cleaner assembly.
3. Remove the battery tray.
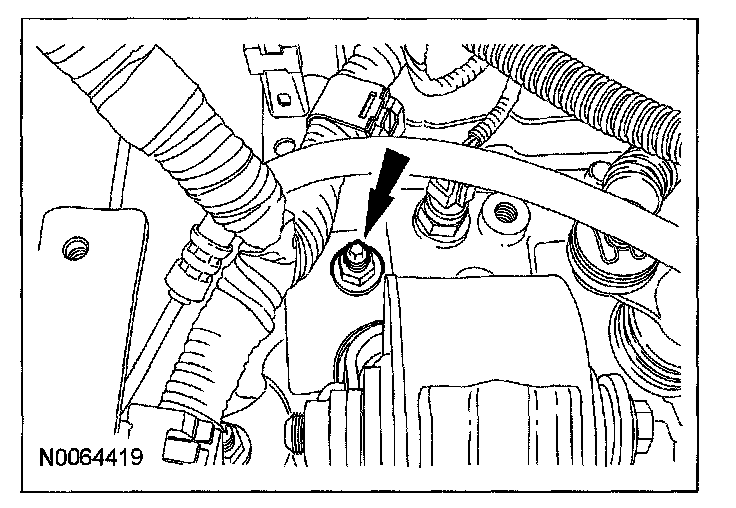
4. Remove the wiring harness bracket nut.
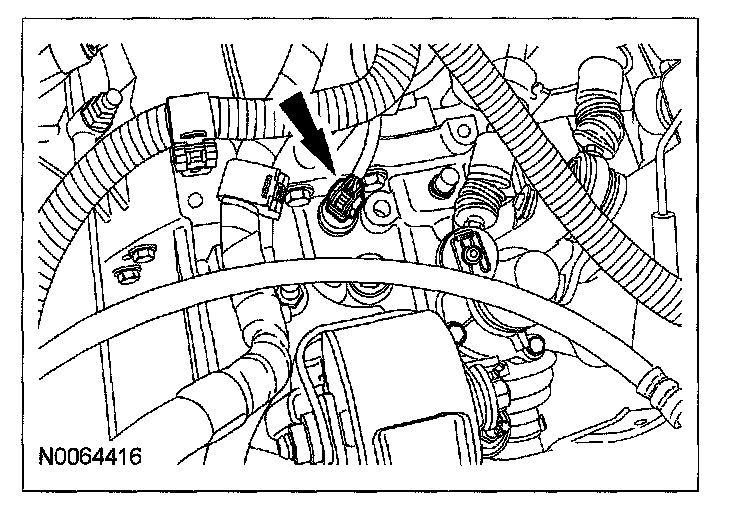
5. Disconnect the reverse switch and vehicle speed sensor (VSS) connectors.
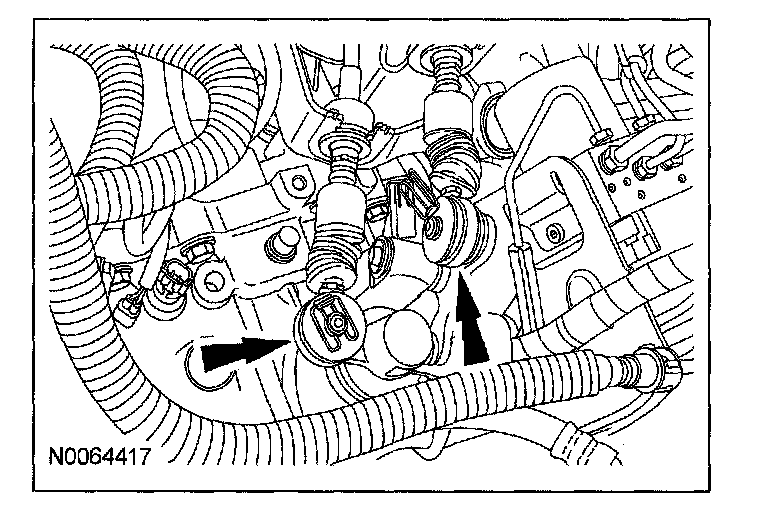
6. Disconnect the shift cables.
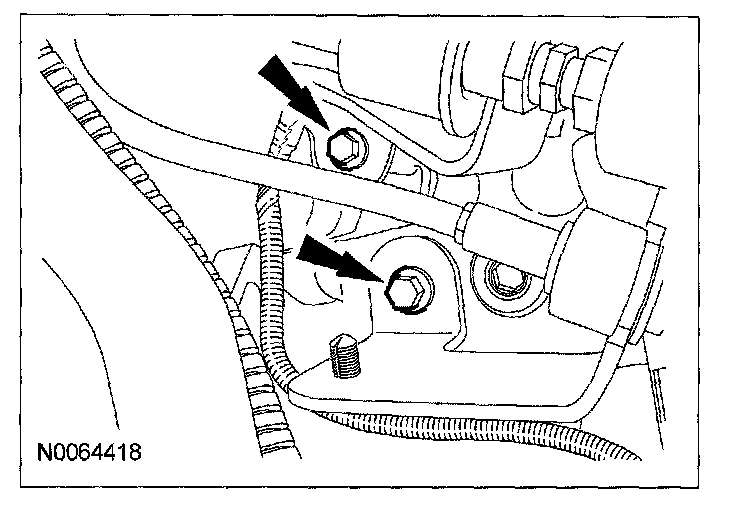
7. Remove the 3 shift cable bracket bolts. Position the bracket and shift cables aside.
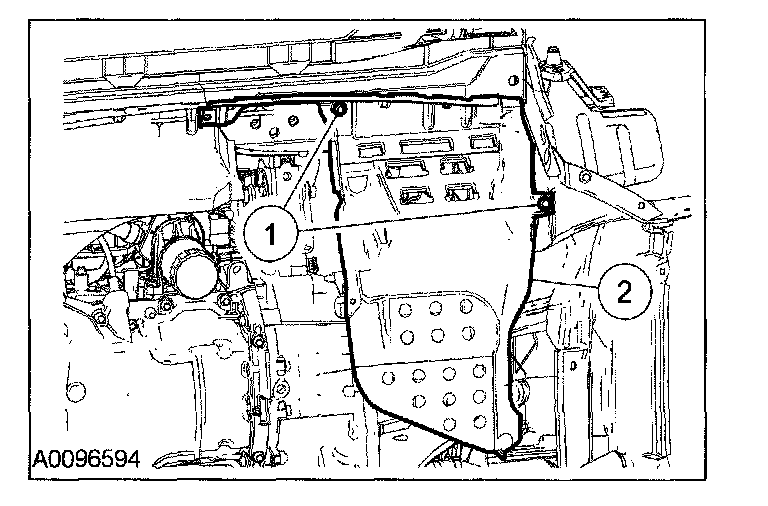
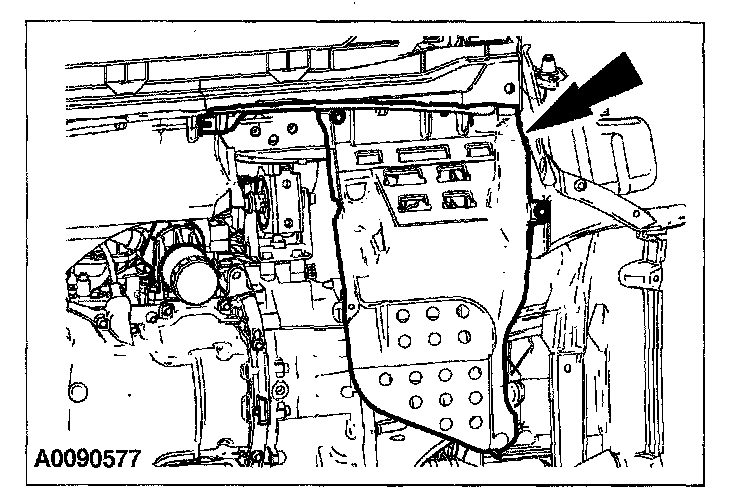
8. Position the clutch hydraulic line aside.
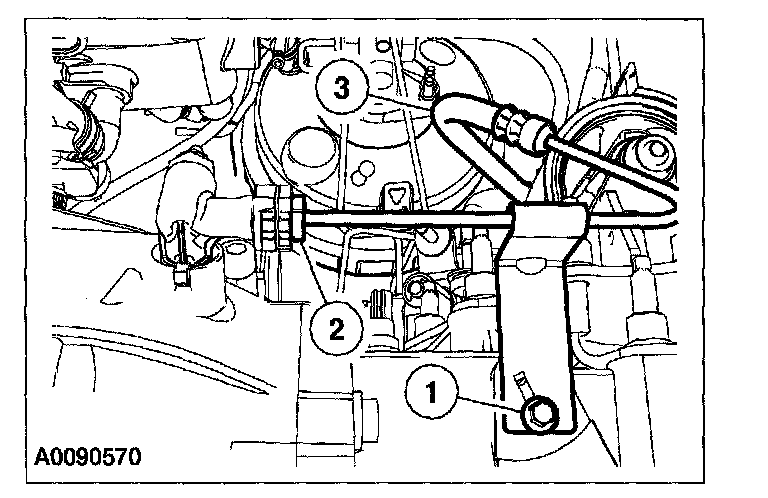
(1) Remove the clutch hydraulic tube bracket-to-transaxle bolt.
(2) Disconnect the clutch hydraulic tube from the clutch slave cylinder.
1) Plug the hydraulic tube.
(3) Position the clutch hydraulic tube aside.
Caution
^ To prevent damage, do not spill brake fluid onto plastic or painted surfaces.
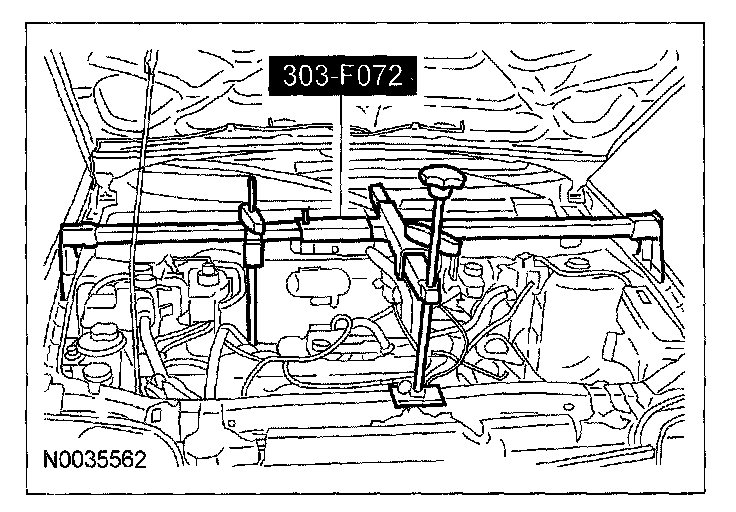
9. Using the special tool, support the engine.
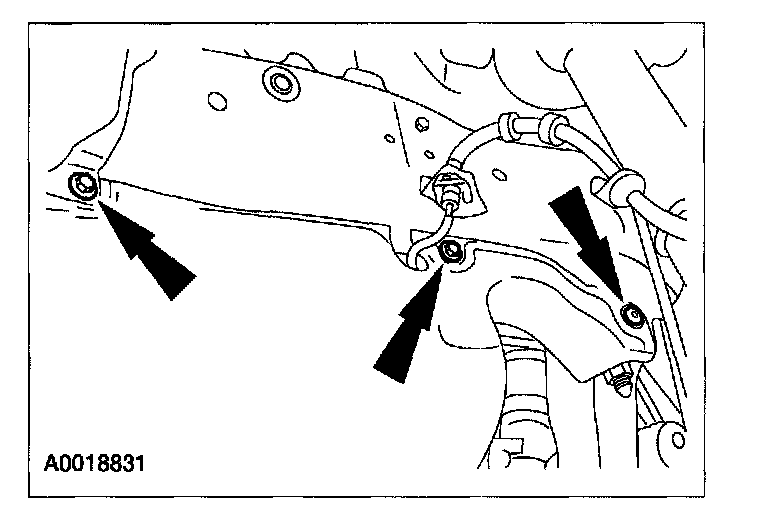
10. Remove the 3 LH transaxle support insulator bracket nuts. Loosen, but do not remove the through bolt.
11. Remove the transaxle rear support insulator bolt and the 2 nuts.
12. Using the 3-Bar Engine Support, raise the engine up 25.4 mm (1.0 in), lower the transaxle side downward.
13. Remove the RH engine mount bolt.
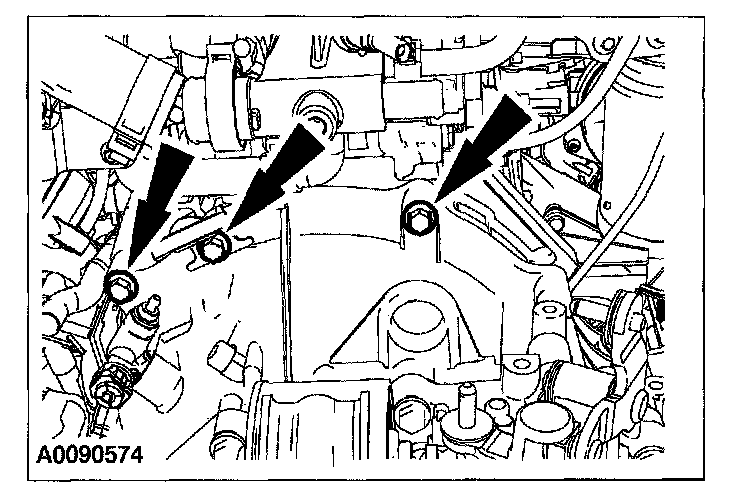
14. Remove the 3 upper transaxle-to-engine bolts.
Caution
^ Do not use heat to loosen a seized wheel nut or damage to the wheel and wheel bearing can occur.
15. With the weight of the vehicle on the wheels, loosen the wheel nuts.
16. With the vehicle in NEUTRAL, position it on a hoist.
17. Remove the 5 wheel nuts.
18. Remove the wheel and tire assembly.
19. Remove the 6 LH splash shield screws.
20. Remove the LH lower splash shield.
(1) Remove the 6 screws and a pushpin.
(2) Remove the LH splash shield.
21. Drain the transaxle fluid.
22. Remove the crossmember.
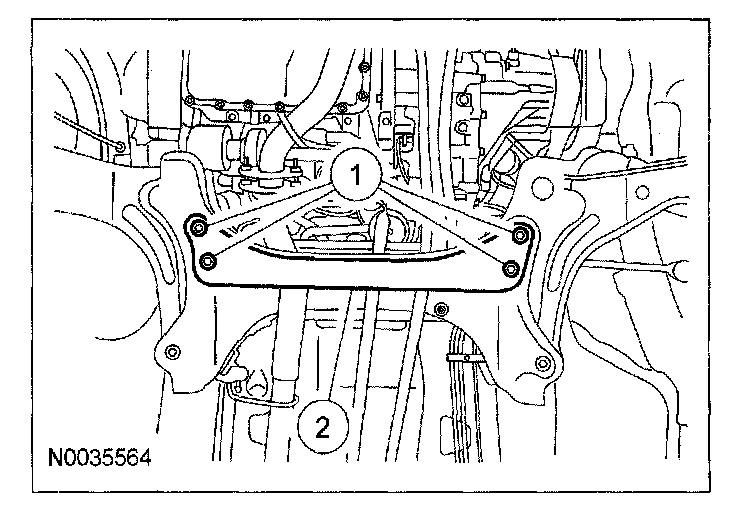
(1) Remove the bolts.
(2) Remove the crossmember.
23. Remove the 3 front-to-aft crossmember bolts.
24. Remove the LH transaxle support insulator through bolt.
25. Remove the front-to-aft crossmember and the LH transaxle support insulator.
26. Working in the engine compartment, use the 3-Bar Engine Support to raise the engine up 25.4 mm (1.0 in), lowering the transaxle side downward.
27. Remove the transaxle right support insulator through bolt and the mount.
28. Remove the starter motor assembly.
29. Disconnect the LH stabilizer bar link.
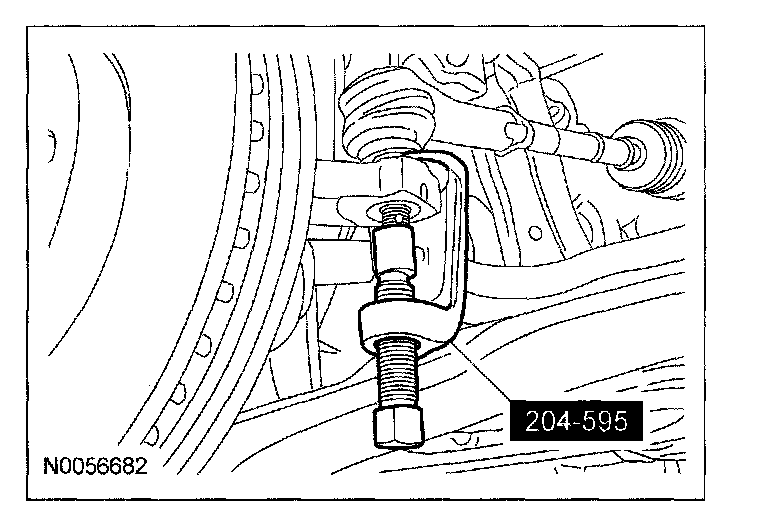
30. Using the special tool, disconnect the LH tie rod-end.
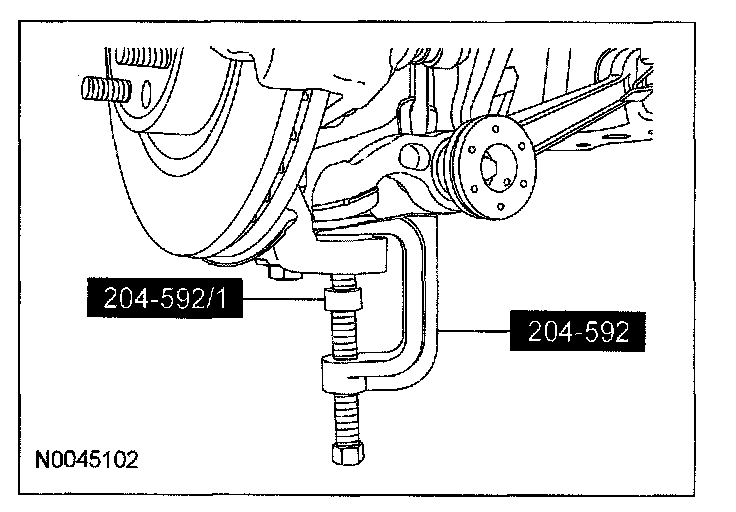
31. Disconnect the ball joint.
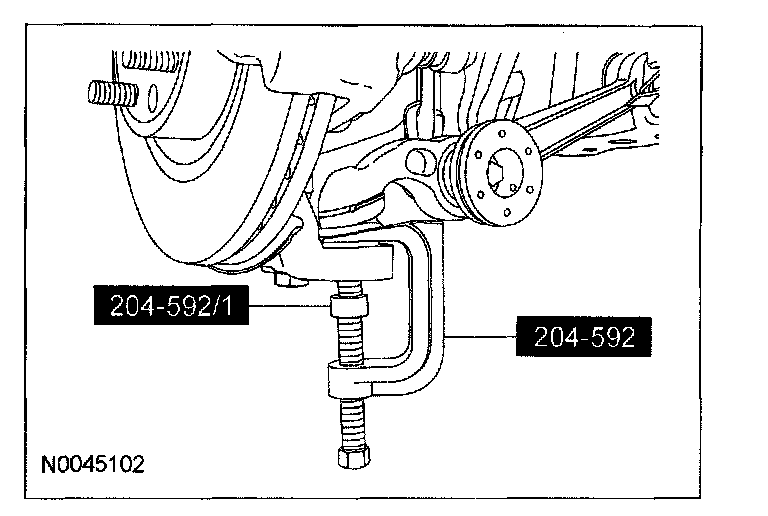
^ Use special tool 204-592 in conjunction with 204-592/1.
32. Remove the clip, then disconnect the brake hose.
33. Remove the bolt and position the ABS wire aside.
34. Remove the LH halfshaft from the transaxle.
35. Disconnect the RH stabilizer bar link.
36. Using the special tool, disconnect the RH tie-rod end.
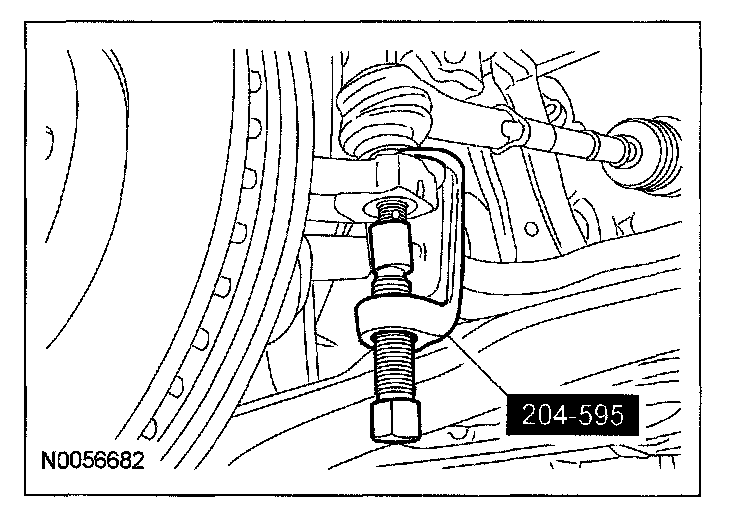
37. Disconnect the RH ball joint.
^ Use special tool 204-592 in conjunction with 204-592/1.
38. Remove the clip, then disconnect the brake hose.
39. Remove the bolt and position the ABS wire aside.
40. Remove the RH halfshaft from the transaxle.
41. Remove the RH intermediate shaft.
42. If equipped, remove the power transfer unit (PTU).
43. Remove 2 lower transaxle-to-engine bolts.
44. Position the transaxle jack under the transaxle.
Warning
^ Secure the transaxle to the transaxle jack with a safety strap. Failure to follow this instruction may result in personal injury.
45. Remove the remaining 4 transaxle-to-engine bolts.
46. Remove the transaxle.