Muffler: Service and Repair
MUFFLER AND TAILPIPE REMOVAL/INSTALLATION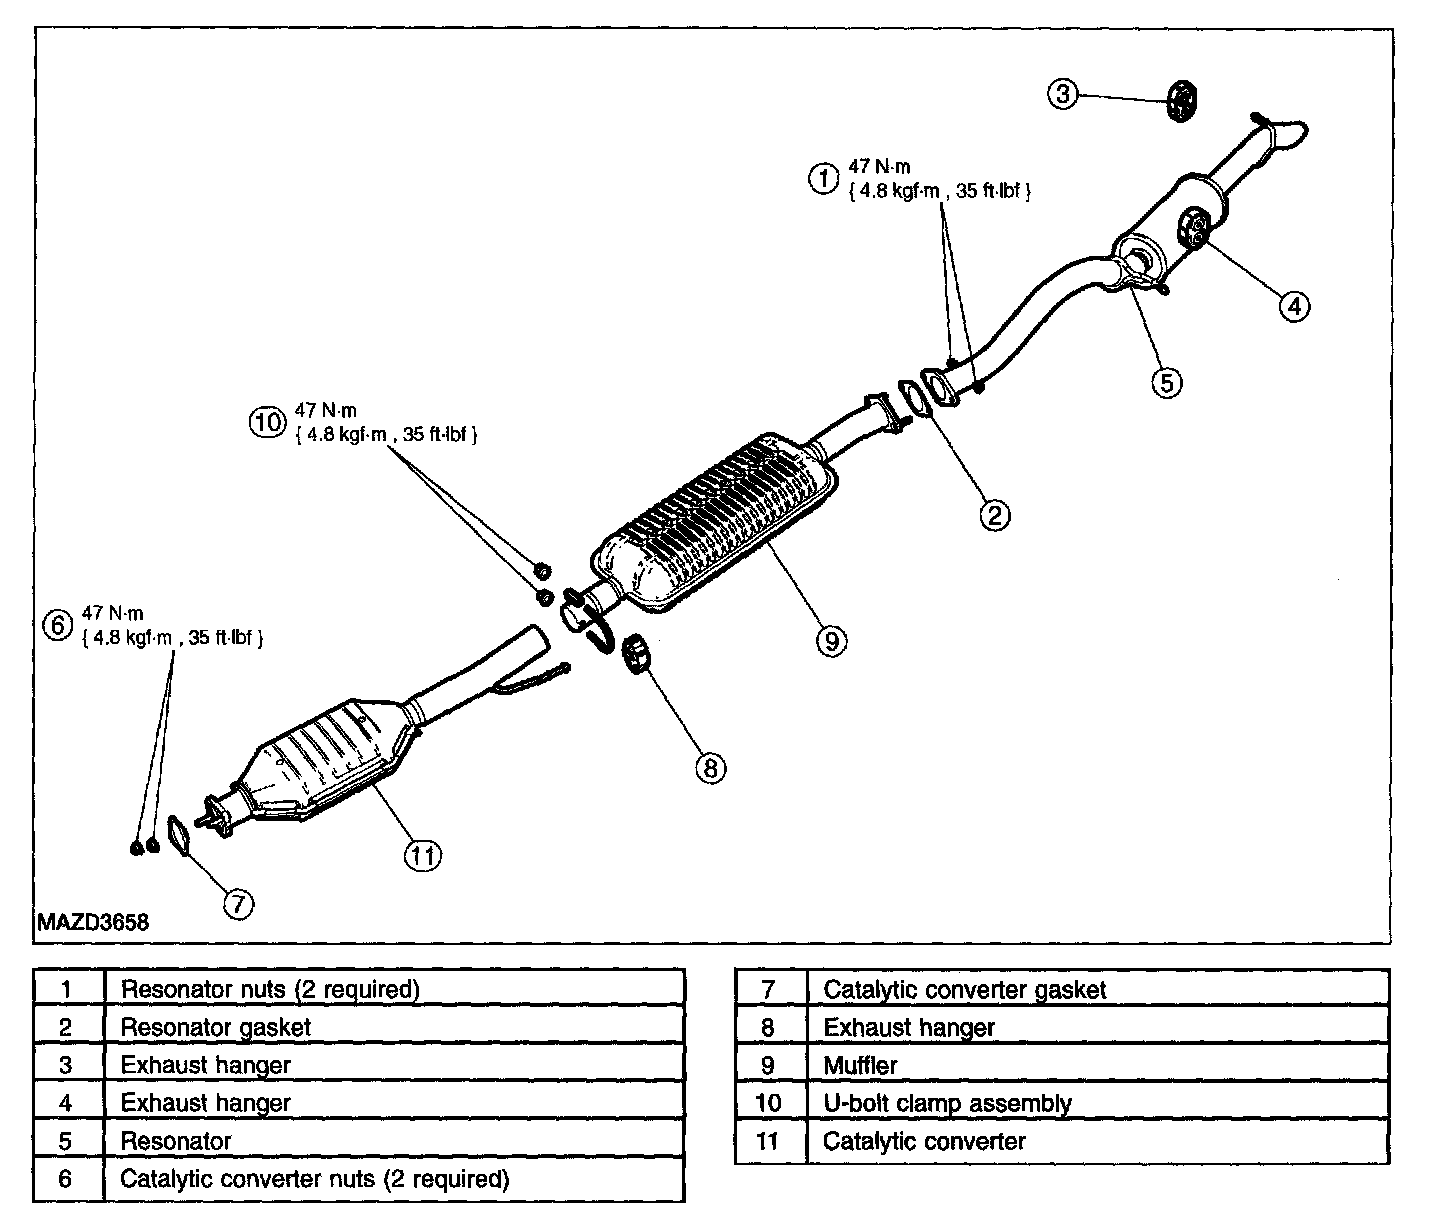
Caution
^ Do not use oil or grease-based lubricants on the insulators. They may cause deterioration of the rubber.
Caution
^ Oil or grease-based lubricants on the insulators may cause the exhaust hanger insulator to separate from the exhaust hanger bracket during vehicle operation.
Note
^ Exhaust fasteners are of a torque prevailing design. Use only new fasteners with the same part number as the original. Torque values must be used during reassembly to make sure of correct retention of exhaust components.
1. With the vehicle in NEUTRAL, position it on a hoist.
2. Remove and discard the 2 exhaust catalytic converter nuts.
^ To install, tighten to 47 N-m (4.8 kgf-m, 35 ft-lbf).
3. Remove and discard the U-bolt clamp assembly from the muffler.
^ To install, tighten to 47 N-m (4.8 kgf-m, 35 ft-lbf).
4. Remove and discard the 2 resonator nuts.
^ To install, tighten to 47 N-m (4.8 kgf-m, 35 ft-lbf).
5. Remove and discard the catalytic converter exhaust hanger.
6. Remove the exhaust catalytic converter and the muffler from the vehicle as an assembly.
^ Discard the catalytic converter gasket.
7. Separate the muffler from the catalytic converter.
8. To install, reverse the removal procedure.
^ Install new gaskets.