Transaxle Removal
-
TRANSAXLE - 3.0L REMOVAL
Removal
All vehicles
1. With the vehicle in NEUTRAL, position it on a hoist. See Lifting.
NOTE:Carry out the transmission fluid cooler backflushing and cleaning if the transaxle is being overhauled or if installing a new or remanufactured transaxle. See - Service and Repair.
NOTE:Carry out the transmission fluid cooler flow test if the transaxle is being overhauled or if installing a new or remanufactured transaxle. See - Service and Repair.
2. Remove the battery and the battery tray. See Removal and Replacement and Service and Repair.

3. Remove the air cleaner (ACL) and outlet pipe assembly. See - Air Cleaner Outlet Pipe Removal/Installation for 3.0L engine.
a. Remove the ACL assembly bracket bolt.
b. Disconnect the mass air flow sensor (MAF) sensor electrical connector.
c. Disconnect the brake booster vacuum hose from the ACL outlet pipe.
d. Detach the wiring fastener from the ACL assembly.
e. Disconnect the engine breather from the ACL assembly.
f. Loosen the ACL outlet pipe clamp at the throttle body (TB) and remove the ACL and ACL outlet pipe assembly.
All wheel drive (AWD) vehicles

1. Disconnect the powertrain transfer unit (PTU) vent hose from the clip located on the transaxle fluid filler tube.
All vehicles

1. Disconnect the selector lever cable from the manual control lever.

2. Remove the 2 retaining bolts and position the selector lever cable and bracket aside.

3. Remove the selector lever cable retainer from the transaxle fluid filler tube bracket.

4. Remove the starter motor. See - Service and Repair.

5. Remove the 4 upper transaxle retaining bolts (3 shown).
NOTE:Transaxle removed for clarity.

6. Install the Engine Lifting Bracket and the Universal Adapter Brackets on both cylinder heads.

7. Install the Engine Support Bar, Support Leg and Adapters.
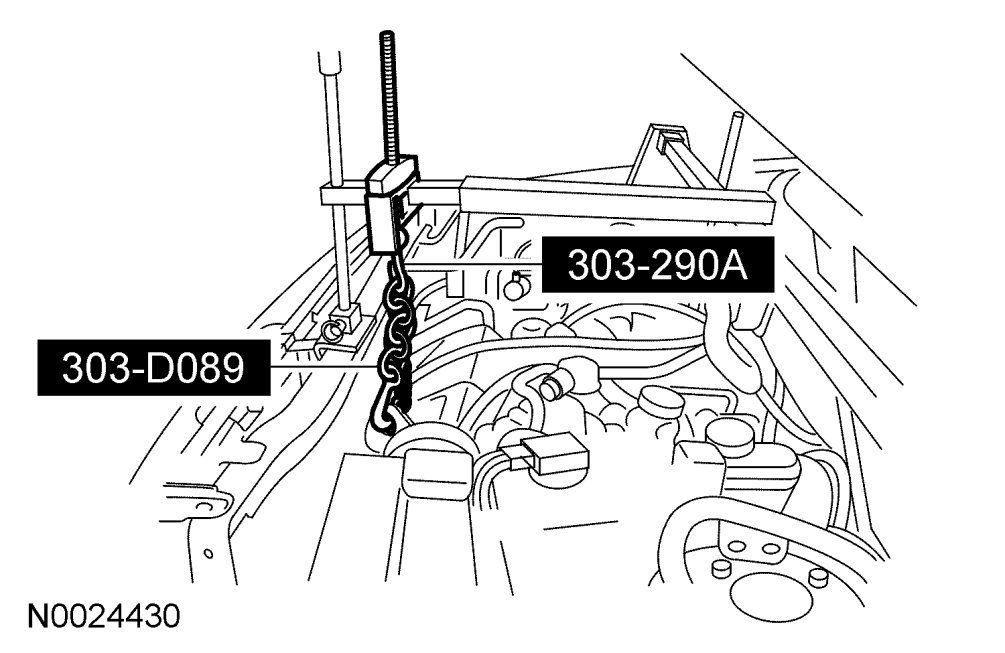
8. Install the Engine Lifting Chain and Adapter.
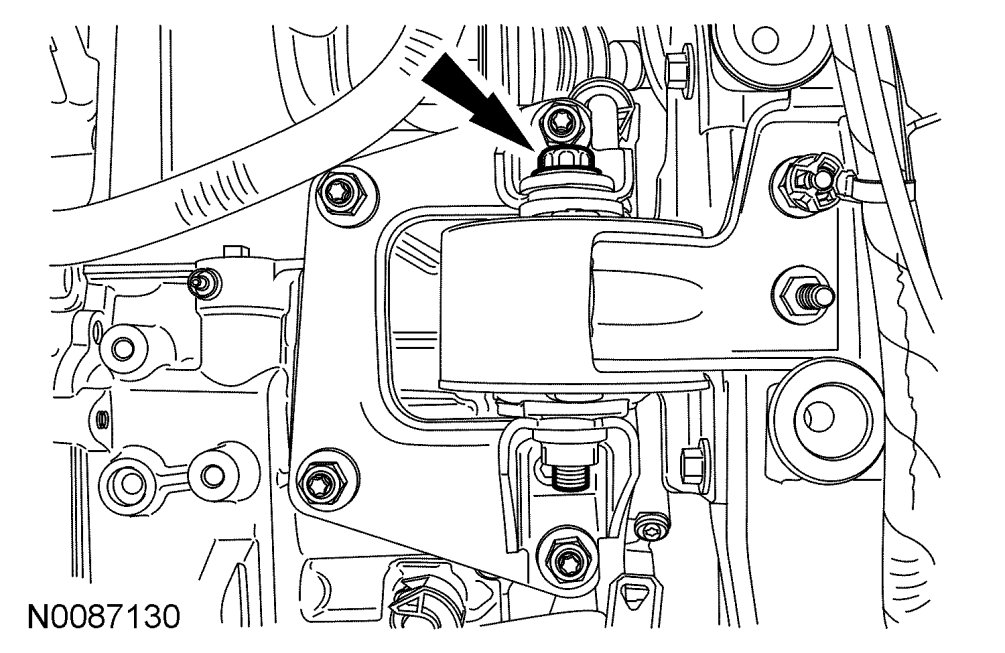
9. Remove the LH support insulator through bolt.

10. Remove the 4 nuts and the support insulator bracket.
11. Remove the front wheels and tires. See Description and Operation.

12. Remove the 7 retainers and the LH splash shield.

13. Remove the 6 retainers and the RH splash shield.
14. Remove the LH front halfshaft and RH intermediate shaft. See Front Axle / Front Drive Halfshafts Removal/Installation.
All wheel drive (AWD) vehicles

1. Remove and discard the 6 front driveshaft-to-PTU bolts and washers.
- Position the driveshaft aside and support with mechanic's wire.
CAUTION:Do not reuse the driveshaft flange bolts and washers. Install new bolts and washers or damage to the vehicle may occur.
NOTE:Index-mark the drive shaft flange and PTU flange for installation.
All vehicles

1. Remove the 4 bolts and remove the cross brace.

2. Remove the lower front support insulator through bolt for the mount and the 2 bolts from the cross brace.

3. Remove and discard the nut and remove the rear cross brace.
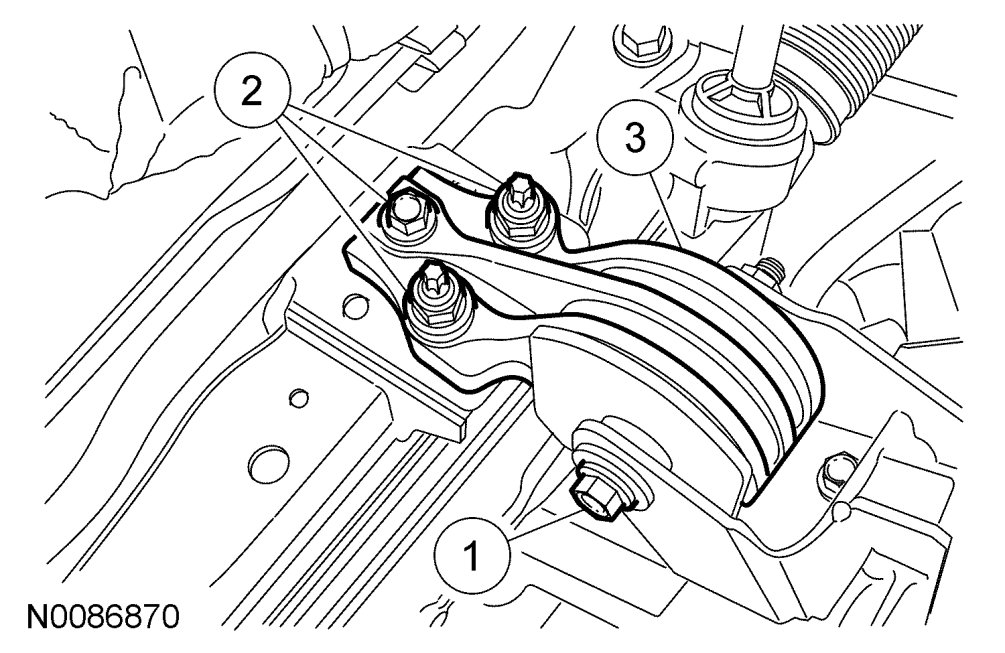
4. Remove the lower support insulator.
a. Remove the lower support insulator through bolt.
b. Remove the lower support insulator bolt and 2 nuts.
c. Remove the lower support insulator.

5. Remove the drain plug and drain the transaxle fluid.
NOTE:If transaxle disassembly or installation of a new transaxle is necessary, the transaxle fluid will need to be drained.
6. Install the transaxle fluid drain plug.
- Tighten to 12 Nm {1.2 kgf-m, 106 in-lbf}.

7. Disconnect the LH heated oxygen sensor (HO2S) electrical connector.

8. Disconnect the RH heated oxygen sensor (HO2S) electrical connector.

9. Remove and discard the 6 exhaust Y-pipe nuts and remove the Y-pipe.
All wheel drive (AWD) vehicles
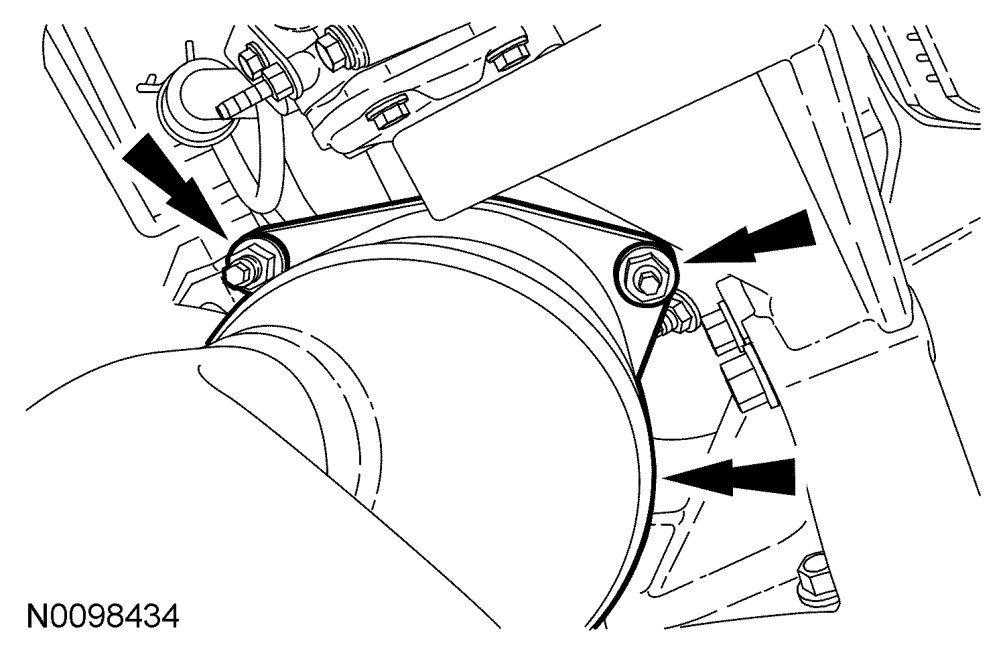
1. Remove the 3 nuts and the RH catalytic converter. See - Catalytic Converter Removal/Installation.

2. Remove the bolts and the PTU support bracket.

3. Remove the bolts from the PTU.

4. Remove the bolt and remove the PTU.
All vehicles

1. Remove the 2 secondary latches from the transaxle fluid cooler tubes.
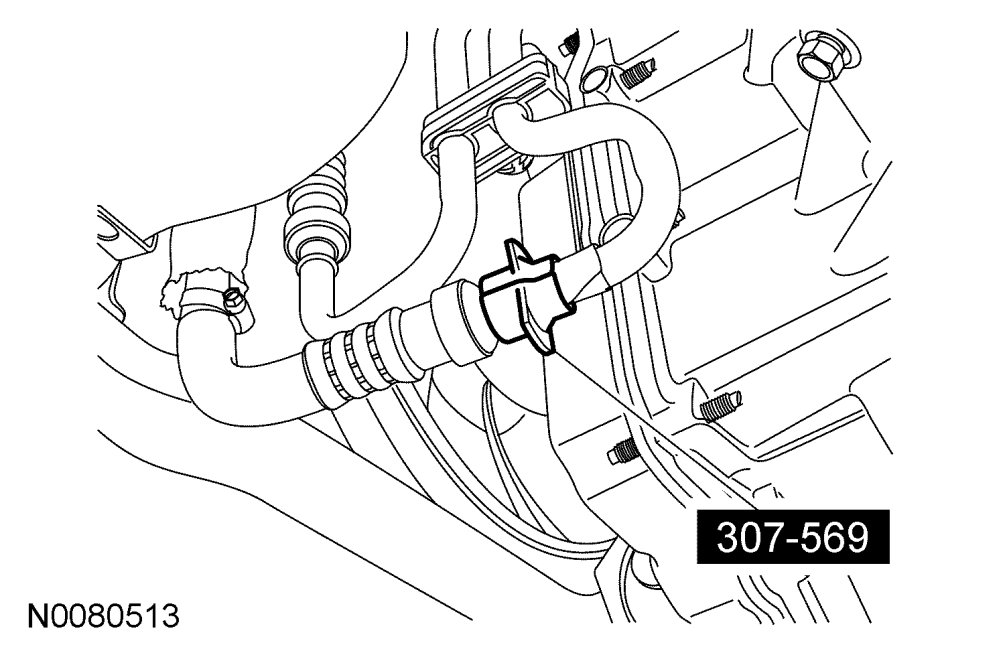
2. Using the Transmission Cooler Line Disconnect Tool, disconnect the 2 transaxle fluid cooler tubes (1 shown).

3. Disconnect the transaxle electrical connector.

4. Remove the transaxle electrical wiring harness retainers from the main control cover stud bolts.

5. Disconnect the turbine shaft speed (TSS) sensor electrical wiring.
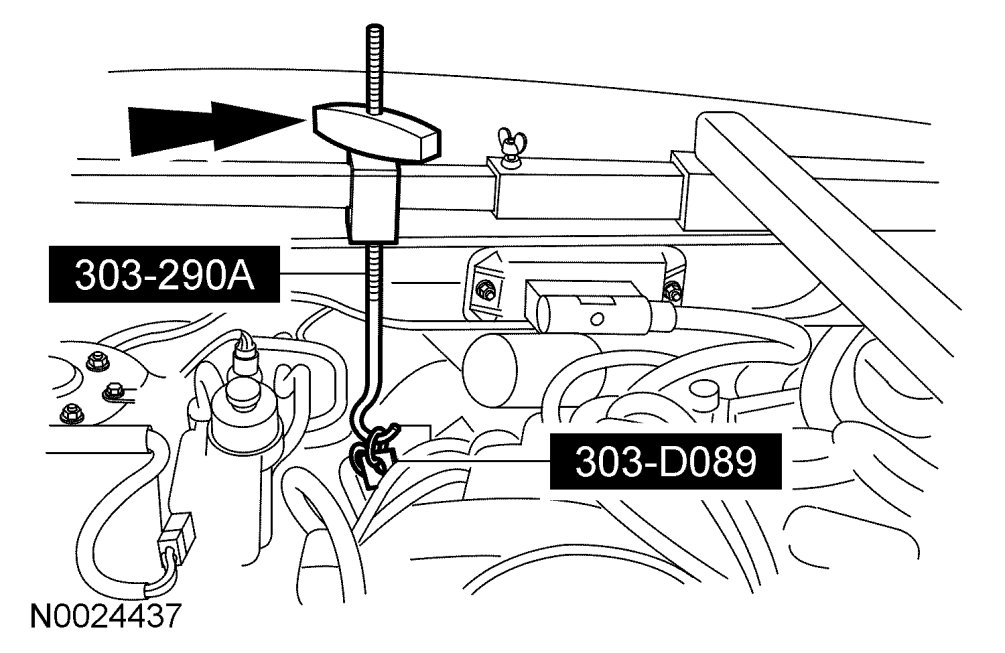
6. Using the Engine Lifting Chain and Adapter, raise the front of the engine.
NOTE:It is necessary to raise the engine a couple of inches in order to remove the transaxle.
7. Lower the transaxle enough to clear the frame using the Engine Lifting Chain and Adapter.
NOTE:It is necessary to lower the transaxle in order to clear the subframe to remove the transaxle.

8. Remove the torque converter access cover.

9. Remove and discard the 4 torque converter nuts.
10. Support the transaxle with a high-lift jack.

11. Remove the 2 oil pan-to-transaxle bolts.

12. Remove the 2 nuts and the transaxle-to-engine stud.

13. Remove the bolt.

14. Move the transaxle back far enough to install the Torque Converter Retainer.
NOTE:The torque converter is heavy. Install the Torque Converter Retainer before lowering the transaxle.

15. Lower the transaxle from the engine compartment.
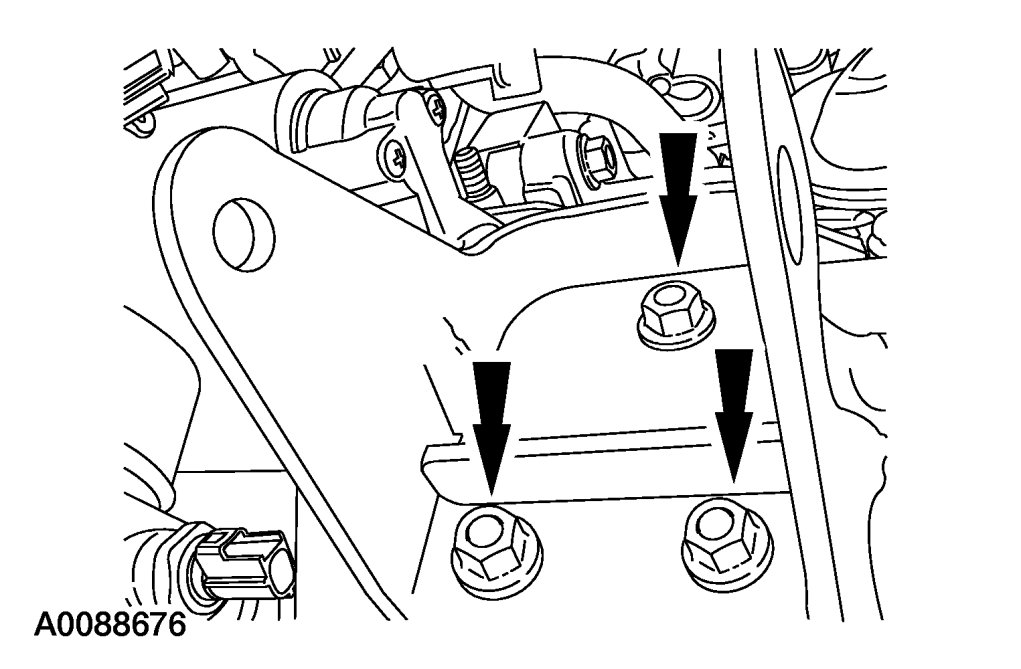
16. If it is necessary to install a new transaxle, remove the mount bracket and reuse the 3 bolts and the mount bracket on the new transaxle.