Main Control Valve Body Removal/Installation
MAIN CONTROL VALVE BODY REMOVAL/INSTALLATION

Removal
1. With the vehicle in NEUTRAL, position it on a hoist. See Lifting.

2. Remove the air cleaner (ACL) assembly.
a. Remove the ACL assembly bracket bolt.
b. Disconnect the mass air flow sensor (MAF) sensor electrical connector.
c. Disconnect the brake booster vacuum hose from the ACL outlet pipe.
d. Detach the wiring fastener from the ACL assembly.
e. Disconnect the engine breather from the ACL assembly.
f. Loosen the ACL outlet pipe clamp at the throttle body (TB) and remove the ACL and ACL outlet pipe assembly.

3. Disconnect the selector lever cable end from the manual control lever.

4. Remove the transaxle fluid drain plug and allow the transaxle fluid to drain.
5. Install the transaxle fluid drain plug.
- Tighten to 9 Nm {0.9 kgf-m, 80 in-lbf}.

6. Disconnect the transaxle electrical connector.

7. Remove the transaxle electrical wiring harness retainers from the transmission fluid pan stud bolts.

8. Remove the 2 nuts, pull the transaxle fluid cooler tube bracket and tubes away from the transaxle and position it aside.
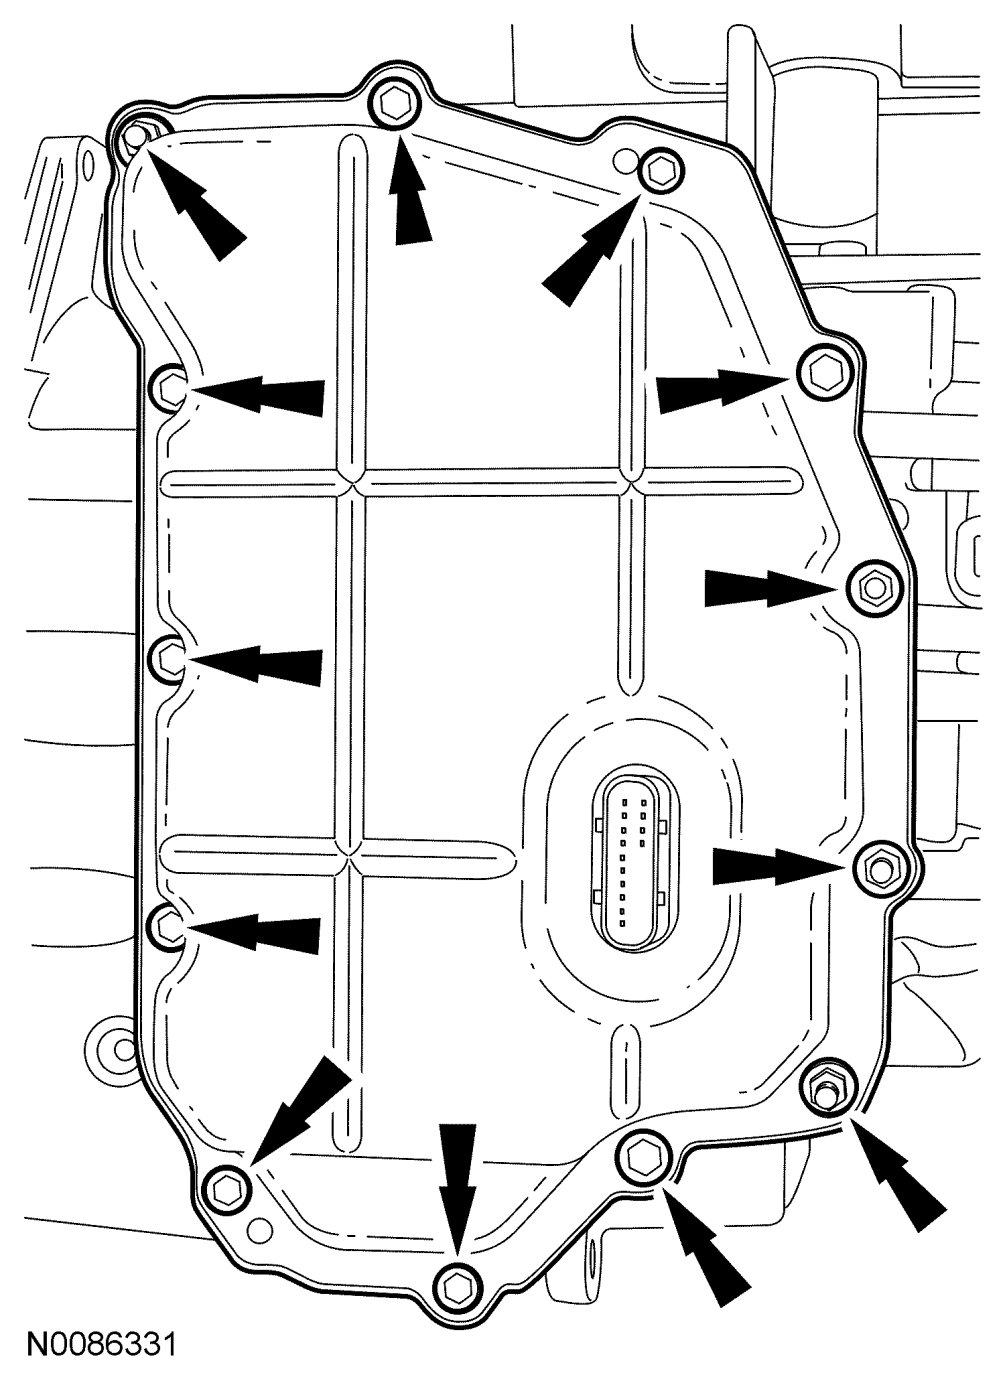
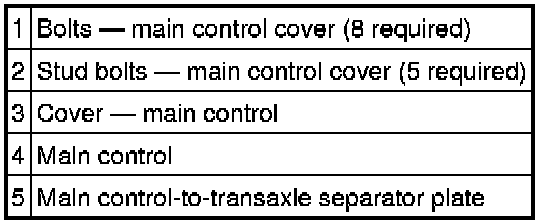
9. Remove the 8 bolts, 5 stud bolts and the main control cover.
NOTE:Note the location of the stud bolts for assembly.

10. Disconnect the TR sensor electrical connector.

11. Disconnect the OSS sensor electrical connector.

12. Remove the main control-to-main control cover grommet.

13. Remove the nut, 22 bolts and the main control.
CAUTION:The main control should be handled with care, damage to the main control may occur.
NOTE:Note the location of the different length bolts for assembly.

14. Remove the main control-to-transaxle case separator plate.
Installation

1. Install the solenoid body assembly onto the main control valve body. Install the 2 bolts.
- Tighten to 10 Nm {1.0 kgf-m, 89 in-lbf}.
NOTE:If cleaning the main control assembly or inspecting the valves, see Main Control Valve Body Assembly Disassembly/Assembly.
NOTE:Make sure that the manual lever pin (part of the TR sensor) is correctly installed in the manual valve.
2. Position the output shaft speed (OSS) and TR sensor wiring harnesses aside and install the main control-to-transaxle case separator plate.

3. Install the main control.
NOTE:Make sure that the manual lever pin (part of the TR sensor) is correctly installed in the manual valve.
4. Install the main control nut and 22 bolts. Tighten in a crisscross pattern.
- Tighten to 10 Nm {1.0 kgf-m, 89 in-lbf}.
CAUTION:Make sure not to pinch the OSS or TR sensor wiring when installing the main control.
NOTE:Install the different length bolts in the locations noted during disassembly.
5. Route the OSS sensor wiring harness and connect the electrical connector.
6. Connect the TR sensor electrical connector.
7. Install the main control-to-main control cover grommet.

8. Clean the main control cover sealing surface.

9. Apply silicone to the main control sealing surface of the transaxle case.

10. Position the main control cover in place.

11. Tighten the 8 main control cover bolts and 5 stud bolts.
- Tighten to 12 Nm {1.2 kgf-m, 106 in-lbf}.
CAUTION:Inspect the main control-to-main control cover grommet to make sure that the seals is on the inside of the main control cover, or transaxle fluid leak will occur.
NOTE:Install the stud bolts in the locations noted during disassembly.
12. Position the transaxle fluid cooler tube bracket and transaxle fluid cooler tube assembly in place and install the 2 nuts.
- Tighten to 9 Nm {0.9 kgf-m, 80 in-lbf}.

13. Connect the transaxle electrical connector.
14. Connect the transaxle electrical wiring harness retainers to the transmission fluid pan stud bolts.

15. Connect the selector lever cable end to the manual control lever.
16. Install the ACL assembly.
a. Install the ACL assembly bracket bolt.
i. Tighten to 11 Nm {1.1 kgf-m, 97 in-lbf}.
b. Connect the MAF sensor electrical connector.
c. Connect the brake booster vacuum hose to the ACL outlet pipe.
d. Attach the wiring harness fastener to the ACL assembly.
e. Connect the engine breather to the ACL assembly.
f. Tighten the ACL outlet pipe clamp at the TB.
i. Tighten to 5 Nm {0.5 kgf-m, 44 in-lbf}.
17. Fill with clean transaxle fluid to the correct level.