Bumper Reinforcement Removal/Installation
BUMPER REINFORCEMENT REMOVAL/INSTALLATION
Front
WARNING:
- Because the shroud panel is installed to the bumper reinforcement, support the shroud panel using a jack before removing the bumper reinforcement so as not to apply excessive force to the shroud panel.
- Since the servicing is performed with the hood open, secure the hood using a piece of wood to prevent it from falling.
1. Disconnect the negative battery cable.
2. Remove the following parts:
a. Front bumper Removal and Replacement
b. Front energy-absorbing form Energy-Absorbing Foam Removal/Installation
c. Washer tank Service and Repair
d. Horn Service and Repair
3. Set the electric power steering oil pump component out of the way. Removal and Replacement
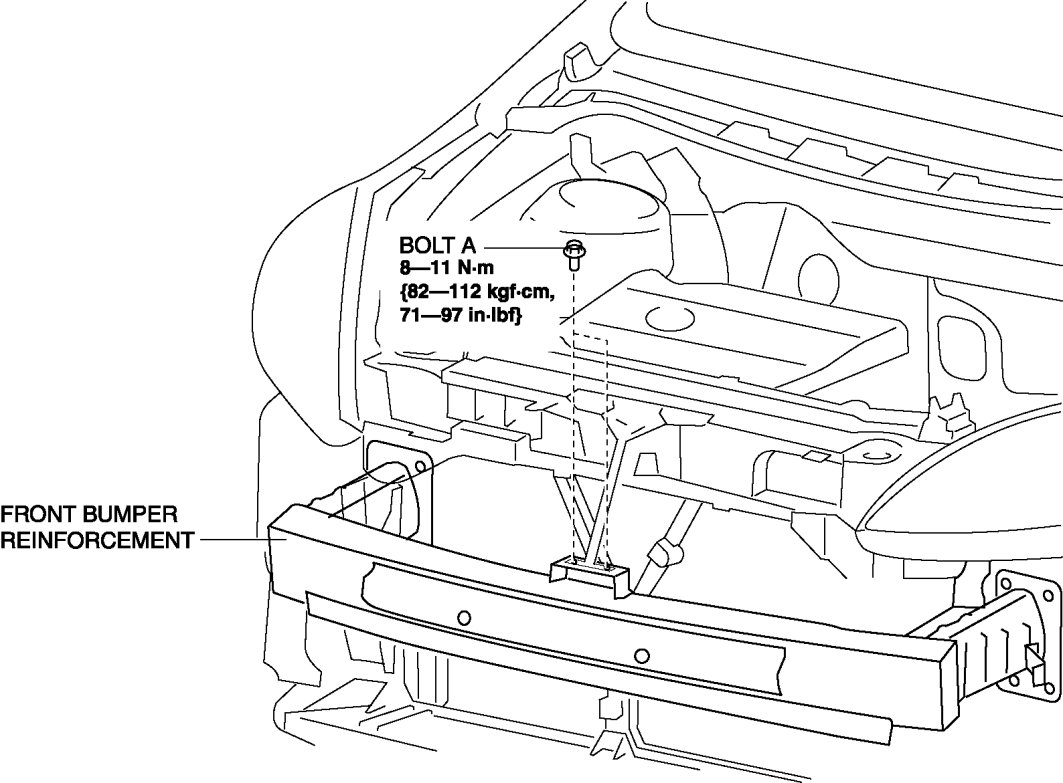
4. Remove the bolt A.
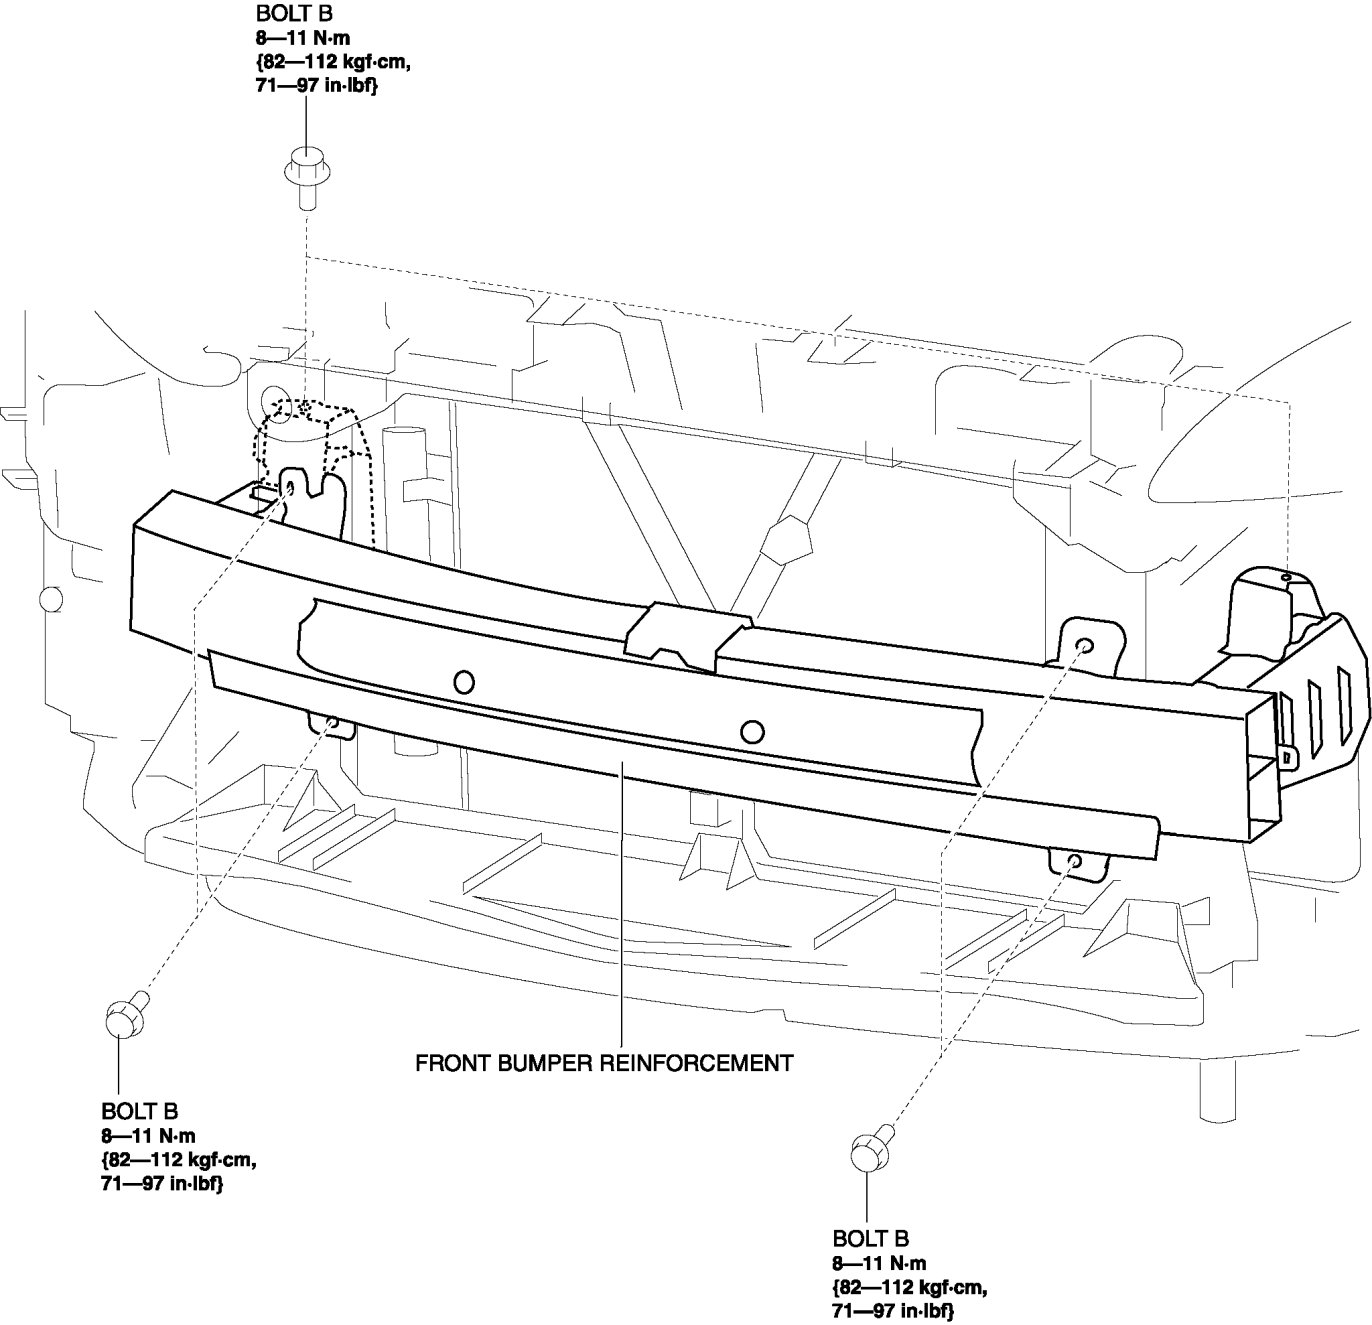
5. Remove the bolt B.
6. Remove the bolt C.
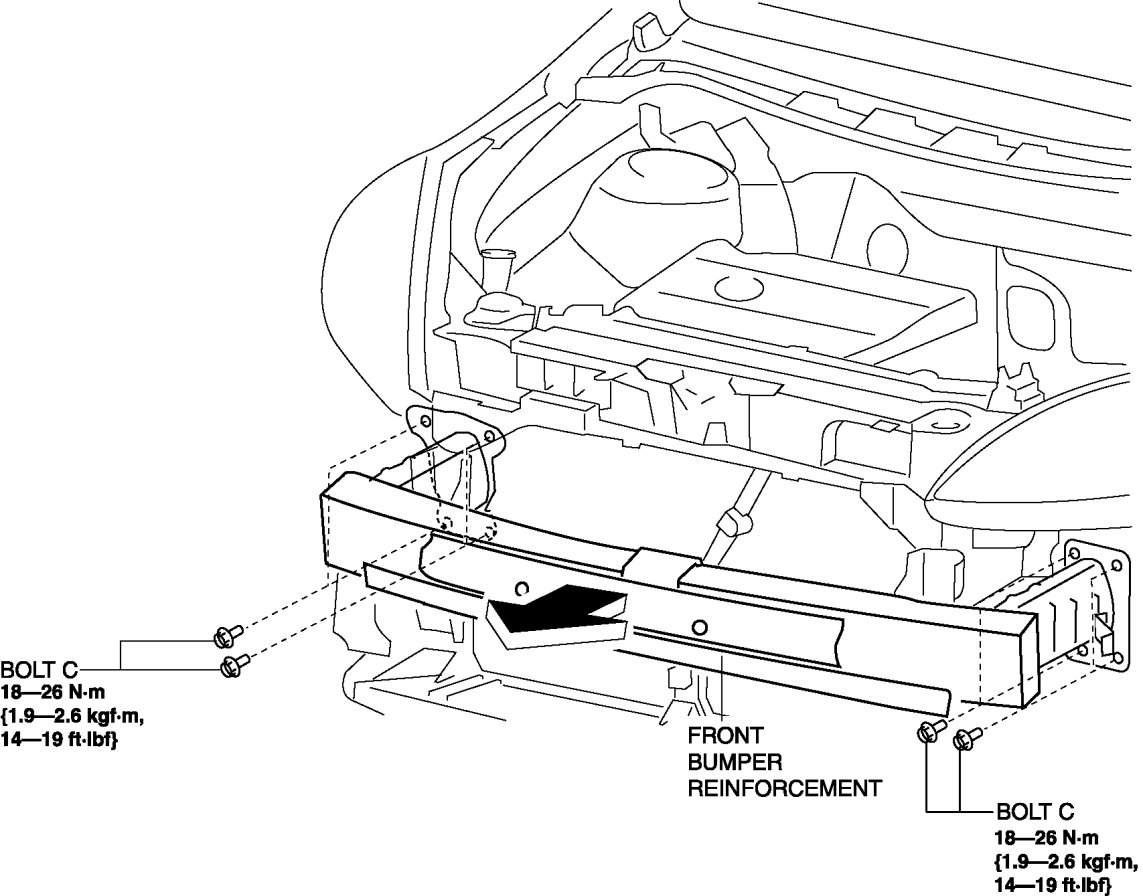
7. Remove the front bumper reinforcement in the direction of the arrow shown in the figure.
8. Install in the reverse order of removal.