 |
arnffw00000740
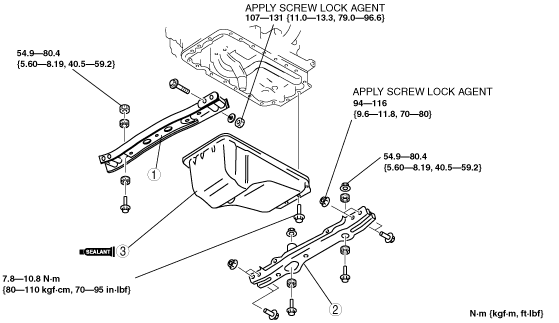
OIL PAN REMOVAL/INSTALLATION [WLT-1, WLT-2, WL-3]
id011180800200
1. Disconnect the negative battery cable.
2. Drain the engine oil. (See ENGINE OIL REPLACEMENT [WLT-1, WLT-2, WL-3].)
3. Remove the under cover.
4. Remove the front stabilizer. (See FRONT DIFFERENTIAL REMOVAL/INSTALLATION.) (See FRONT STABILIZER REMOVAL/INSTALLATION [4x2 (HIGH CLEARANCE MODEL), 4x4].)
5. Disconnect the center link on the left side of the vehicle. (See STEERING GEAR AND LINKAGE REMOVAL/INSTALLATION.)
6. Remove in the order shown in the figure.
7. Install in the reverse order of removal.
8. Fill with the specified amount and type of engine oil. (See ENGINE OIL REPLACEMENT [WLT-1, WLT-2, WL-3].)
9. Start the engine and inspect for engine oil leakage.
arnffw00000740
|
|
1
|
Front crossmember
|
|
2
|
Rear crossmember (4x4)
|
|
3
|
Oil pan
(See Oil Pan Removal Note.)
(See Oil Pan Installation Note.)
|
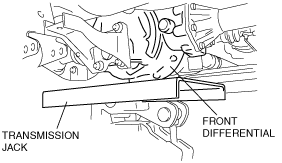
Rear Crossmember Removal Note
1. Set the transmission jack on the front differential.
arnffw00000741
|
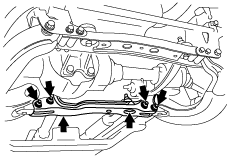
2. Remove the bolts and nuts indicated in the figure.
arnffw00000742
|
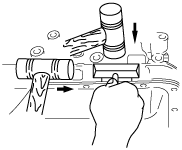
Oil Pan Removal Note
1. Remove the oil pan mounting bolts.
2. Use a separate tool to separate the oil pan.
arnffw00000743
|
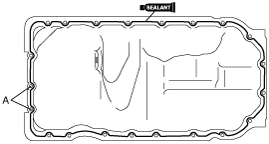
Oil Pan Installation Note
arnffw00000744
|
1. Apply silicone sealant to the oil pan along the inside of the bolt holes and overlap the ends.
arnffw00000745
|
2. Tighten the oil pan bolts A as indicated in the figure.
3. Tighten the remaining oil pan bolts in several passes.