1. Component views
Transfer

Part name
- Nut
- Front propeller shaft
- Transfer
- Rear propeller shaft
Tightening torque
1: 59 N・m { 6.0 kgf・m / 44 lb・ft }
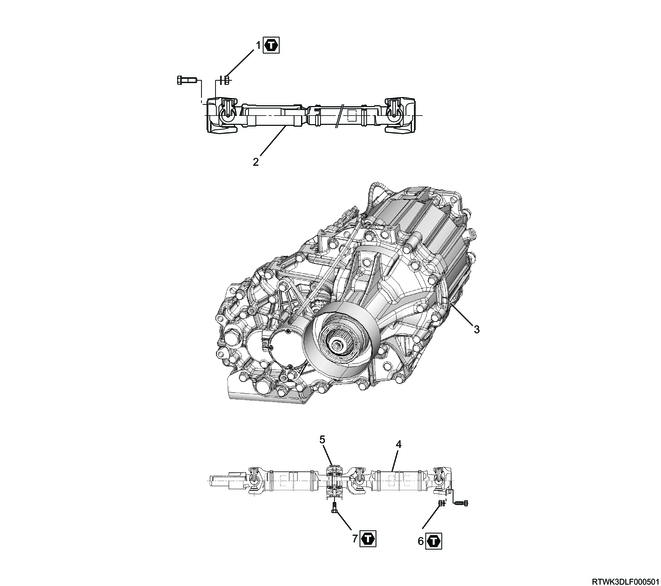
Part name
- Nut
- Front propeller shaft
- Transfer
- Rear propeller shaft
- Center bearing
- Nut
- Bolt
Tightening torque
1: 59 N・m { 6.0 kgf・m / 44 lb・ft }
6: 59 N・m { 6.0 kgf・m / 44 lb・ft }
7: 69 N・m { 7.0 kgf・m / 51 lb・ft }
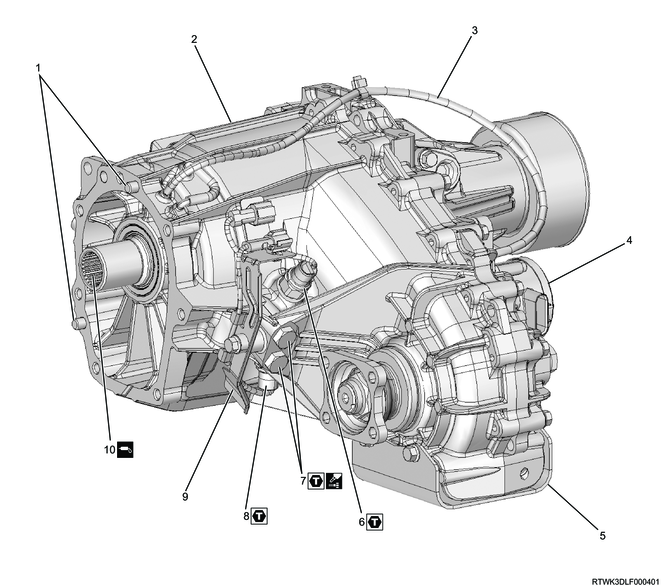
Part name
- Dowel pin
- Transfer case
- Breather hose
- Transfer actuator
- Stone guard
- 2-4 switch
- Detent plug
- Neutral switch
- Switch bracket
- Input shaft
Tightening torque
6: 39 N・m { 4.0 kgf・m / 29 lb・ft }
7: 19 N・m { 1.9 kgf・m / 14 lb・ft }
8: 39 N・m { 4.0 kgf・m / 29 lb・ft }
2. Transfer installation
1) When replacing the following parts with new ones, refer to the diagram to press-fit the dowel pin to the transfer.
- Transfer
- Transfer case
Caution
- If the dowel pin is not press-fitted, press-fit the dowel pin to the transfer side.
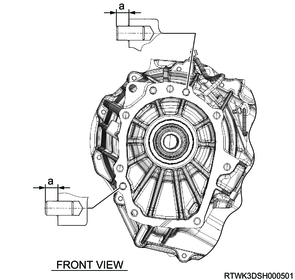
Dimensions
a: 9 mm { 0.35 in }
2) Apply BESCO L-2 grease or equivalent to the spline section.
3) Install the transfer to the transmission.
Caution
- When assembling the transfer to the transmission, check that the dowel pins (2 pcs.) are press-fitted to the transfer side.
Tightening torque: 41 N・m { 4.2 kgf・m / 30 lb・ft }
M/T models

Dimensions
a: 20 mm { 0.79 in }
b: 9 mm { 0.35 in }
c: 11 mm { 0.43 in }
d: 35 mm { 1.38 in }
e: 15 mm { 0.59 in }
f: 20 mm { 0.79 in }
g: 16.5 mm { 0.65 in }
h: 15 mm { 0.59 in }
i: 43.5 mm { 1.71 in }
j: 14 mm { 0.55 in }
A/T models
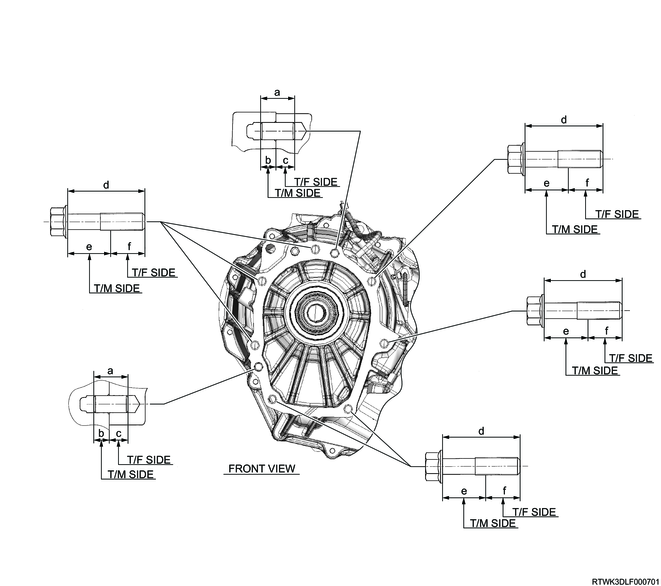
Dimensions
a: 20 mm { 0.79 in }
b: 9 mm { 0.35 in }
c: 11 mm { 0.43 in }
d: 45 mm { 1.77 in }
e: 25 mm { 0.98 in }
f: 20 mm { 0.79 in }
3. Transmission installation
1. AWR6B45 equipped models
Refer to "5.Transmission, Transaxle 5B.Automatic(AWR6B45) transmission installation".
4. Engine harness connect
1. MVL equipped models (With ABS)
1) Connect the connectors of the following parts to the engine harness.
- 2-4 switch connector
- Neutral switch connector
- Transfer actuator connector
Note
- Connect the clip to the engine harness.
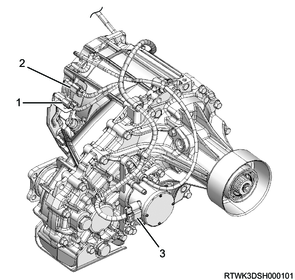
Legend
- Neutral switch connector
- 2-4 switch connector
- Transfer actuator connector
2. MVL equipped models (Without ABS)
1) Connect the connectors of the following parts to the engine harness.
- 2-4 switch connector
- Neutral switch connector
- Vehicle speed sensor connector
- Transfer actuator connector
Note
- Connect the clip to the engine harness.
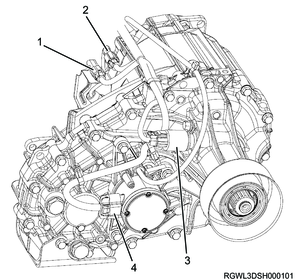
Legend
- Neutral switch connector
- 2-4 switch connector
- Vehicle speed sensor connector
- Transfer actuator connector
5. Rear propeller shaft installation
1. MVL equipped models
Refer to "3.Driveline, Axle 3C.Drive Shaft System rear propeller shaft installation".
6. Front propeller shaft installation
1. MVL equipped models
Refer to "3.Driveline, Axle 3C.Drive Shaft System front propeller shaft installation".
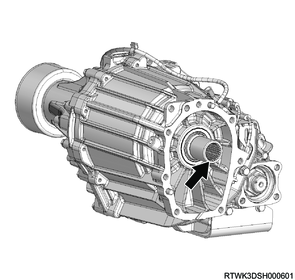
7. Transfer oil filling
1) Tighten the drain plug to the specified torque.
Caution
- Do not reuse the O-ring.
Tightening torque: 39 N・m { 4.0 kgf・m / 29 lb・ft }
2) Remove the filler plug.
3) From the filler plug hole, fill oil up to the lower edge of the filler plug hole.
Oil to be used
BESCO GEAR OIL TRANSAXLE 5W-30 or equivalent
1.3 L { 0.34 US gal / 0.29 Imp.gal } Oil capacity [Reference value]

Legend
- Filler plug
- Drain plug
- Oil surface
- Lower surface of the hole
4) Tighten the filler plug to the specified torque.
Caution
- Do not reuse the O-ring.
Tightening torque: 39 N・m { 4.0 kgf・m / 29 lb・ft }
8. Preliminary and post procedures
1. Post procedures
1) Lower the vehicle.
2) Connect the battery cable to the battery negative terminal.
3) Referring to the following, perform the setting of the front door power window switch with AUTO UP/AUTO DOWN function.
Refer to "9.Body, Cab, Accessories 9T.Glass, Windows, Mirrors front door power window switch setting".
4) Close the engine hood.