|
ac5wzw00003130
UPPER PANEL REMOVAL/INSTALLATION
id091700898300
1. Disconnect the negative battery cable. (See NEGATIVE BATTERY CABLE DISCONNECTION/CONNECTION [SKYACTIV-G 2.0, SKYACTIV-G 2.5].) (See NEGATIVE BATTERY CABLE DISCONNECTION/CONNECTION [SKYACTIV-G 2.0, SKYACTIV-G 2.5 (WITHOUT i-stop)].) (See NEGATIVE BATTERY CABLE DISCONNECTION/CONNECTION [SKYACTIV-D 2.2].)
2. Remove the following parts:
3. Open the console lid.
4. Remove the button, then open the fastener.
ac5wzw00003130
|
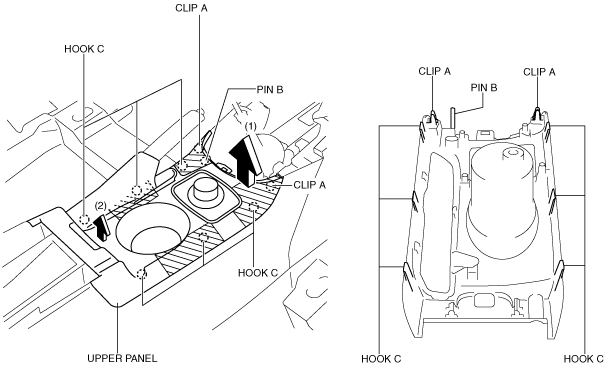
5. Take the shaded area shown in the figure, and remove the upper panel in the direction of the arrow in the order of (1), (2) while detaching clips A, pin B, hooks C.
ac5wzw00002809
|
6. Remove clips D.
ac5wzw00002905
|
7. Disconnect the commander switch connector (with commander switch).
8. Install in the reverse order of removal.