 |
ac5wzw00006102
FRONT FENDER STAY REMOVAL/INSTALLATION
id091000803900
1. Disconnect the negative battery cable. (See NEGATIVE BATTERY CABLE DISCONNECTION/CONNECTION [SKYACTIV-G 2.0, SKYACTIV-G 2.5].) (See NEGATIVE BATTERY CABLE DISCONNECTION/CONNECTION [SKYACTIV-G 2.0, SKYACTIV-G 2.5 (WITHOUT i-stop)].) (See NEGATIVE BATTERY CABLE DISCONNECTION/CONNECTION [SKYACTIV-D 2.2].)
2. Remove the following parts:
3. Disconnect the service plug.(LH)(with i-ELOOP)(See SERVICE PLUG DISCONNECTION/CONNECTION [i-ELOOP])
4. Remove the capacitor (i-ELOOP).(LH)(with i-ELOOP) (See CAPACITOR (i-ELOOP) REMOVAL/INSTALLATION [i-ELOOP])
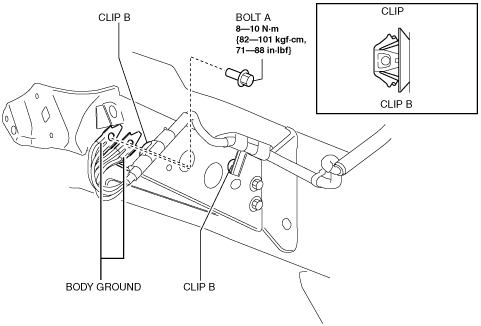
5. Remove bolts A and then remove body grounds.
6. Remove clips B.
ac5wzw00006102
|
7. Remove bolt C and bolt D.
ac5wzw00006103
|
8. Remove the front fender stay.
9. Install in the reverse order of removal. (See Front Fender Stay Newly Replace Note.)
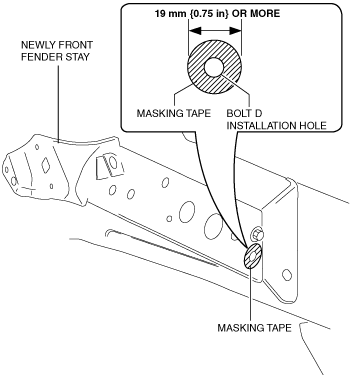
Front Fender Stay Newly Replace Note
1. Before painting a newly replaced part, affix masking tape to the shaded areas shown in the figure.
ac5wzw00006106
|