 |
ac5uuw00002620
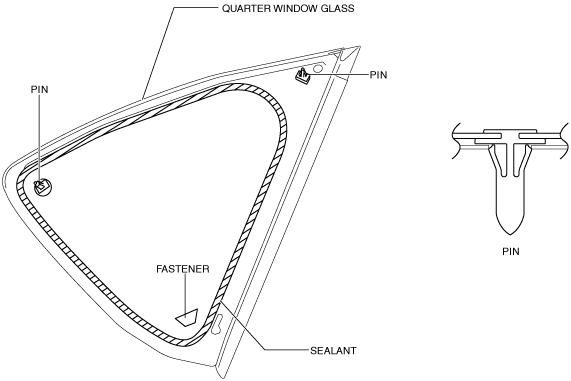
QUARTER WINDOW GLASS REMOVAL
id091200002500
1. Disconnect the negative battery cable. (See NEGATIVE BATTERY CABLE DISCONNECTION/CONNECTION [SKYACTIV-G 2.0, SKYACTIV-G 2.5].) (See NEGATIVE BATTERY CABLE DISCONNECTION/CONNECTION [SKYACTIV-G 2.0, SKYACTIV-G 2.5 (WITHOUT i-stop)].) (See NEGATIVE BATTERY CABLE DISCONNECTION/CONNECTION [SKYACTIV-D 2.2].)
2. Remove the following parts:
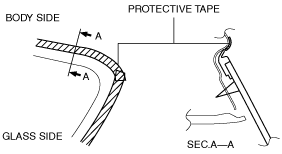
3. Apply protective tape along the edge of the body and the quarter window glass.
ac5uuw00002620
|
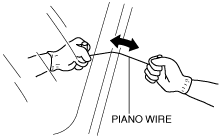
4. Avoiding pins on the inside of the vehicle, insert the piano wire which has been cut to sufficient length.
ac5wzw00002959
|
5. Wind each end of the piano wire around a bar.
6. Secure one end of the piano wire, and while pulling the other end, cut the sealant around the quarter window glass.
ac5wzw00001337
|
7. Pull the quarter window glass outward and detach the pins from the body.
8. If a pins or fastener is damaged, remove it.