 |
acxuuw00002318
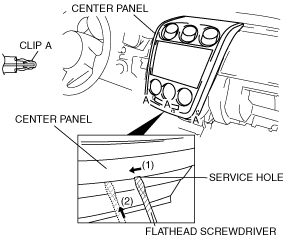
CENTER PANEL REMOVAL/INSTALLATION
id091700804500
1. Remove the following parts:
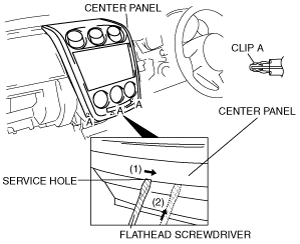
2. Insert a tape-wrapped flathead screwdriver into the service hole and slide it in the direction of arrow (1).
L.H.D.
acxuuw00002318
|
R.H.D.
acxaaw00000089
|
3. After sliding the flathead screwdriver, insert it in the direction of arrow (2) and remove clip A.
4. Remove clip A on the opposite side in the same procedure.
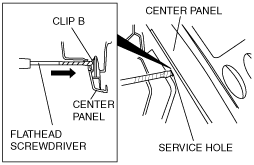
5. Insert the tape-wrapped flathead screwdriver into the service hole. While pressing the clip B inward, place your hands on the edge of the center panel and carefully raise until the clip B is removed.Do this work on the other side as well.
L.H.D.
acxaaw00001367
|
R.H.D.
acxaaw00001368
|
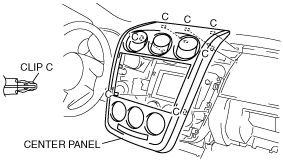
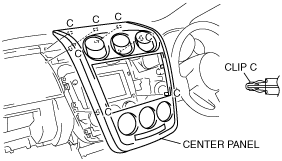
6. Make sure that the clips B have been removed, then pull the center panel toward you and remove clips C.
L.H.D.
acxaaw00001539
|
R.H.D.
acxaaw00001364
|
7. Remove the center panel.
8. Install in the reverse order of removal.