 |
ac8wzw00000138
A/C COMPRESSOR REMOVAL/INSTALLATION [SKYACTIV-D 2.2]
id071100801034
Replacement Part
|
O-ring (front cooler hose (HI))
Quantity: 1
Location of use: A/C compressor
|
O-ring (front cooler hose (LO))
Quantity: 1
Location of use: A/C compressor
|
1. Disconnect the negative battery terminal. (See NEGATIVE BATTERY TERMINAL DISCONNECTION/CONNECTION.)
2. Discharge the refrigerant. (See REFRIGERANT RECOVERY.) (See REFRIGERANT CHARGING.)
3. Remove the following parts:
4. Disconnect the connector.
ac8wzw00000138
|
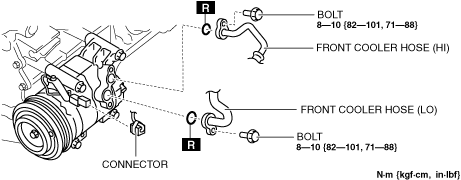
5. Remove bolts.
6. Disconnect the front cooler hose (LO). Do not allow compressor oil to spill.
7. Disconnect the front cooler hose (HI). Do not allow compressor oil to spill.
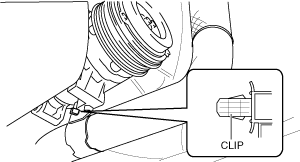
8. Detach the clip.
ac5wzw00008780
|
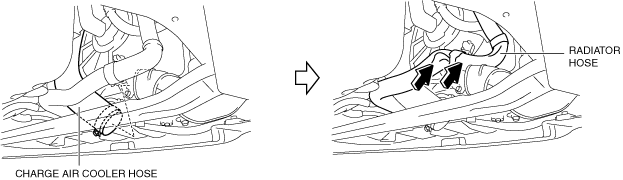
9. Disconnect the charge air cooler hose.
ac5wzw00008781
|
10. Set the radiator hose out of the way.
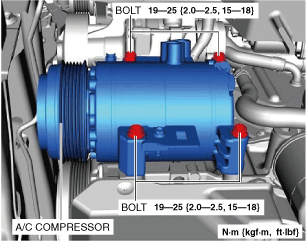
11. Remove bolts.
ac8wzw00000139
|
12. Remove the A/C compressor. Do not allow compressor oil to spill. (See A/C Compressor Installation Note.)
13. Install in the reverse order of removal.
14. Perform the refrigerant system performance test. (See REFRIGERANT SYSTEM PERFORMANCE TEST.)
A/C Compressor Installation Note
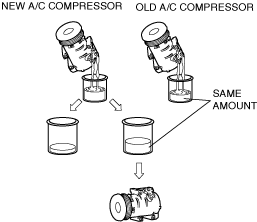
1. Rotate the new A/C compressor shaft six to eight revolutions while pouring refrigerant oil in a clean measuring container. Use this refrigerant oil to refill new compressor. Do not allow refrigerant oil to become contaminated.
2. Rotate old A/C compressor shaft six to eight revolutions while pouring refrigerant oil in a separate, clean measuring container.
3. Compare those oil amounts. The amount of the oil drained from the new A/C compressor should be greater than the old one.
4. Pour the same amount oil of drained from the old A/C compressor back into the new A/C compressor.
ac5wzw00001807
|