 |
ac8wzw00001642
METER HOOD REMOVAL/INSTALLATION
id091700800900
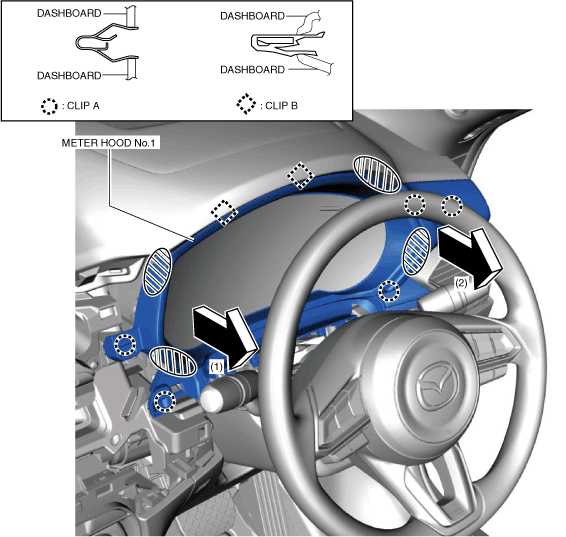
Meter Hood No.1
1. Disconnect the negative battery terminal. (See NEGATIVE BATTERY TERMINAL DISCONNECTION/CONNECTION.)
2. Remove the following parts:
3. Hold the shaded areas shown in the figure, pull meter hood No.1 in the order of arrows (1) and (2), and then remove it while detaching clips A and B.
ac8wzw00001642
|
4. Install in the reverse order of removal.
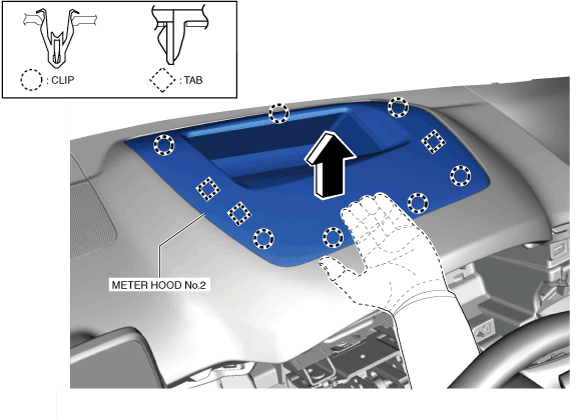
Meter Hood No.2 (with active driving display)
1. Disconnect the negative battery terminal. (See NEGATIVE BATTERY TERMINAL DISCONNECTION/CONNECTION.)
2. Remove the following parts:
3. Insert your hand from the instrument cluster installation hole, press meter hood No.2 up in the direction of the arrow shown in the figure, and then detach the clips and tabs from the dashboard.
ac8wzw00001643
|
4. Remove meter hood No.2.
5. Install in the reverse order of removal.