 |
ac9wzw00001742
HEATED OXYGEN SENSOR (HO2S) REMOVAL/INSTALLATION [MZI-3.7 (PCM CONNECTOR (3 TYPES))]
id0140c3804020
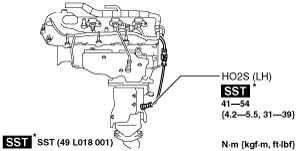
HO2S (LH) Removal/Installation
1. Disconnect the negative battery cable. (See BATTERY REMOVAL/INSTALLATION [MZI-3.7].)
2. Disconnect the HO2S (LH) connector.
3. Remove the HO2S (LH) using the SST.
ac9wzw00001742
|
4. Install in the reverse order of removal.
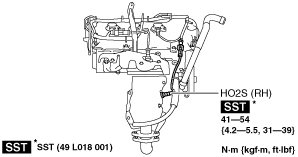
HO2S (RH) Removal/Installation (L.H.D.)
1. Disconnect the negative battery cable. (See BATTERY REMOVAL/INSTALLATION [MZI-3.7].)
2. Remove the cowl panel for easier access. (See COWL PANEL REMOVAL/INSTALLATION.)
3. Disconnect the HO2S (RH) connector.
4. Remove the HO2S (RH) using the SST.
ac9wzw00001743
|
5. Install in the reverse order of removal.
HO2S (RH) Removal/Installation (R.H.D.)
1. Disconnect the negative battery cable. (See BATTERY REMOVAL/INSTALLATION [MZI-3.7].)
2. Remove the following part for easier access:
3. Disconnect the HO2S (RH) connector.
4. Remove the front wheel and tire (RH). (See GENERAL PROCEDURES (SUSPENSION).)
5. Remove the splash shield (RH). (See SPLASH SHIELD REMOVAL/INSTALLATION.)
6. Disconnect the front drive shaft (RH) from the transaxle side. (See FRONT DRIVE SHAFT REMOVAL/INSTALLATION.)
7. Remove the HO2S (RH) using the SST.
ac9wzw00001743
|
8. Install in the reverse order of removal.