|
ac9uuw00001452
COUPLING COMPONENT REMOVAL/INSTALLATION
id031800805300
1. Drain the rear differential oil into a container.
2. Remove the under guard (LH). (See CHARCOAL CANISTER, CANISTER VENT (CV) SOLENOID VALVE, AIR FILTER COMPONENT REMOVAL/INSTALLATION [MZI-3.7].)
3. Remove the presilencer. (See EXHAUST SYSTEM REMOVAL/INSTALLATION [MZI-3.7].)
4. Remove the presilencer insulator. (See REFRIGERANT LINE REMOVAL/INSTALLATION.)
5. Remove the propeller shaft. (See PROPELLER SHAFT REMOVAL/INSTALLATION.)
6. Remove in the order indicated in the table.
7. Install in the reverse order of removal.
8. Add rear differential oil. (See DIFFERENTIAL OIL REPLACEMENT.)
ac9uuw00001452
|
|
1
|
Differential oil temperature sensor connector
|
|
2
|
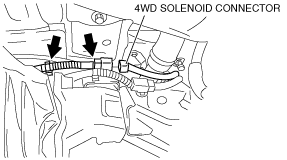
4WD solenoid connector
|
|
3
|
Front differential mounting rubber
|
|
4
|
Coupling component
|
Front Differential Mounting Rubber Removal Note
1. Detach clips as shown in the figure.
ac9wzw00000092
|
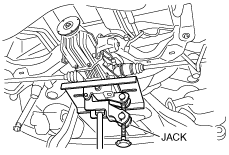
2. Support the rear differential using a jack.
ac9uuw00001448
|
3. Remove the front differential mounting rubbers.
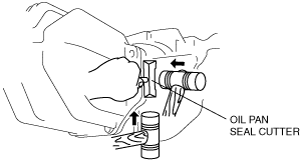
Coupling Component Removal Note
1. Support the coupling unit with a transmission jack.
2. Cut away the coupling unit using an oil pan seal cutter.
ac9uuw00001374
|
Coupling Component Installation Note
1. Apply sealant to the coupling case surface that contacts the rear differential case.
2. Install the coupling unit to the rear differential so that the two tabs on the coupling unit engage the rear differential grooves (two locations).
ac9uuw00001375
|