 |
a30zzw00000295
SUPPORT BRACKET REMOVAL/INSTALLATION [A71M]
id0525a7000600
1. Disconnect the lead-acid battery negative terminal. (See NEGATIVE LEAD-ACID BATTERY TERMINAL DISCONNECTION/CONNECTION.)
2. Remove the lead-acid battery and lead-acid battery tray. (See LEAD-ACID BATTERY REMOVAL/INSTALLATION.)
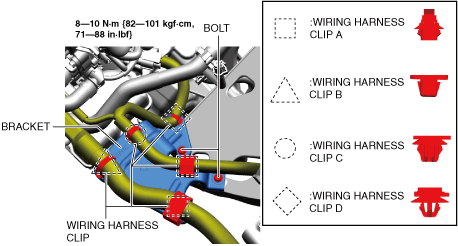
3. Remove the wiring harness clips and bolts shown in the figure, then remove the bracket.
a30zzw00000295
|
4. Remove the front under cover No.2. (See FRONT UNDER COVER No.2 REMOVAL/INSTALLATION.)
5. Loosen the No.4 mount installation nuts. (See Support Bracket Removal Note.) (See No.4 Mount Installation Nuts Installation Note.)
a30zzw00001994
|
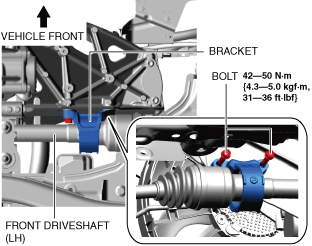
6. Remove the bolts shown in the figure.
a30zzw00002179
|
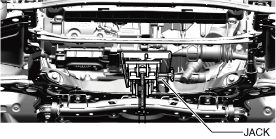
7. Support the EV transaxle using a jack.
a30zzw00001995
|
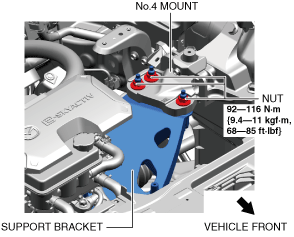
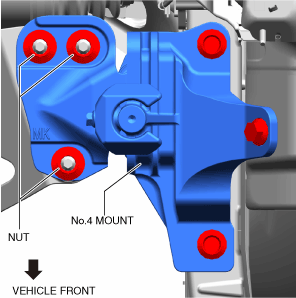
8. Remove the No.4 mount installation nuts shown in the figure. (See No.4 Mount Installation Nuts Installation Note.)
a30zzw00001996
|
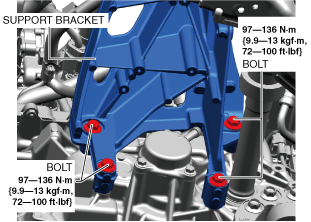
9. Remove the support bracket installation bolts. (See Support Bracket Installation Note.)
a30zzw00002180
|
10. Remove the support bracket.
11. Install in the reverse order of removal.
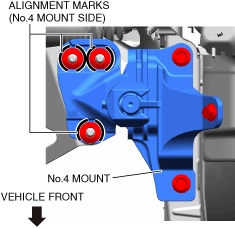
Support Bracket Removal Note
1. Place alignment marks at the positions shown in the figure so that they can be assembled to the same positions as before removal.
a30zzw00004309
|
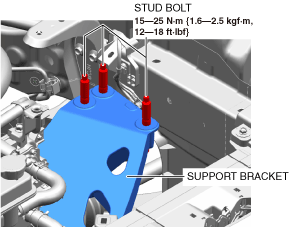
Support Bracket Installation Note
1. Tighten the support bracket stud bolts.
a30zzw00005354
|
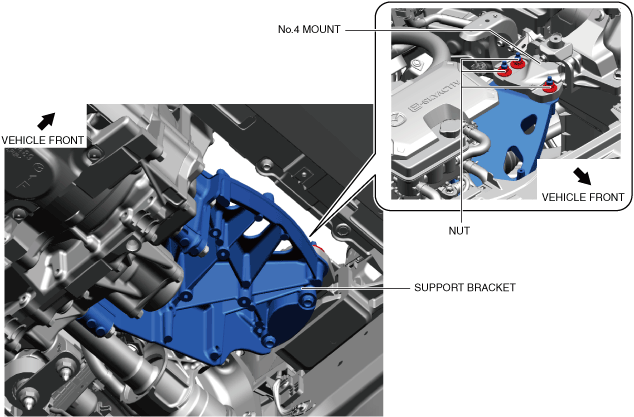
2. Temporarily tighten the No.4 mount installation nuts shown in the figure
a30zzw00001999
|
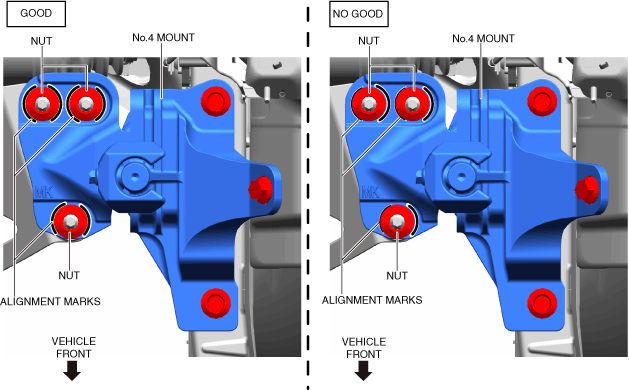
No.4 Mount Installation Nuts Installation Note
1. Support the support bracket using a garage jack.
2. Temporarily tighten the nuts shown in the figure while aligning the alignment marks of the No.4 mount with the nuts.
a30zzw00006624
|
3. Tighten the No.4 mount installation nuts in the shown in the figure.
a30zzw00002001
|