FRONT DOOR SPEAKER REMOVAL/INSTALLATION
id092000701100
-
Caution
-
• If the procedure is performed while holding the front door speaker cone, it could deform the cone causing a malfunction. Therefore, perform the procedure while holding any part other than the cone.
1. Disconnect the negative battery terminal. (See NEGATIVE BATTERY TERMINAL DISCONNECTION/CONNECTION.)
2. Remove the following parts:
- (1) Inner garnish (See INNER GARNISH REMOVAL/INSTALLATION.)
-
- (2) Power window main switch (to remove from driver’s side) (See POWER WINDOW MAIN SWITCH REMOVAL/INSTALLATION.)
-
- (3) Power window subswitch (to remove from passenger’s side) (See POWER WINDOW SUBSWITCH REMOVAL/INSTALLATION.)
-
- (4) Front door trim. (See FRONT DOOR TRIM REMOVAL/INSTALLATION.)
-
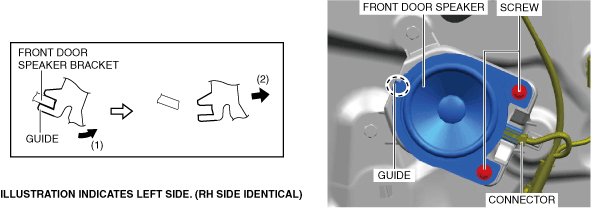
3. Disconnect the connector.
4. Remove the screws.
5. Move the front door speaker in the order of arrows (1) and (2) shown in the figure, and remove it while removing the guide.
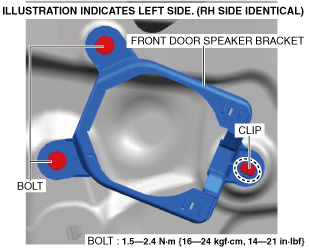
6. To remove the front door speaker bracket, perform the following procedure.
- (1) Remove the bolts.
-
- (2) Remove the clip.
-
- (3) Remove the front door speaker bracket.
-
7. Install in the reverse order of removal.