 |
amxzzw00005283
RETRACTABLE HARDTOP ADJUSTMENT
id091600105400
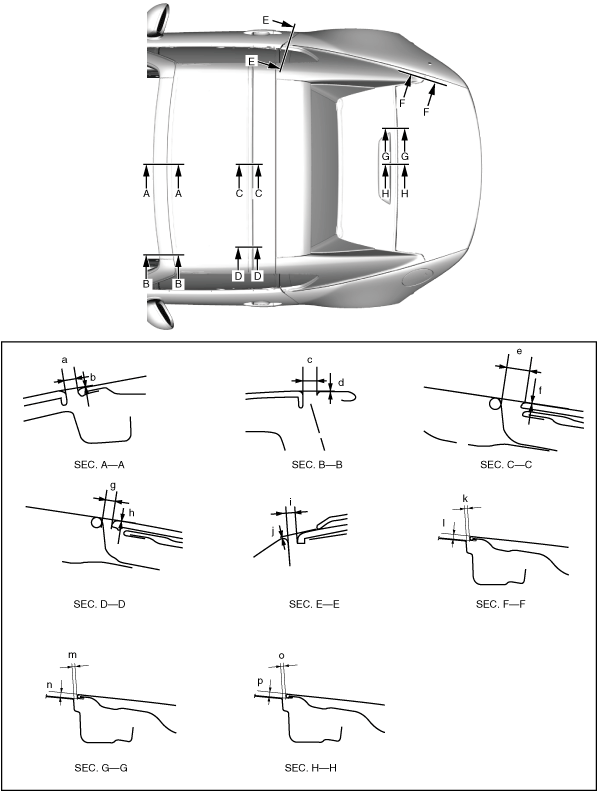
Retractable Hardtop Adjustment
1. Measure the clearance and height difference between the roofs and the vehicle body.
amxzzw00005283
|
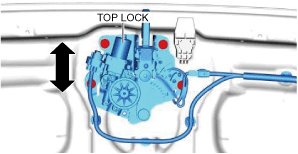
Top Lock Adjustment
1. Using the retractable hardtop switch, keep the front roof half-open.
amxzzw00004099
|
2. Remove the front roof link cover. (See FRONT ROOF LINK COVER REMOVAL/INSTALLATION.)
3. Remove the front headliner. (See FRONT HEADLINER REMOVAL/INSTALLATION.)
4. Loosen the top lock installation screws and adjust the top lock position.
amxzzw00005284
|
5. Tighten the top lock installation screws. (See TOP LOCK REMOVAL/INSTALLATION.)
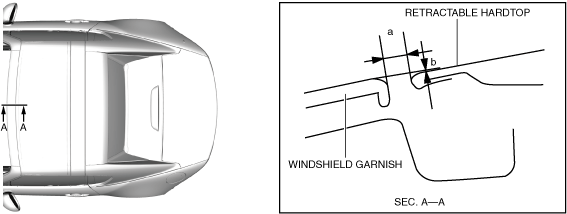
6. Fully close the retractable hardtop.
7. Verify that the gap between the windshield garnish and the retractable hardtop is within the standard clearance.
amxzzw00005285
|
8. Verify that the top lock can be secured/released smoothly.
9. Install the front headliner. (See FRONT HEADLINER REMOVAL/INSTALLATION.)
10. Install the front roof link cover. (See FRONT ROOF LINK COVER REMOVAL/INSTALLATION.)
Female Wedge Adjustment
1. Loosen the female wedge installation screws and adjust the female wedge position. (See FEMALE WEDGE REMOVAL/INSTALLATION.)
2. Tighten the female wedge installation screws. (See FEMALE WEDGE REMOVAL/INSTALLATION.)
3. Verify that the top lock can be secured/released smoothly.