 |
amxzzw00003808
BLOWER FAN CONTROLLER REMOVAL/INSTALLATION
id071100006100
1. Disconnect the negative battery cable. (See NEGATIVE BATTERY CABLE DISCONNECTION/CONNECTION.)
2. Remove the following parts:
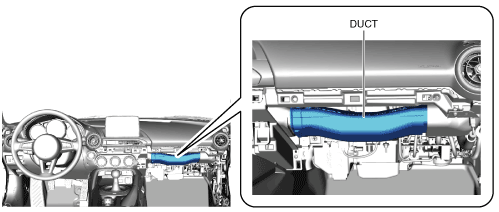
3. Remove the duct.
amxzzw00003808
|
4. Remove the auto leveling control module. (Without adaptive front lighting system (AFS)) (See AUTO LEVELING CONTROL MODULE REMOVAL/INSTALLATION.)
5. Remove the adaptive front lighting system (AFS) control module. (With adaptive front lighting system (AFS)) (See ADAPTIVE FRONT LIGHTING SYSTEM (AFS) CONTROL MODULE REMOVAL/INSTALLATION.)
6. Remove the adaptive led headlights control module. (With adaptive led headlights system) (See ADAPTIVE LED HEADLIGHTS CONTROL MODULE REMOVAL/INSTALLATION.)
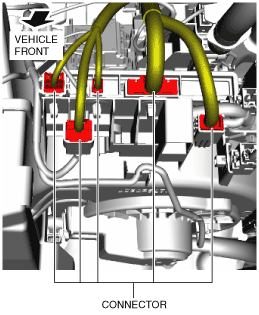
7. Disconnect the connectors.
amxuuw00003837
|
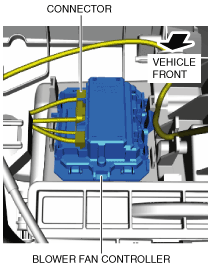
8. Disconnect the connector.
amxuuw00003838
|
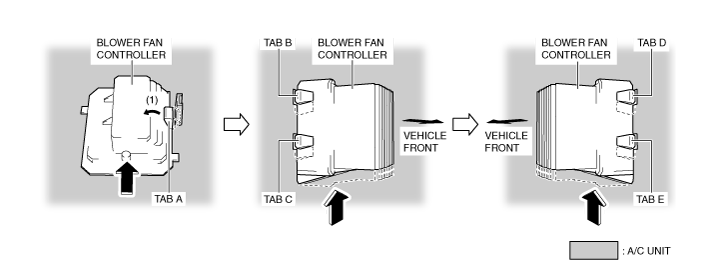
9. While pressing tab A of the blower fan controller in the direction of arrows (1) shown in the figure, lift the blower fan controller to detach tab A of the blower fan controller from the A/C unit.
amxuuw00003839
|
10. Lift the blower fan controller and detach tabs B, C, D and E of the blower fan controller from the A/C unit.
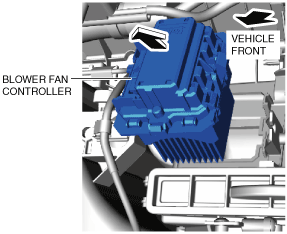
11. Remove the blower fan controller.
amxuuw00003840
|
12. Install in the reverse order of removal.