 |
am2zzw00013972
REAR WINDOW GLASS REMOVAL
id091200000600
4SD
1. Disconnect the negative battery cable. (See NEGATIVE BATTERY CABLE DISCONNECTION/CONNECTION.)
2. Remove the following parts:
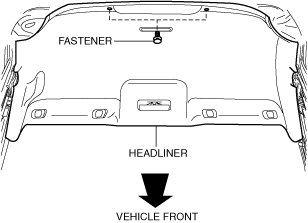
3. Remove the fastener and set the headliner aside to a position where it does not interfere with the piano wire.
am2zzw00013972
|
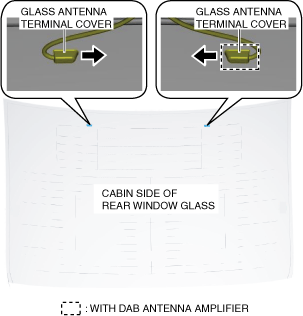
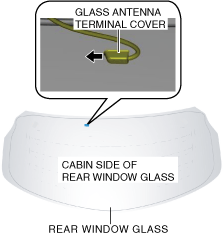
4. Remove the glass antenna terminal cover in the direction of the arrows shown in the figure.
am2zzw00014223
|
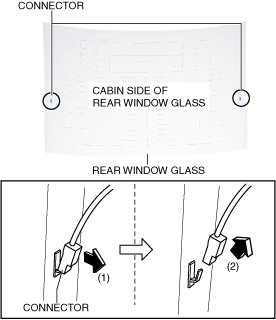
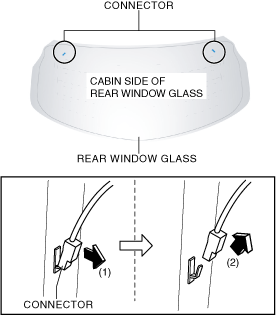
5. Disconnect the connectors in the direction of the arrow in the order of (1), (2) shown in the figure.
am2zzw00014224
|
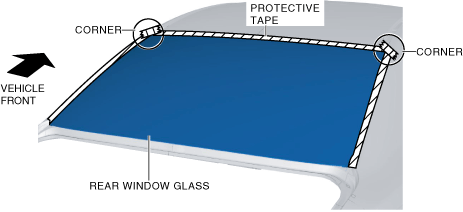
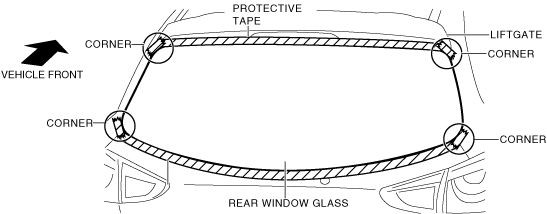
6. Apply protective tape along the edge of the body.
am2zzw00013974
|
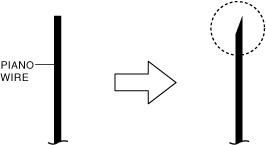
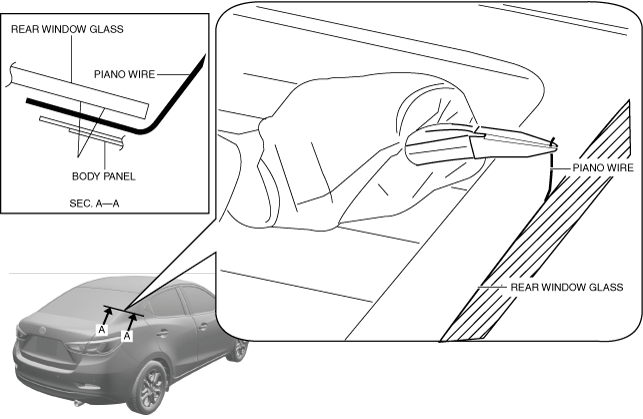
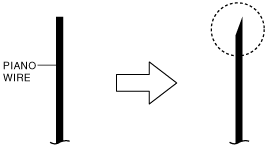
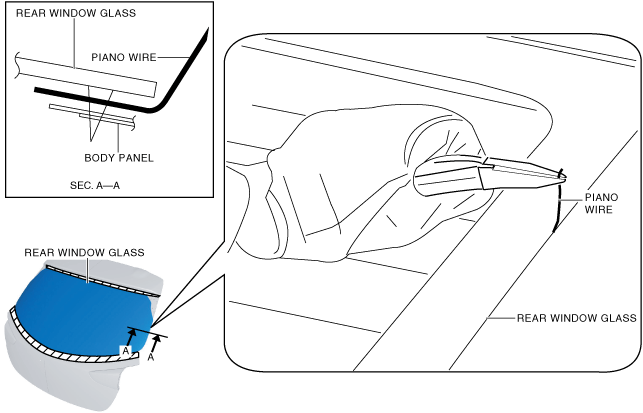
7. Cut the tip of the piano wire diagonally to facilitate insertion of the piano wire through the sealant.
am2zzw00013975
|
8. Pass the piano wire through from the cabin side.
am2zzw00013976
|
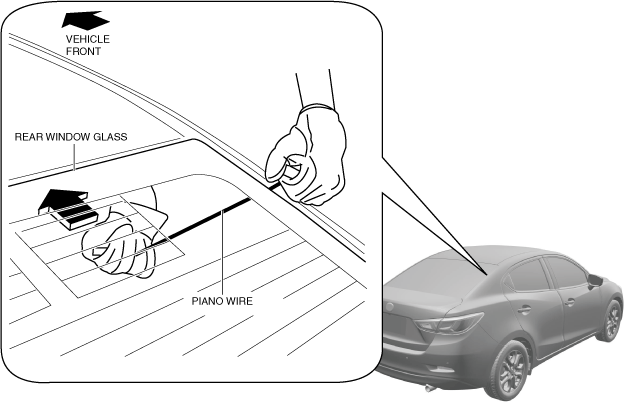
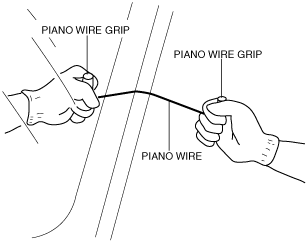
9. Install the piano wire to the piano wire grip.
10. Secure the piano wire on the outer side, and pull the wire on the cabin side in the direction of the arrow shown in the figure to cut the sealant.
am2zzw00013977
|
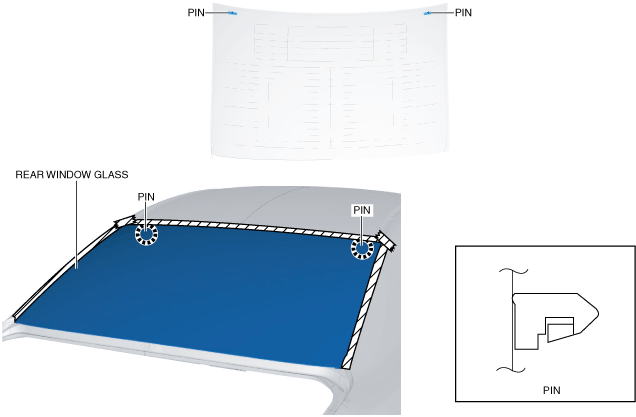
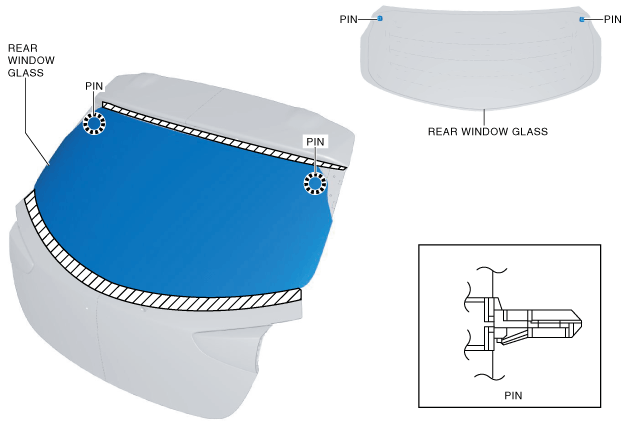
11. When reaching the pin, pull the piano wire out to go around the pin, then pass the piano wire through from the cabin side again.
am2zzw00013978
|
12. Secure one end of piano wire, and while pulling the other end, cut the sealant around the windshield.
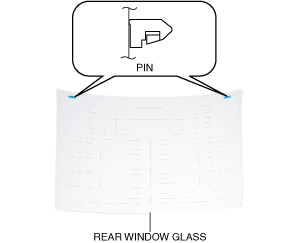
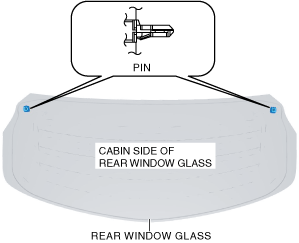
13. Pinch the pin from the inside of the vehicle and detach it.
am2zzw00013979
|
14. Before removing the rear window glass from the body, mark the position of the glass by affixing tape to the glass and body panel. (When reusing rear window glass)
15. Remove the rear window glass.
16. If the pin is damaged, remove the pin.
5HB
1. Disconnect the negative battery cable. (See NEGATIVE BATTERY CABLE DISCONNECTION/CONNECTION.)
2. Remove the rear side spoiler. (See REAR SIDE SPOILER REMOVAL/INSTALLATION.)
3. Remove the rear wiper arm and blade. (See REAR WIPER ARM AND BLADE REMOVAL/INSTALLATION.)
4. Remove the glass antenna terminal cover in the direction of the arrow shown in the figure. (With DAB antenna amplifier)
am2zzw00014364
|
5. Disconnect the connectors in the direction of the arrow in the order of (1), (2) shown in the figure.
am2zzw00013980
|
6. Apply protective tape along the edge of the body.
am2zzw00013981
|
7. Cut the tip of the piano wire diagonally to facilitate insertion of the piano wire through the sealant.
am2zzw00008638
|
8. Pass the piano wire through from the cabin side.
am2zzw00013068
|
9. Install the piano wire to the piano wire grip.
10. Secure one end of piano wire, and while pulling the other end, cut the sealant around the rear window glass.
am2zzw00008024
|
11. When reaching the pin, pull the piano wire out to go around the pin, then pass the piano wire through from the cabin side again.
am2zzw00013069
|
12. Secure one end of piano wire, and while pulling the other end, cut the sealant around the windshield.
13. Pinch the pin from the inside of the vehicle and detach it.
am2zzw00013982
|
14. Before removing the rear window glass from the body, mark the position of the glass by affixing tape to the glass and body panel. (When reusing rear window glass)
15. Remove the rear window glass.
16. If the pin is damaged, remove the pin.