 |
am2zzw00001805
LOWER PANEL REMOVAL/INSTALLATION [3HB]
id0917004539z3
Driver's Side
1. Disconnect the negative battery cable.
2. Remove the following parts:
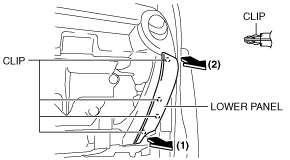
3. Remove the screw, pull the lower panel in the direction of the arrow in the order of (1) and (2), and remove the lower panel while detaching the clips.
L.H.D.
am2zzw00001805
|
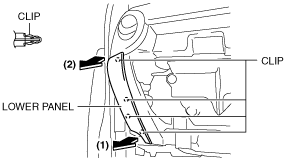
R.H.D.
adejjw00003103
|
4. Disconnect the switch connector.
5. Install in the reverse order of removal.
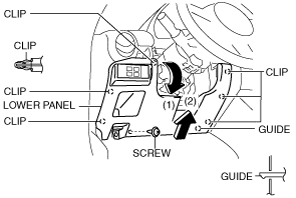
Passenger's Side
1. Remove the front scuff plate. (See FRONT SCUFF PLATE REMOVAL/INSTALLATION [3HB])
2. Remove the front side trim. (See FRONT SIDE TRIM REMOVAL/INSTALLATION [3HB])
3. Pull the lower panel in the direction of the arrow in the order of (1) and (2), then remove it while detaching the clips.
L.H.D.
am2zzw00001806
|
R.H.D.
am2zzw00001807
|
4. Install in the reverse order of removal.