CENTER PANEL UNIT REMOVAL/INSTALLATION
id092000800600
1. Disconnect the negative battery cable.
2. Remove the following parts:
- (1) Shift lever knob (MTX) (See MANUAL TRANSAXLE SHIFT MECHANISM REMOVAL/INSTALLATION [F35M-R].) (See MANUAL TRANSAXLE SHIFT MECHANISM REMOVAL/INSTALLATION [B65M-R].)
- (2) Side wall (See SIDE WALL REMOVAL/INSTALLATION.)
- (3) Front console component (See FRONT CONSOLE COMPONENT REMOVAL/INSTALLATION.)
- (4) Glove compartment (See GLOVE COMPARTMENT REMOVAL/INSTALLATION.)
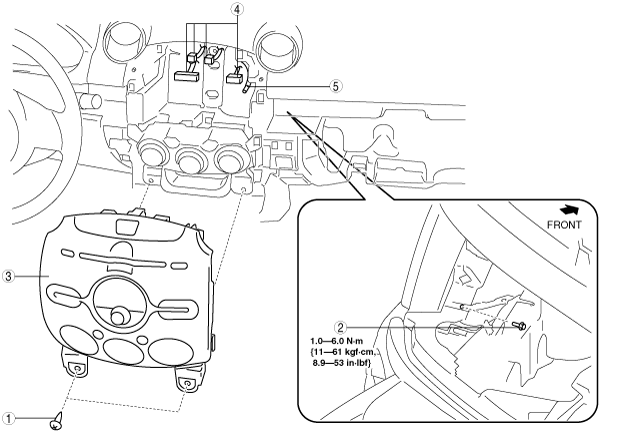
3. Remove in the order indicated in the table.
4. Install in the reverse order of removal.
-
Caution
-
• If the wiring harness or the antenna feeder is caught between the center panel unit and dashboard, it could cause a malfunction. When installing the center panel unit, make sure that the wiring harness and antenna feeders are not caught between the center panel unit and dashboard.
|
1
|
Screw
|
|
2
|
Bolt
|
|
3
|
Center panel unit
|
|
4
|
Connector
|
|
5
|
Antenna feeder plug
|
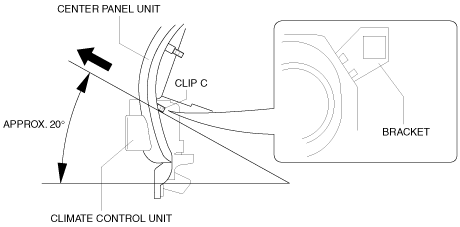
Center Panel Unit Removal Note
1. Remove the center panel unit tabs A and clips B, C from the dashboard.
-
Caution
-
• When the center panel unit is removed, clips C could interfere with the climate control unit bracket and cause damage. Pull the center panel unit in the direction of the arrow shown in the figure (upward at a
approx. 20°angle) when removing it.