 |
am3zzw00021700
UP SWITCH INSPECTION [EV6A-EL]
id0517n2600500
Continuity Inspection
1. Disconnect the negative battery terminal. (See NEGATIVE BATTERY TERMINAL DISCONNECTION/CONNECTION [(E)].)
2. Remove the following parts:
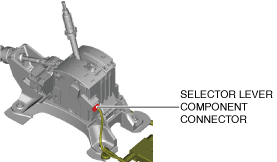
3. Disconnect the selector lever component connector.
am3zzw00021700
|
4. Verify that the continuity between selector lever component terminals F and H.
am3zzw00034557
|
Up switch specification
|
Test condition |
Continuity |
|---|---|
|
Selector lever is in the M position (+) side position.
|
Continuity
|
|
Selector lever is not in the M position (+) side position.
|
No continuity
|
