|
am3zzw00023265
SHROUD UPPER MEMBER REMOVAL/INSTALLATION [(E)]
id0910008898x2
1. Disconnect the negative battery terminal. (See NEGATIVE BATTERY TERMINAL DISCONNECTION/CONNECTION [(E)].)
2. Remove the following parts:
3. Remove the bolts shown in the figure and set the horns aside.
am3zzw00023265
|
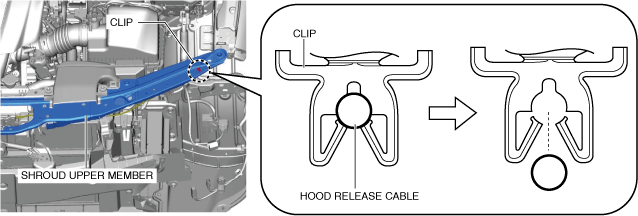
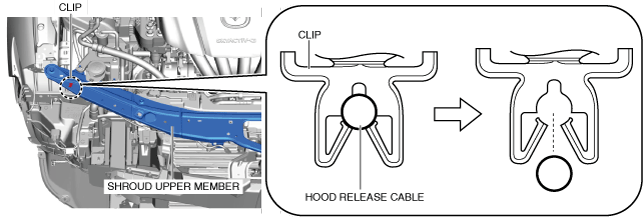
4. Remove the hood release cable from the clip shown in the figure.
L.H.D.
am3zzw00023266
|
R.H.D.
am3zzw00029224
|
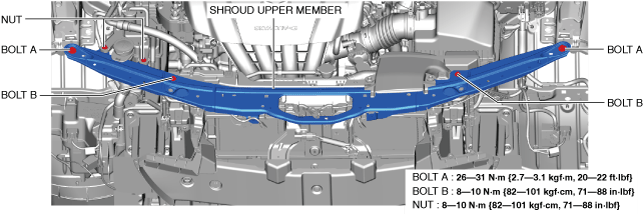
5. Remove the nuts.
am3zzw00023267
|
6. Remove bolts A and B.
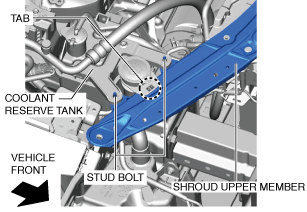
7. Move the coolant reserve tank in the direction of the arrow shown in the figure and detach the pin.
am3zzw00023268
|
8. Detach the tab from the shroud upper member.
am3zzw00035419
|
9. Pull out the coolant reserve tank from the stud bolts of the shroud upper member.
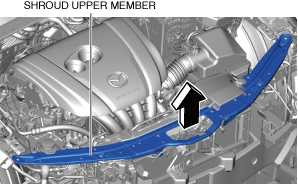
10. Remove the shroud upper member in the direction of the arrow.
am3zzw00023270
|
11. Install in the reverse order of removal.
12. Adjust the headlight aiming. (See HEADLIGHT AIMING [(E)].)
13. Perform the 360° view monitor system aiming. (with 360° view monitor system) (See 360°VIEW MONITOR SYSTEM AIMING.)
14. Perform the front radar sensor aiming adjustment. (with front radar sensor) (See FRONT RADAR SENSOR AIMING.)
15. Perform the front side radar sensor aiming adjustment. (with front side radar sensor) (See FRONT SIDE/REAR SIDE RADAR SENSOR AIMING.)