 |
am3zzw00007458
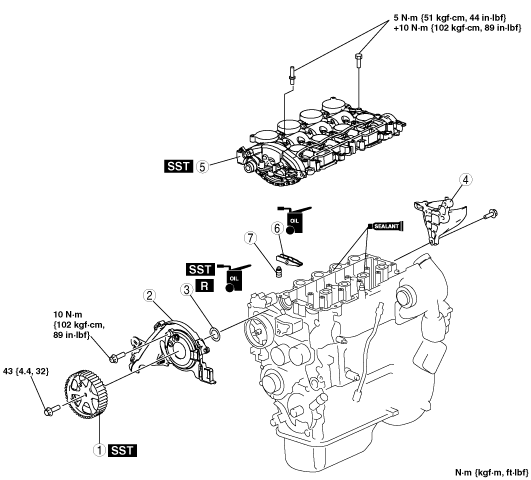
HYDRAULIC LASH ADJUSTER (HLA) REMOVAL/INSTALLATION [MZ-CD 1.6 (Y6) (EURO4 emission level)]
id0110e4804100
1. Remove the following parts:
2. Remove in the order indicated in the table.
3. Install in the reverse order of removal.
4. Start the engine.
5. Inspect the following and adjust them if necessary.
am3zzw00007458
|
|
1
|
Camshaft pulley
(See Camshaft Pulley Removal Note.)
|
|
2
|
Camshaft seal plate
|
|
3
|
Camshaft oil seal
|
|
4
|
Fuel filter bracket
|
|
5
|
Lower cylinder head cover and camshaft component
|
|
6
|
Rocker arm
|
|
7
|
Hydraulic lash adjuster (HLA)
|
Camshaft Pulley Removal Note
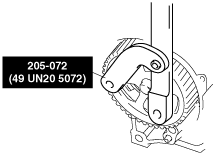
1. Lock the camshaft using the SSTs.
am3zzw00007459
|
2. Remove the camshaft pulley installation bolt.
Lower Cylinder Head Cover And Camshaft Component Removal Note
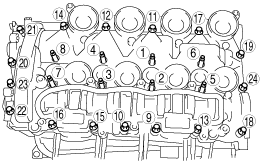
1. Remove the lower cylinder head cover installation bolts and studs in the order shown in the figure.
am3zzw00001374
|
Rocker Arm And HLA Removal Note
Lower Cylinder head Cover And Camshaft Component Installation Note
1. Clean the mating surfaces of the cylinder head and lower cylinder head cover.
2. Apply the sealant to the mating surface of the cylinder head.
am3zzw00001375
|
3. Align the lower cylinder head cover to the cylinder head using the SSTs.
am3zzw00001376
|
4. Tighten the lower cylinder head cover installation bolts and studs in two steps in the order shown in the figure.
am3zzw00001377
|
Camshaft Oil Seal Installation Note
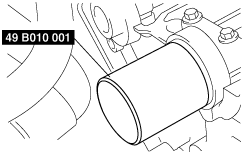
1. Apply clean engine oil to a new camshaft oil seal.
2. Install the camshaft oil seal using the SST.
am3zzw00001378
|
Camshaft Pulley Installation Note
1. Lock the camshaft using the SSTs.
am3zzw00007459
|
2. Install the camshaft pulley installation bolt.