 |
am3zzw00013406
OVERHEAD CONSOLE REMOVAL/INSTALLATION
id091700468800
1. Shift to the D (ATX) or 4th gear (MTX) position. (4SD)
2. Disconnect the negative battery cable.
3. Remove the rain sensor cover. (Vehicles with auto light/wiper system) (See RAIN SENSOR REMOVAL/INSTALLATION)
4. Disconnect the rain sensor connector. (Vehicles with auto light/wiper system)
5. Partially peel back the seaming welts.
6. Remove the following parts:
7. Partially peel back the headliner fornt side. (See HEADLINER REMOVAL/INSTALLATION.)
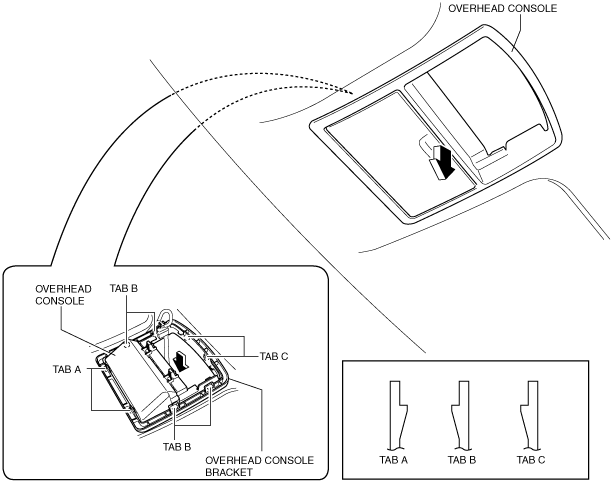
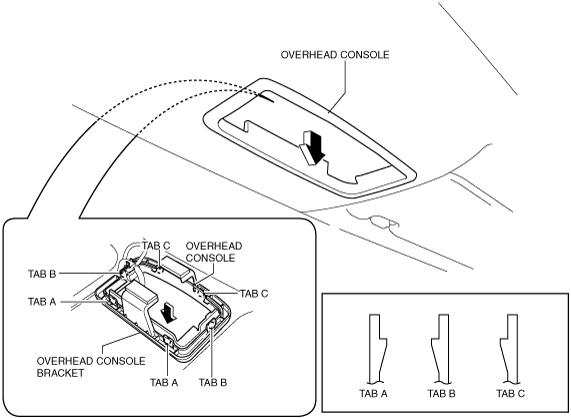
8. Detach the tabs A.
9. Remove the tabs B and C.
10. Pull the overhead console in the direction of arrow shown in the figure, then remove it.
Type A
am3zzw00013406
|
Type B
am3zzw00013407
|
11. Install in the reverse order of removal.