 |
aaxjjw00020300
BRAKE LIGHT UNIT REMOVAL/INSTALLATION
id091800400000
4SD
1. Disconnect the negative battery cable. (See NEGATIVE BATTERY CABLE DISCONNECTION/CONNECTION [SKYACTIV-G 1.5, SKYACTIV-G 2.0, SKYACTIV-G 2.5].) (See NEGATIVE BATTERY CABLE DISCONNECTION/CONNECTION [SKYACTIV-D 1.5].) (See NEGATIVE BATTERY CABLE DISCONNECTION/CONNECTION [SKYACTIV-D 2.2].) (See NEGATIVE BATTERY CABLE DISCONNECTION/CONNECTION [MZR 1.6].)
2. Remove the following parts.
3. Disconnect the connector.
aaxjjw00020300
|
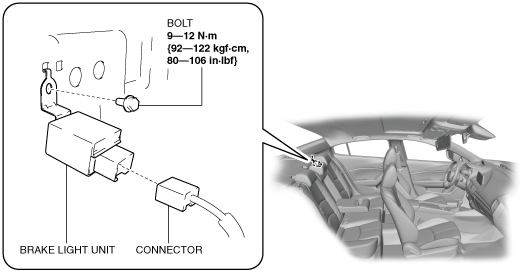
4. Remove the bolt.
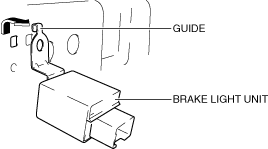
5. Remove the brake light unit in the direction of the arrow shown in the figure.
aaxjjw00020303
|
6. Install in the reverse order of removal.
5HB
1. Disconnect the negative battery cable. (See NEGATIVE BATTERY CABLE DISCONNECTION/CONNECTION [SKYACTIV-G 1.5, SKYACTIV-G 2.0, SKYACTIV-G 2.5].) (See NEGATIVE BATTERY CABLE DISCONNECTION/CONNECTION [SKYACTIV-D 1.5].) (See NEGATIVE BATTERY CABLE DISCONNECTION/CONNECTION [SKYACTIV-D 2.2].) (See NEGATIVE BATTERY CABLE DISCONNECTION/CONNECTION [MZR 1.6].)
2. Partially peel back the following parts.
3. Disconnect the connector.
aaxjjw00020302
|
4. Remove the bolt.
5. Remove the brake light unit in the direction of the arrow shown in the figure.
aaxjjw00020303
|
6. Install in the reverse order of removal.