ON-BOARD DIAGNOSTIC TEST MODE [FW6A-EL]
id050225950000
Foreword
• The on-board diagnosis test displays DTCs for locations determined to be malfunctioning based on the operation results from the forced operation of each solenoid and selection of each gear. Therefore, this is an effective mode if DTCs which do not specify the malfunctioning location, such as a gear ratio malfunction, are displayed.
• When the following DTCs displayed, perform the on-board diagnostic test.
|
DTC No.
|
Description
|
|
P0729:00
|
6GR incorrect ratio
|
|
P0731:00
|
1GR incorrect ratio
|
|
P0732:00
|
2GR incorrect ratio
|
|
P0733:00
|
3GR incorrect ratio
|
|
P0734:00
|
4GR incorrect ratio
|
|
P0735:00
|
5GR incorrect ratio
|
|
P0736:00
|
Gear reverse incorrect ratio
|
|
P0780:00
|
Gear shifting malfunction
|
|
P079A:00
|
Shift solenoid No.3 stuck off/On/off solenoid stuck on
|
|
P1738:00
|
Automatic transaxle internal malfunction
|
|
P1784:00
|
Hi cut valve stuck off/R-3-5 cut valve stuck on
|
• When DTCs are displayed by the on-board diagnosis test, perform the instructions in the applicable DTC troubleshooting.
-
Warning
-
• The on-board diagnosis test forcibly changes gears within the driving shift range while the engine is running. Before implementing the on-board diagnosis test, securely apply the parking brake and set the wheel blocks for both the front and rear wheels. Otherwise, the vehicle will move which could cause injury or property damage.
-
Note
-
• The time required to perform the diagnostic is 2 to 3 min.
• If unsafe actions such as shift operation and brake pedal release are detected before the AT warning light flashes, the on-board diagnostic test mode is canceled and the AT warning light flashes 5 times.
1. Apply the parking brake firmly, and set the wheel blocks for both the front and rear wheels.
2. Inspect the ATF level. (See AUTOMATIC TRANSAXLE FLUID (ATF) INSPECTION [FW6A-EL].)
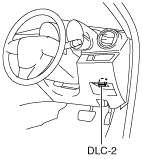
3. Connect the M-MDS (IDS) to the DLC-2.
4. Perform vehicle identification using the M-MDS.
5. Start the engine.
6. After the vehicle is identified, select the following items from the initialization screen of the IDS.
- (1) Select “DataLogger”.
- (2) Select “Modules”.
- (3) Select “TCM”.
7. While checking the PID TFT (ATF temperature), warm-up the engine completely and allow the ATF temperature to reach 55 °C {131 °F} or more.
8. Select the following items from the initialization screen of the IDS.
- (1) Select “Self Test”.
- (2) Select “Modules”.
- (3) Select “TCM”.
- (4) Select “Retrieve CMDTCs”.
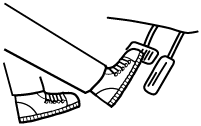
9. Perform the following steps (1) to (5) with the brake pedal depressed.
-
Note
-
• If the on-board diagnosis test is shut down (AT warning light flashes 5 times), resume the procedure from Step 1.
- (1) Shift the selector lever to the R position.
-
- (2) Clear DTCs using the M-MDS and verify that the AT warning light flashes 2 times. (See ON-BOARD DIAGNOSTIC SYSTEM DTC INSPECTION [FW6A-EL].)
-
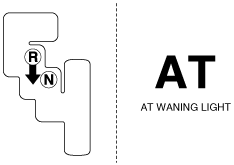
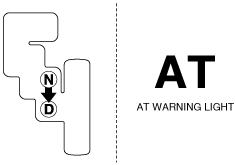
- (3) Within 5 s after the AT warning light flashes 2 times, shift the selector lever to the N position and verify that the AT warning light flashes 2 times.
-
- (4) Within 5 s after the AT warning light flashes 2 times, shift the selector lever to the D position and verify that the AT warning light flashes 3 times.
-
-
Note
-
• Approx. 30 s is required until the AT warning light flashes. In addition, shift shock occurs a few times during stand-by.
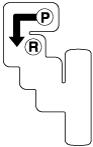
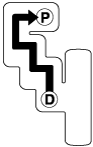
- (5) After the AT warning light flashes 3 times, shift the selector lever to the P position.
-
10. Release the brake pedal.
11. Perform the DTC inspection using the M-MDS. (See ON-BOARD DIAGNOSTIC SYSTEM DTC INSPECTION [FW6A-EL].)
-