 |
am6zzw00000487
LIFTGATE HINGE REMOVAL/INSTALLATION
id091100521300
5HB
1. Disconnect the negative battery cable.
2. Remove the following parts:
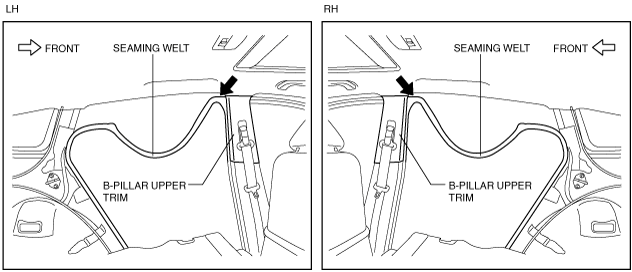
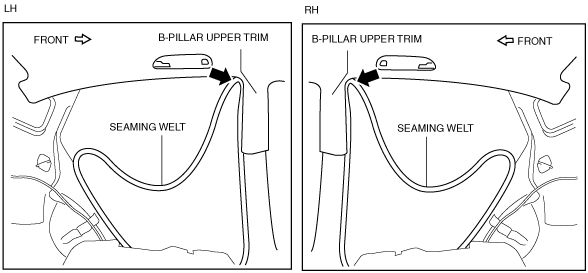
3. Peel back the seaming welt to the point indicated by the arrow in the figure.
am6zzw00000487
|
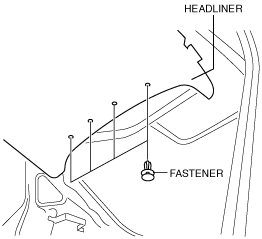
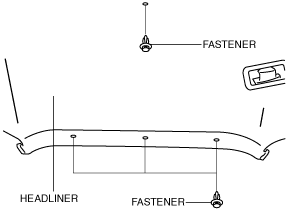
4. Remove the fasteners.
am6zzw00000488
|
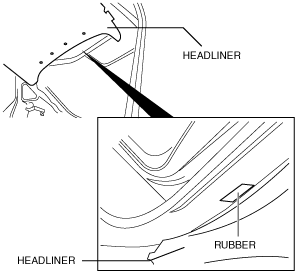
5. Remove the rubber.
am6zzw00000489
|
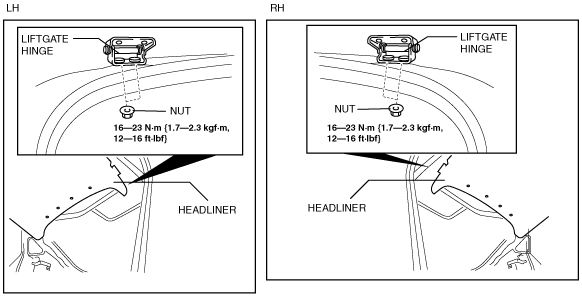
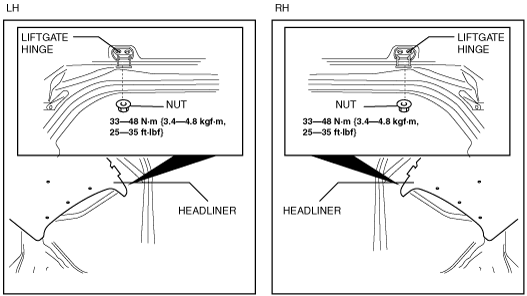
6. Remove the nut while partially peeling back the headliner.
am6zzw00000490
|
7. Remove the liftgate hinge.
8. Install in the reverse order of removal.
WGN
1. Disconnect the negative battery cable.
2. Remove the following parts:
3. Peel back the seaming welt to the point indicated by the arrow in the figure.
am6zzw00003352
|
4. Remove the fasteners.
am6zzw00003353
|
5. Remove the nut while partially peeling back the headliner.
am6zzw00003354
|
6. Remove the liftgate hinge.
7. Install in the reverse order of removal.