 |
am6zzw00004283
C-PILLAR TRIM REMOVAL/INSTALLATION
id091700802200
4SD
1. Remove the following parts:
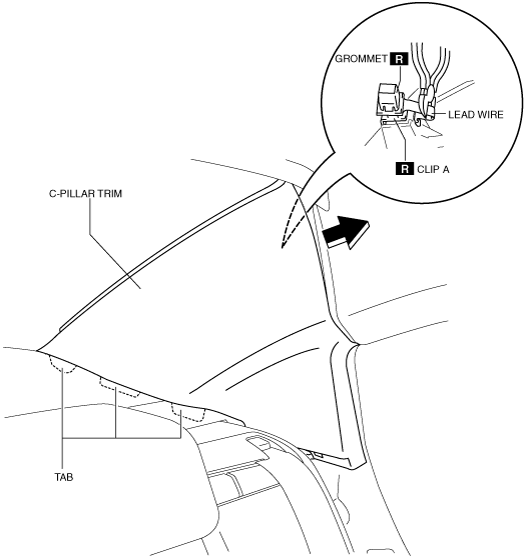
2. Partially peel back the seaming welt.
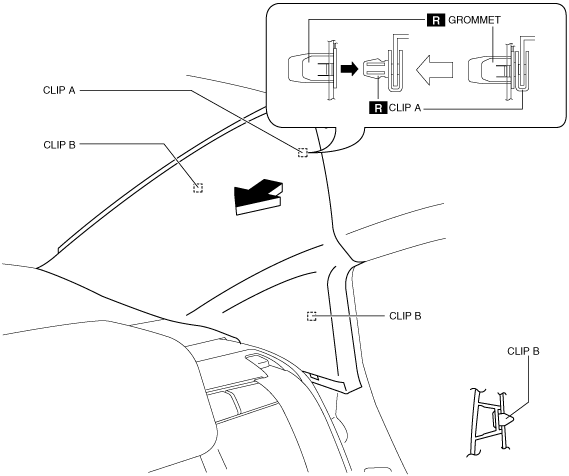
3. Pull the C-pillar trim in the direction of the arrow shown in the figure, then detaching clip A and B.
am6zzw00004283
|
4. Cut the lead wire connecting clip A and grommet using a nipper and pull out the C-pillar trim in the direction of the arrow shown in the figure.
am6zzw00004284
|
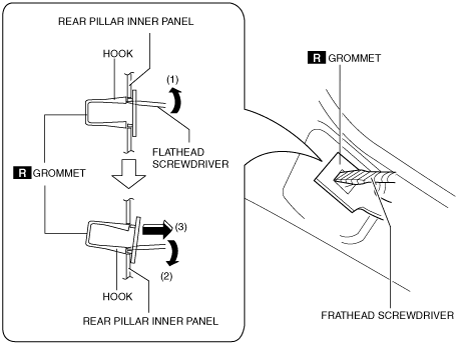
5. Move the hook in the direction of arrows (1) and (2) shown in the figure using a flathead screwdriver and detach it from the rear pillar inner panel.
am6zzw00004285
|
6. Remove the grommet in the direction of the arrow (3) shown in the figure.
7. When installing the C-pillar trim, install the new clip A and grommet to the C-pillar trim in advance.
8. Install in the reverse order of removal.
5HB
1. Remove the following parts:
2. Partially peel back the seaming welt.
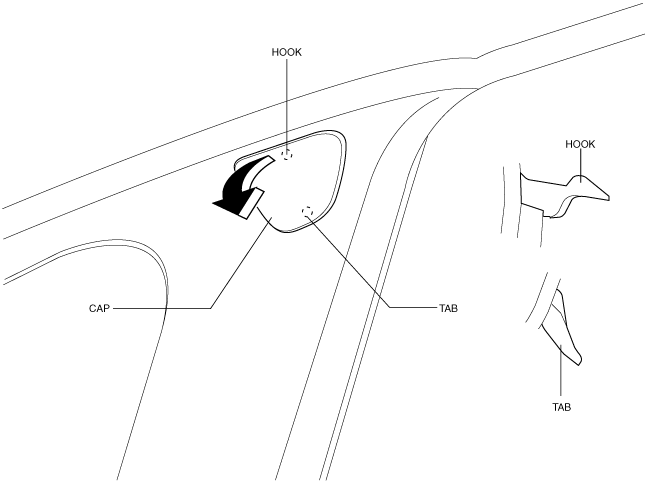
3. Remove the cap using a fastener remove in the direction of the arrow shown in the figure.
am6zzw00001723
|
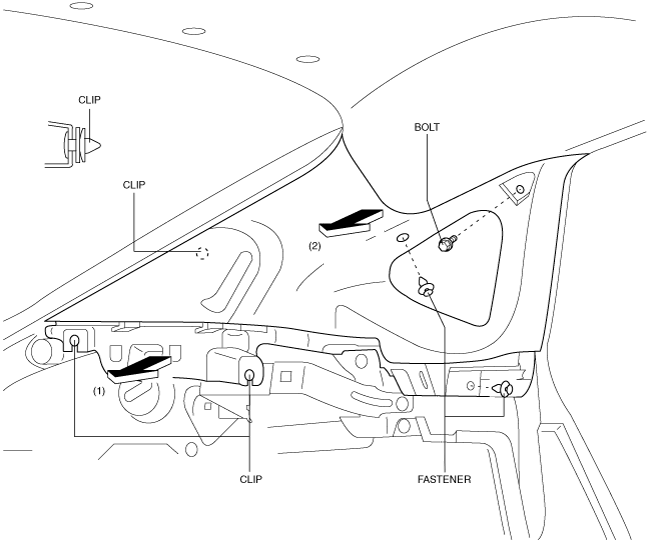
4. Remove the bolt and fasteners.
am6zzw00001724
|
5. Pull the C-pillar trim in the direction of the arrow shown in the order of (1) and (2), then detaching clips.
6. Remove the rear center seat belt tongue from the C-pillar trim. (LH only)
7. Remove the C-pillar trim.
8. Install in the reverse order of removal.
Wagon
1. Remove the following parts:
2. Partially peel back the seaming welt.
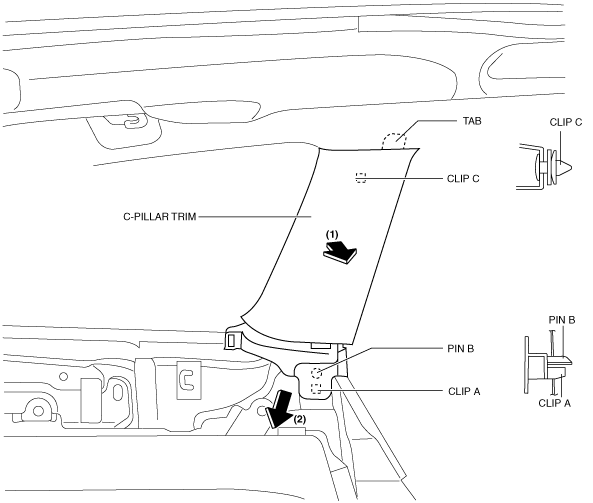
3. Pull the C-pillar trim in the direction of the arrow in the order of (1) and (2), then detaching clip A, C and pin B.
am6zzw00007256
|
4. Remove the C-pillar trim.
5. Install in the reverse order of removal.