ACTIVE DRIVING DISPLAY REMOVAL/INSTALLATION
id092200103700
1. Disconnect the negative battery terminal. (See NEGATIVE BATTERY TERMINAL DISCONNECTION/CONNECTION.)
2. Remove the battery. (See NEGATIVE BATTERY TERMINAL DISCONNECTION/CONNECTION.)
3. Disconnect the brake pipes from the master cylinder. (See MASTER CYLINDER REMOVAL/INSTALLATION [L.H.D.].)(See MASTER CYLINDER REMOVAL/INSTALLATION [R.H.D.].)
4. Disconnect the clutch reserve hose from the master cylinder.(MTX) (See CLUTCH MASTER CYLINDER REMOVAL/INSTALLATION [C66M-R].)(See CLUTCH MASTER CYLINDER REMOVAL/INSTALLATION [D66M-R, D66MX-R])
5. Remove the following parts:
- (1) Side wall (driver side) (See SIDE WALL REMOVAL/INSTALLATION.)
-
- (2) Front heat duct (LH) (See FRONT HEAT DUCT REMOVAL/INSTALLATION.)
-
- (3) Brake pedal (See BRAKE PEDAL REMOVAL/INSTALLATION [L.H.D.].)(See BRAKE PEDAL REMOVAL/INSTALLATION [R.H.D.].)
-
- (4) Clutch pedal (MTX) (See CLUTCH PEDAL REMOVAL/INSTALLATION [C66M-R].)(See CLUTCH PEDAL REMOVAL/INSTALLATION [D66M-R, D66MX-R].)
-
- (5) Meter hood No.2 (See METER HOOD REMOVAL/INSTALLATION.)
-
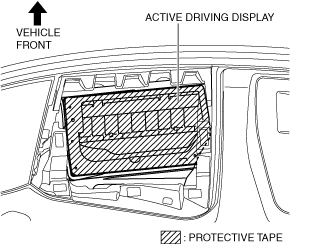
6. To prevent scratches, apply protective tape to the active driving display lens.
-
Caution
-
• When removing the active driving display, the active driving display lens could contact the dashboard panel frame and scratch or damage the active driving display lens. When removing the active driving display, apply protective tape to the active driving display lens before performing the servicing.
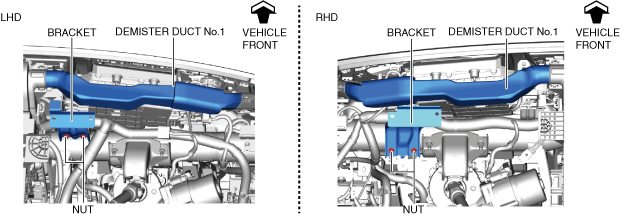
7. Remove the nuts.
8. Remove the bracket.
9. Remove the demister duct No.1.
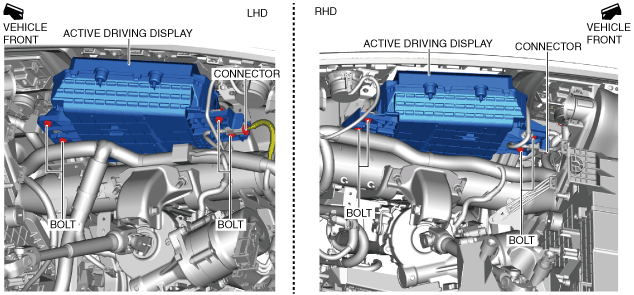
10. Remove the bolts.
11. Disconnect the connector.
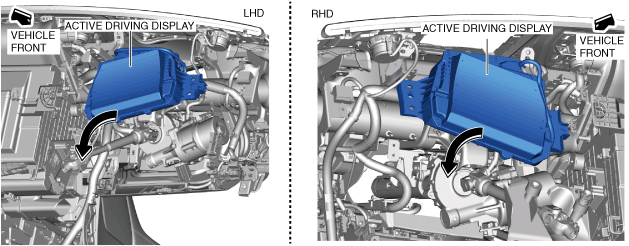
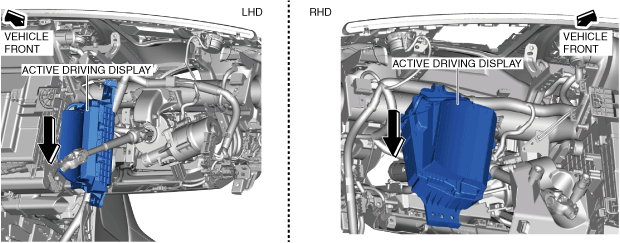
12. Tilt the active driving display in the direction of the arrow shown in the figure.
13. Move the active driving display in the direction of the arrow shown in the figure.
14. Move the active driving display in the direction of the arrow shown in the figure and remove it.
15. Install in the reverse order of removal.
16. After installation, add brake fluid, bleed the air, and inspect for fluid leakage. (See BRAKE FLUID AIR BLEEDING.)