1. Disconnect the negative battery cable.
2. Remove the following parts:
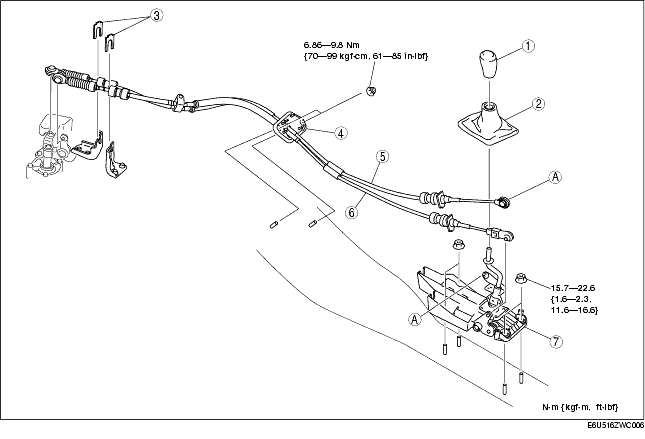
3. Remove in the order indicated in the table.
4. Install in the reverse order of removal.
5. After installation, verify that the shift lever can be shifted smoothly into each position.
|
1
|
Shift lever knob
|
|
2
|
Boot panel
|
|
3
|
Clip
|
|
4
|
Seal plate
|
|
5
|
Shift cable
|
|
6
|
Select cable
|
|
7
|
Shift lever component
|
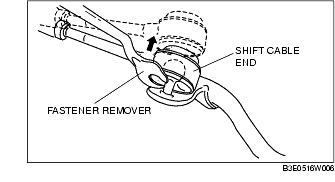
1. Remove the both shift cable end and select cable end using a fastener remover.
1. Install the shift cable and select cable to the mount rubber bracket turning the marking upward.
2. Make sure that the shift lever (transaxle side) is in neutral.
3. Unlock the lock piece of the select cable (shift lever side) in the order shown in the figure.
4. Shift the shift lever to neutral.
5. Lock the lock piece of the selector cable (shift cable side) in the order shown in the figure.
6. Shift the shift lever from neutral to other position, and make sure that there are no other components in that area to interfere with the lever.