 |
am6zzw00010164
TRUNK LID REMOVAL/INSTALLATION
id091000801600
1. Disconnect the negative battery cable. (See NEGATIVE BATTERY CABLE DISCONNECTION/CONNECTION [SKYACTIV-G 2.0, SKYACTIV-G 2.5].) (See NEGATIVE BATTERY CABLE DISCONNECTION/CONNECTION [SKYACTIV-G 2.0, SKYACTIV-G 2.5 (WITHOUT i-stop)].) (See NEGATIVE BATTERY CABLE DISCONNECTION/CONNECTION [SKYACTIV-D 2.2].)
2. Remove the following parts:
3. Set the trunk side trim aside. (See TRUNK SIDE TRIM REMOVAL/INSTALLATION.)
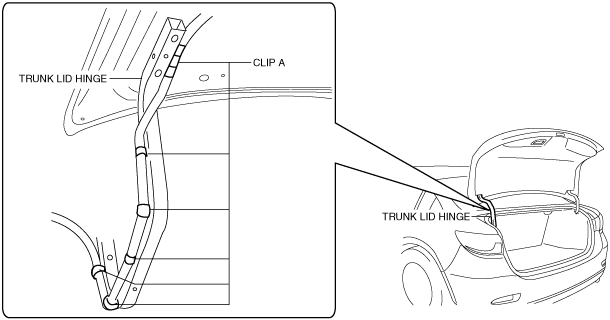
4. Remove clips A shown in the figure.
am6zzw00010164
|
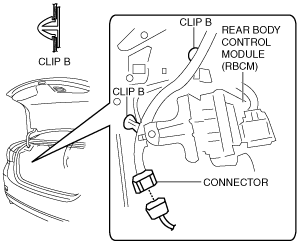
5. Set the rear body control module (RBCM) bracket aside. (See REAR BODY CONTROL MODULE (RBCM) BRACKET REMOVAL/INSTALLATION.)
6. Disconnect the connector.
am6zzw00010323
|
7. Remove clips B.
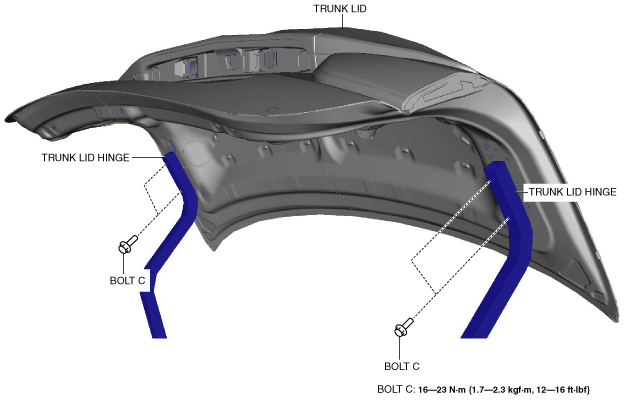
8. Remove bolts C, then remove the trunk lid.
am6zzw00011284
|
9. Remove the following parts:
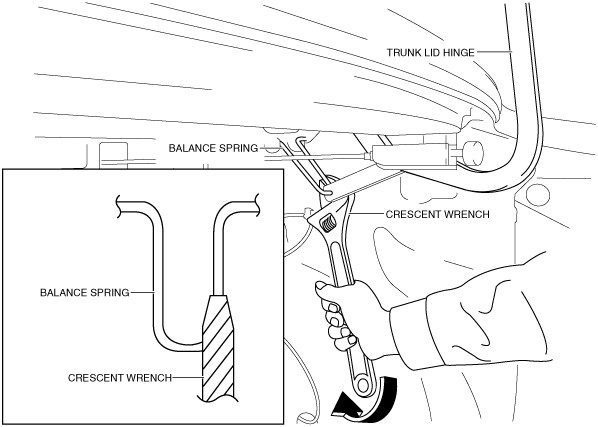
10. Using a crescent wrench, remove the balance spring in the directions of arrow shown in the figure from trunk lid hinge.
am6xuw00006240
|
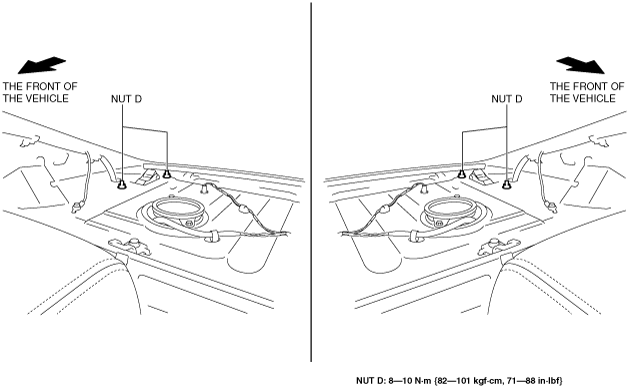
11. Remove nuts D.
am6xuw00005621
|
12. Remove the trunk lid hinge.
13. Install in the reverse order of removal.
14. Adjust the trunk lid. (See TRUNK LID ADJUSTMENT.)