 |
atraaw00002415
REAR CROSSMEMBER REMOVAL/INSTALLATION
id021400801000
Removal
1. Lift up the vehicle.
2. Remove the rear drive shaft. (See REAR DRIVE SHAFT REMOVAL/INSTALLATION.)
3. Remove the rear differential. (See REAR DIFFERENTIAL REMOVAL/INSTALLATION.)
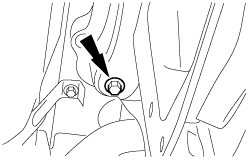
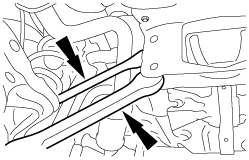
4. Remove the four bolts and disconnect the upper and lower arm from rear crossmember.
atraaw00002415
|
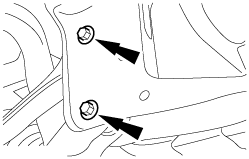
5. Disconnect the exhaust hanger from the rear crossmember.
atraaw00002416
|
6. With another person, remove the rear crossmember.
atraaw00002417
|
Installation
1. With another person, temporarily install the rear crossmember.
atraaw00002417
|
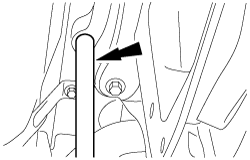
2. With a 19 mm {0.75 in} rod, align the rear crossmember with the alignment holes.
atraaw00002418
|
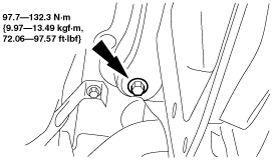
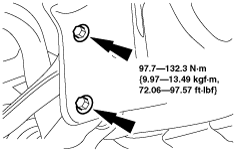
3. Tighten the rear crossmember bolts.
atraaw00002419
|
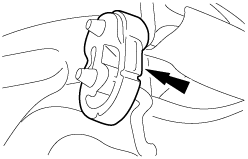
4. Connect the exhaust hanger to the rear crossmember.
atraaw00002420
|
5. Position the four rear control arms in the rear crossmember.
atraaw00002421
|
6. Install the rear differential. (See REAR DIFFERENTIAL REMOVAL/INSTALLATION.)
7. Install the rear drive shaft. (See REAR DRIVE SHAFT REMOVAL/INSTALLATION.)
8. Lower the vehicle.
9. Tighten the four control arms bolts.
atraaw00002422
|