1. Perform the 'Fuel Line Safety Procedure' referring to the BEFORE SERVICE PRECAUTION. (See BEFORE SERVICE PRECAUTION [L3].)
2. Disconnect the negative battery cable.
3. Lift up the rear seat cushion (LH).
4. Remove the scuff plate and turn over the carpet.
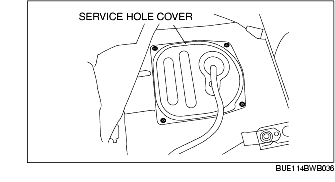
5. Remove the service hole cover.
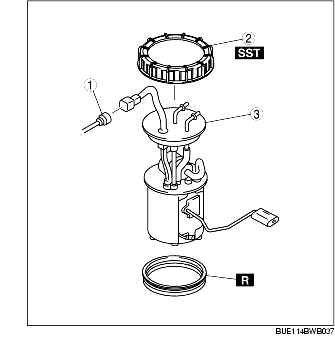
6. Remove in the order indicated in the figure.
|
1
|
Fuel pump unit connector
|
|
2
|
Fuel pump cap
(See Fuel pump cap removal note.)
|
|
3
|
Fuel pump unit
|
7. Install in the reverse order of removal.
8. Inspect all parts by performing AFTER SERVICE PRECAUTION. (See AFTER SERVICE PRECAUTION [L3].)
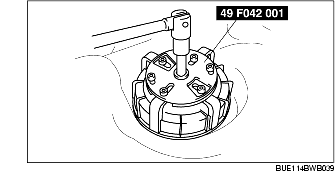
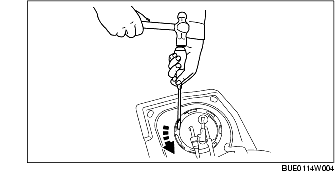
1. Remove the fuel pump cap using the SST.
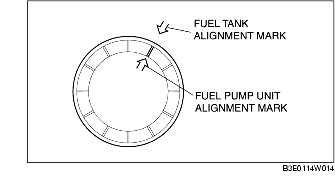
1. Align the fuel tank and fuel pump unit alignment marks as shown in the figure.
2. Install the SST as shown in the figure.
3. Using the SST, tighten the fuel pump cap with the specified tightening torque without shifting the alignment marks.
1. Before installing the fuel tank, verify that there is no leakage when a pressure of +5.9 kPa {44 mmHg, 17 inHg} is applied to the fuel tank.
2. Install the fuel tank. (See FUEL TANK REMOVAL/INSTALLATION [L3].)
3. Drive the vehicle starting from a standstill and brake suddenly five to six times at a low speed.
4. Stop the vehicle and verify from outside the vehicle that there is no fuel leakage around the fuel pump unit.
1. Follow "BEFORE SERVICE PRECAUTION" before performing any work operations to prevent fuel from spilling from the fuel system. (See BEFORE SERVICE PRECAUTION [L3].)
2. Disconnect the negative battery cable.
3. Lift up the rear seat cushion (LH).
4. Remove the service hole cover.
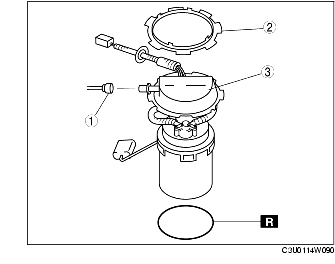
5. Remove in the order indicated in the table.
|
1
|
Quick release connector
(See Type B Removal, Type B Installation,.)
|
|
2
|
Retainer ring
(See Retainer ring removal note.)
|
|
3
|
Fuel pump unit
|
6. Install in the reverse order of removal.
7. Inspect all related parts by performing "AFTER SERVICE PRECAUTION". (See AFTER SERVICE PRECAUTION [L3].)
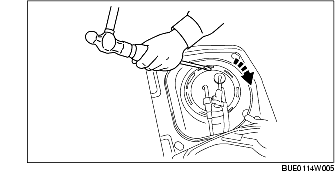
1. Remove the retainer ring by tapping a retainer ring projection using a flathead screwdriver as shown in the figure.
1. Tap a retainer ring projection using a flathead screwdriver as shown in the figure and tighten the retainer until it is fixed in place.