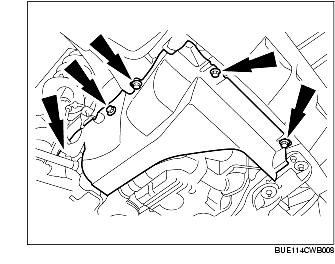
1. Remove the splash shield.
2. Remove the HO2S (LH). (See HEATED OXYGEN SENSOR (HO2S) REMOVAL/INSTALLATION [AJ (3.0L Duratec)].)
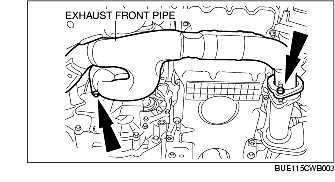
3. Remove the exhaust front pipe and slide aside.
4. Remove the accessory drive belt and slide aside.
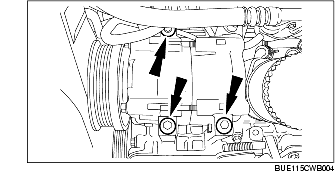
5. Remove the A/C compressor bolts and slide aside.
6. Remove the exhaust manifold (LH) and dispose of the gasket.
7. Install in the reverse order of removal.
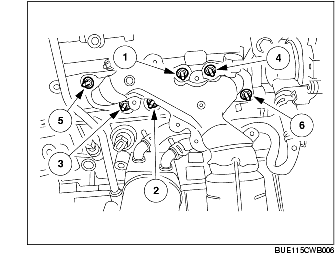
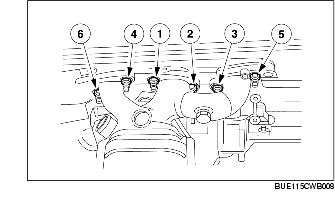
1. Position the new gasket and tighten the exhaust manifold (LH) bolts in the order indicated in the figure.
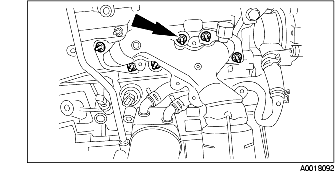
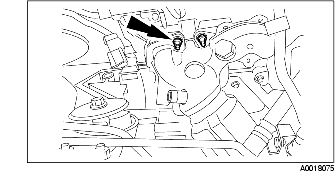
1. Remove the PCM wiring harness protector connecting bolt and position it out of the way.
2. Remove the exhaust gas recirculation (EGR) tube. (See EGR PIPE REMOVAL/INSTALLATION [AJ (3.0L Duratec)].)
3. Remove the generator.
4. Remove the HO2S (RH). (See HEATED OXYGEN SENSOR (HO2S) REMOVAL/INSTALLATION [AJ (3.0L Duratec)].)
5. Remove the exhaust manifold (RH) and dispose of the gasket.
6. Install in the reverse order of removal.
1. Position the new gasket and tighten the exhaust manifold (RH) bolts in the order indicated in the figure.