WHEEL CYLINDER REMOVAL/INSTALLATION
id041100190100
1. Remove the brake drum. (See BRAKE DRUM REMOVAL/INSTALLATION.)
2. Using the Brake/Clutch/Service Vacuum, remove brake dust and dirt from the brake components.
3. Remove the parking brake cable from the operating lever.
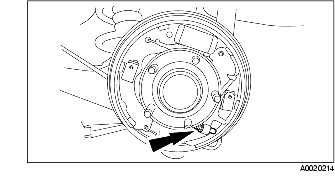
4. Remove the hold springs and the hold pins.
5. Remove the return spring (lower).
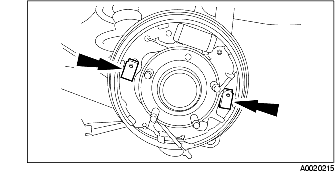
6. Remove the brake shoe.
-
(1) Pull the bottom of the leading shoe toward the vehicle front.
-
(2) Remove the return spring (upper).
-
Note
-
• Remove the return spring (upper) and the trailing shoe as a single unit.
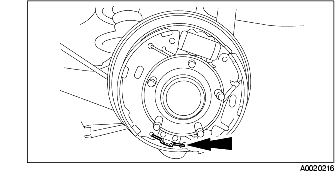
7. Disconnect the brake pipe from the wheel cylinder.
-
Warning
-
• Use of any brake fluid other than the specified brake fluid will cause permanent damage to brake components and will render the brakes inoperative. Failure to follow these instructions may result in personal injury.
-
• Brake fluid contains polyglycol ethers and polyglycols. Avoid contact with eyes. Wash hands thoroughly after handling. If brake fluid contacts eyes, flush eyes with running water for 15 minutes. Get medical attention if irritation persists. If taken internally, drink water and induce vomiting. Get medical attention immediately. Failure to follow these instructions may result in personal injury.
-
Caution
-
• Brake fluid will damage painted surfaces. Be careful not to spill any on painted surfaces. If brake fluid is spilled, wipe it off immediately.
-
Note
-
• When any part of the brake system has been disconnected for repair or replacement, air may enter the system, causing spongy brake pedal action. This requires the air bleeding of the brake system after it has been correctly connected.
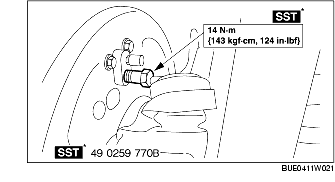
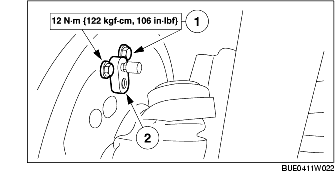
8. Remove the wheel cylinder.
-
(1) Remove the bolts.
-
(2) Remove the wheel cylinder.
9. Install in the reverse order of removal.
10. After installation, bleed the brake system. (See AIR BLEEDING (BRAKE SYSTEM).)