Control Module Box, Remove/Install
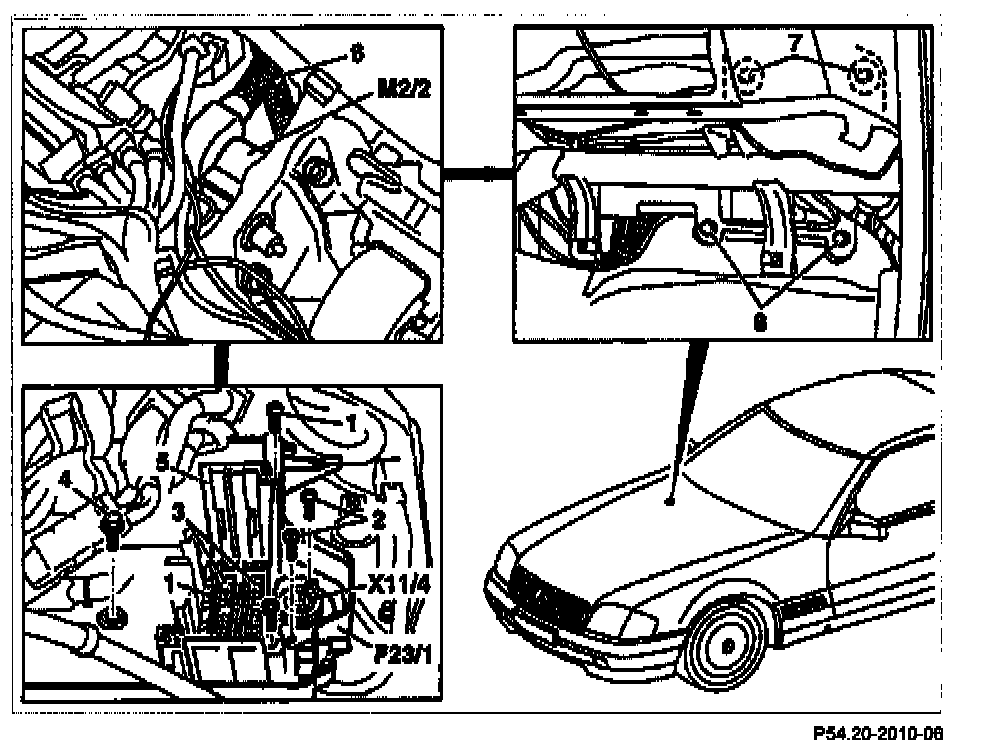
1 Screws
2 Screws
3 Coupling block
4 Bolt
5 Control module bracket
6 Hose
7 Bolts
8 Bolts
F23/1 Control module box
M2/2 Module box blower motor
X11/4 Data link connector
Removal and Installation:
1. Remove control modules.
2. Remove cover underneath right of instrument panel.
3. Remove front passenger's airbag.
4. Unscrew screws (2).
5. Remove data link connector (X11/4).
6. Remove screws (1).
7. Take out control module bracket (5).
8. Unclip coupling blocks (3).
9. Disconnect all connectors in housing of control module box (F23/1).
10. Pull off hose (6) on module box blower motor (M2/2).
11. Unclip connector on blower motor protective housing.
12. Unclip connectors in the area of module box blower motor (M2/2) on housing of control module box (F23/1).
13. Disconnect electric connectors and connections in engine compartment and interior.
14. Carefully guide disconnected cables and wiring harnesses out of control module box housing (F23/1).
15. Unscrew bolt (4) from base of housing of control module box (F23/1).
16. Unscrew bolts (7) in the area of the front passenger's airbag removed.
17. Unscrew bolts (8) in front passenger's footwell.
18. Take out control module box housing.
Installation Note: Check housing gasket for damage and correct seating and replace if necessary.
19. Detach blower motor (M2/2).
20. Install in reverse order.